There’s something about the first crisp bite of an apple in autumn that whispers of home. Yet when you crave comfort beyond a simple piece of fruit, nothing satisfies quite like a homemade apple pie. The truth is, many bakers shy away because they fear soggy crusts, bland filling, or hours of complicated steps. I’ve been there too torn between the memory of my mother’s golden pie cooling on the counter and the worry I might not live up to it. This apple pie recipe changes that. It’s approachable, deeply flavorful, and a little piece of warmth you can serve any day of the year.
A Pie That Holds More Than Apples
I remember one late October evening when I was juggling work deadlines, my kids’ soccer practice, and a storm that knocked the power out. In the flicker of candlelight, I decided to bake an apple pie not because it was convenient, but because I needed grounding. Flour dusted the counter, cinnamon clung to the air, and for a while, the world slowed down. That pie became more than dessert; it became a memory stitched into my family’s story.
That’s why this apple pie recipe means so much to me. It doesn’t require fancy equipment or intimidating techniques. Instead, it leans on what truly matters: buttery crust, tender apples, and a filling that’s sweet yet balanced with just the right amount of spice. Every slice tastes like tradition with a touch of reassurance.
My backstory with pies begins in my grandmother’s tiny kitchen. She was an immigrant who believed food carried both history and hope. At nine years old, I’d watch her peel apples with a paring knife so swiftly, the skins curled like ribbons onto the floor. She would remind me that patience not perfection was the secret ingredient. Decades later, I carry her words each time I roll out dough, passing along not only flavor but also resilience.
If you’ve ever struggled with pies turning mushy or too tart, I promise this recipe is forgiving. It respects the apples for what they are and coaxes out their best qualities. I also share simple tips that remove the guesswork, so you can bake with confidence. And if you’re looking for another cozy treat to pair with this, I recommend checking out our cinnamon roll recipe it shares the same heartwarming spice profile and makes a breakfast as memorable as this dessert.
A pie can feel like an impossible challenge, but once you master this apple pie recipe, you’ll realize it’s really just an invitation to slow down, to nourish, and to create joy one flaky slice at a time.
Why This Apple Pie Recipe Works So Well
When people talk about apple pie, they usually remember how it feels more than how it tastes. It’s the warm spice, the flaky crust that shatters just enough, and the balance of sweet and tart apples. But behind that feeling is a recipe built to succeed, every single time.
I’ve tested this apple pie recipe dozens of times, and what sets it apart is the harmony of texture and flavor. The crust bakes golden without turning tough, thanks to a gentle mix of butter and flour with just the right chill. The apples stay tender yet structured never mushy because we use a blend of firm tart apples and softer sweet ones. The filling has depth, with cinnamon and a hint of nutmeg that bloom when baked, creating layers of comfort.
I know the frustration of pulling a pie from the oven only to find it soupy or flavorless. That’s why I created this method: minimal guesswork, maximum reward. You’ll par-bake the crust for crispness, pre-toss the apples with sugar to release extra juices, and layer everything in a way that bakes evenly. The result? A pie that slices beautifully, holds its shape, and tastes like home in every bite.
This apple pie recipe works not just because of ingredients, but because of intention. Each step is designed to build trust with the baker, giving you control over the outcome. By the time you pull it from the oven, you won’t just see a pie you’ll see the promise that baking doesn’t have to be intimidating. It can be simple, joyful, and wonderfully reliable.
Ingredients, Substitutions & Foolproof Steps
Every good pie begins with the right ingredients. But don’t worry you won’t need anything fancy, just pantry basics and fresh apples. Below, I’ve included substitutions so you can adapt based on what you already have at home.
Ingredient List & Substitutions
| Ingredient | Amount | Substitution |
|---|---|---|
| All-purpose flour | 2 ½ cups | Gluten-free flour blend (for GF option) |
| Unsalted butter (chilled) | 1 cup | Coconut oil (firm) or vegan butter |
| Ice water | 6–8 tbsp | Cold milk for richer dough |
| Apples (Granny Smith + Honeycrisp mix) | 6–7 medium | Any firm-tart + sweet apple combo |
| Granulated sugar | ¾ cup | Coconut sugar or light brown sugar |
| Ground cinnamon | 1 tsp | Pumpkin pie spice |
| Nutmeg | ¼ tsp | Cardamom or allspice |
| Cornstarch | 2 tbsp | Arrowroot powder |
| Salt | ½ tsp | Sea salt |
| Egg (for wash) | 1 | Milk or cream (for egg-free) |
Nutrition Highlights (per slice, based on 8 servings)
| Nutrient | Per Serving |
|---|---|
| Protein | 4g |
| Carbs | 52g |
| Fat | 17g |
| Fiber | 3g |
| Sugar | 26g |
| Calories | 370 |
Common Mistakes to Avoid
- Overworking the dough: This makes the crust tough instead of flaky. Handle it gently.
- Using only one type of apple: A mix of tart and sweet creates depth and balance.
- Skipping par-baking: Without it, the crust may turn soggy from apple juices.
- Adding too much liquid: Extra apple juice can ruin the filling’s consistency.
Foolproof Pro Tips
- Chill everything: cold butter, cold flour, cold water.
- Toss apples with sugar and let them rest for 10 minutes this releases excess juice.
- Use a glass pie dish so you can check if the bottom crust is golden.
- Brush the crust with an egg wash for glossy, bakery-style shine.
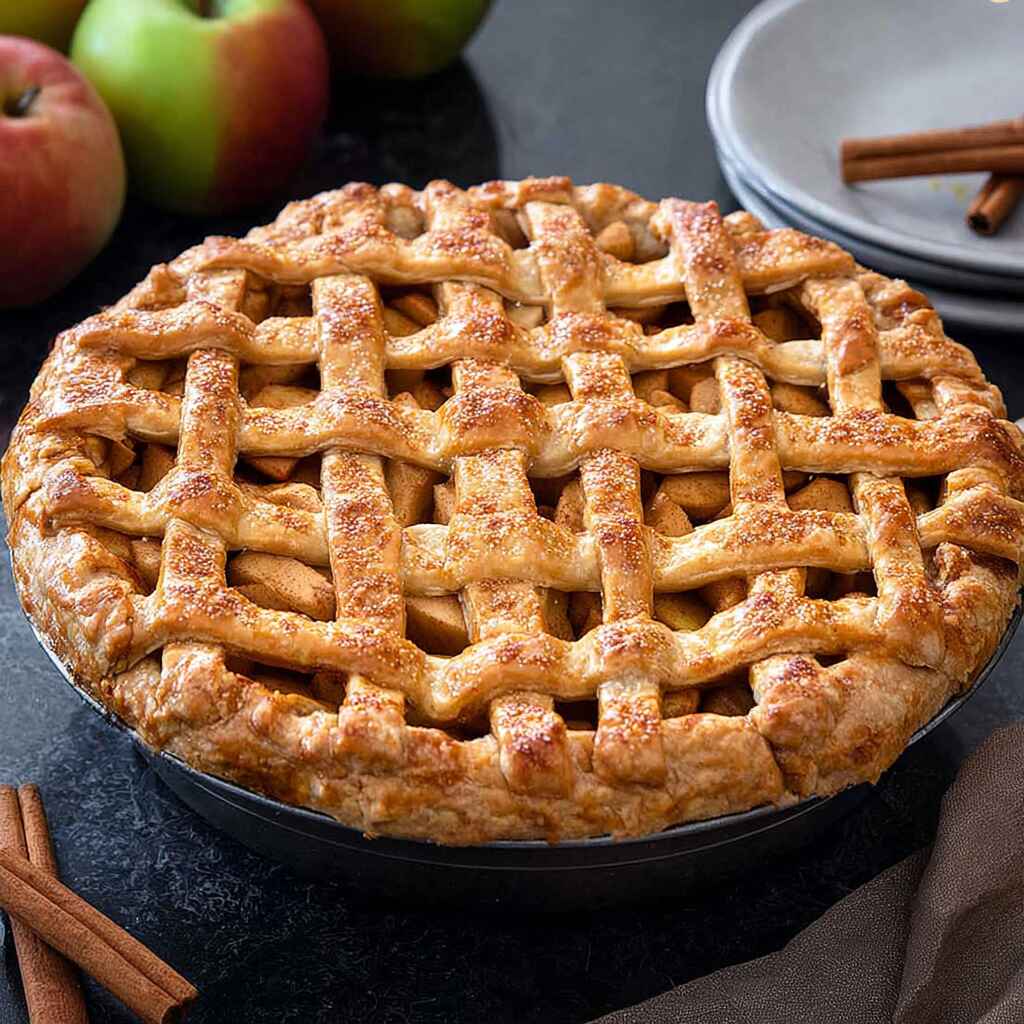
Step-by-Step Instructions
- Make the dough: Blend flour, salt, and butter until pea-sized crumbs form. Add ice water, a tablespoon at a time, until dough holds together. Chill for 1 hour.
- Prepare the apples: Peel, core, and slice. Toss with sugar, cinnamon, nutmeg, and cornstarch. Let rest for 10 minutes.
- Roll out crust: Roll half the dough into a 12-inch circle, place in pie dish, and trim edges.
- Par-bake bottom crust: Bake at 375°F for 10 minutes.
- Assemble filling: Pour apples into crust, dot with small butter cubes if desired.
- Top crust: Roll remaining dough, place over filling, seal edges, and cut slits for steam.
- Bake: Brush with egg wash. Bake at 375°F for 50–60 minutes until golden and bubbling.
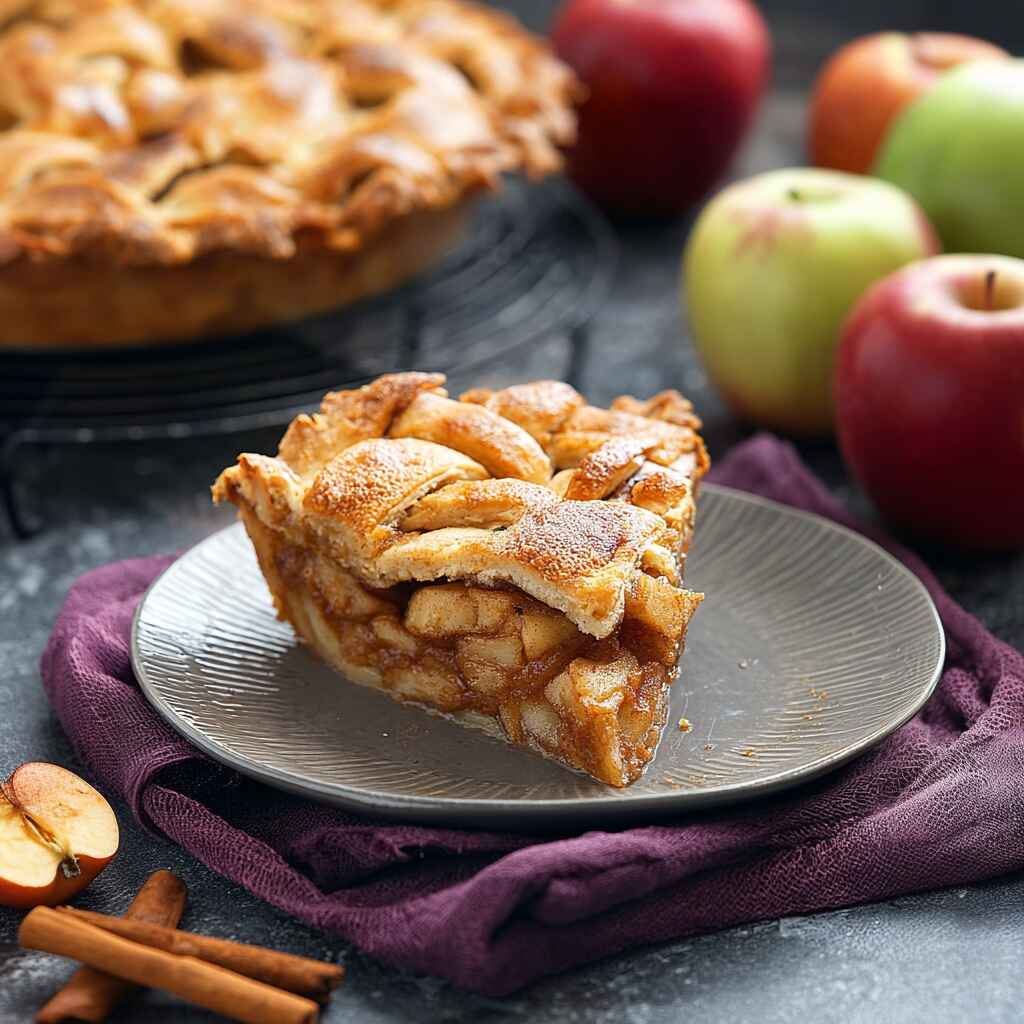
- Cool before serving: Let pie rest for at least 2 hours for the filling to set.
If you want a sweet side to serve alongside, the 3-ingredient banana pancakes make a quick and cheerful breakfast pairing the next morning.
Serving, Storage & Freezer Tips
How to Serve Apple Pie
The joy of apple pie lies in how versatile it is to serve. A warm slice fresh from the oven pairs beautifully with a scoop of vanilla ice cream or a dollop of whipped cream. For brunch, you can even serve it alongside savory dishes like scrambled eggs or a breakfast casserole. When I host autumn dinners, I love slicing the pie in smaller wedges and pairing it with a second dessert, such as this classic New York cheesecake. The creamy tang of cheesecake balances the spiced sweetness of pie, making your dessert table unforgettable.
How to Store
Apple pie keeps its flavor and texture well for several days. Store it at room temperature, lightly covered, for up to 2 days. After that, move it to the refrigerator, where it will last another 3 days. If you’ve baked the pie ahead of time, you can gently rewarm slices in a 300°F oven for about 10 minutes to revive that just-baked aroma. For snacking, I sometimes enjoy a cold slice straight from the fridge it’s almost like apple pie pudding in texture.
Can You Freeze Apple Pie?
Yes, absolutely. Apple pie freezes well, both baked and unbaked. For a baked pie, let it cool completely, then wrap tightly in plastic wrap and foil before freezing for up to 3 months. To reheat, place the frozen pie in a 350°F oven until warmed through, about 35–40 minutes. For an unbaked pie, assemble everything in the dish, wrap, and freeze. When ready to bake, add an extra 15 minutes to the baking time no need to thaw first.
When I bake apple pies in bulk for holidays, I usually freeze one for later. It feels like a little gift to myself when, weeks later, I can pull out a pie and enjoy it with coffee on a quiet Sunday morning. It reminds me of my grandmother’s wisdom: food is a way to prepare for love, not just for hunger.
If you’re curious about other cozy treats that freeze beautifully, I suggest trying these apple cinnamon cottage cheese muffins. They’re portable, wholesome, and carry the same comforting apple flavor in a grab-and-go form.
Frequently Asked Questions
1. What are the best apples for an apple pie recipe?
The best pies come from a mix of firm tart apples like Granny Smith and sweeter varieties like Honeycrisp or Fuji. The tart apples hold their shape and balance the sweetness, while the sweet apples add natural depth and juiciness. This combination prevents the filling from being too bland or overly sharp.
2. How do I keep my apple pie crust from getting soggy?
A soggy crust often comes from excess apple juice seeping into the pastry. To prevent this, toss your sliced apples with sugar and let them rest for 10 minutes before baking. Drain off any extra liquid, then add cornstarch to the filling. Par-baking the bottom crust for 10 minutes also ensures it stays crisp and flaky.
3. Can I make this apple pie recipe ahead of time?
Yes, you can! You can bake the pie a day in advance and store it at room temperature covered loosely with foil. If you prefer, you can also assemble the pie and refrigerate it unbaked for up to 24 hours. When ready, pop it in the oven. This is especially helpful during the busy holiday season.
4. Can I make an apple pie without eggs?
Absolutely. The only egg in this recipe is used for the crust’s egg wash. You can substitute milk or cream for a golden finish, or even brush with melted butter. The flavor and texture remain just as delicious, making this apple pie friendly for those avoiding eggs.
Conclusion
There’s something timeless about an apple pie cooling on the counter, filling the kitchen with the aroma of cinnamon and butter. This apple pie recipe isn’t just about baking it’s about preserving memories and creating new ones around your table. Each slice tells a story of care, warmth, and love.
If this recipe reminds you of someone you love, share it with them. Your memories keep recipes alive, and every time you bake, you’re passing along a piece of yourself.
Recipe written by Jacqueline – from our kitchen to yours.
You May Also Like
If you enjoyed this apple pie recipe, you’ll also love:
Apple Pie Recipe
Ingredients
Equipment
Method
- Blend flour, salt, and butter until pea-sized crumbs form. Add ice water gradually until dough holds together. Chill 1 hour.
- Peel, core, and slice apples. Toss with sugar, cinnamon, nutmeg, and cornstarch. Let rest 10 minutes.
- Roll half the dough into a circle and fit into a pie dish. Trim edges.
- Par-bake bottom crust at 375°F for 10 minutes.
- Pour apples into crust, dot with butter if desired. Top with remaining dough and cut slits for steam.
- Brush crust with egg wash. Bake at 375°F for 50–60 minutes until golden and bubbling.
- Let pie rest 2 hours before slicing.