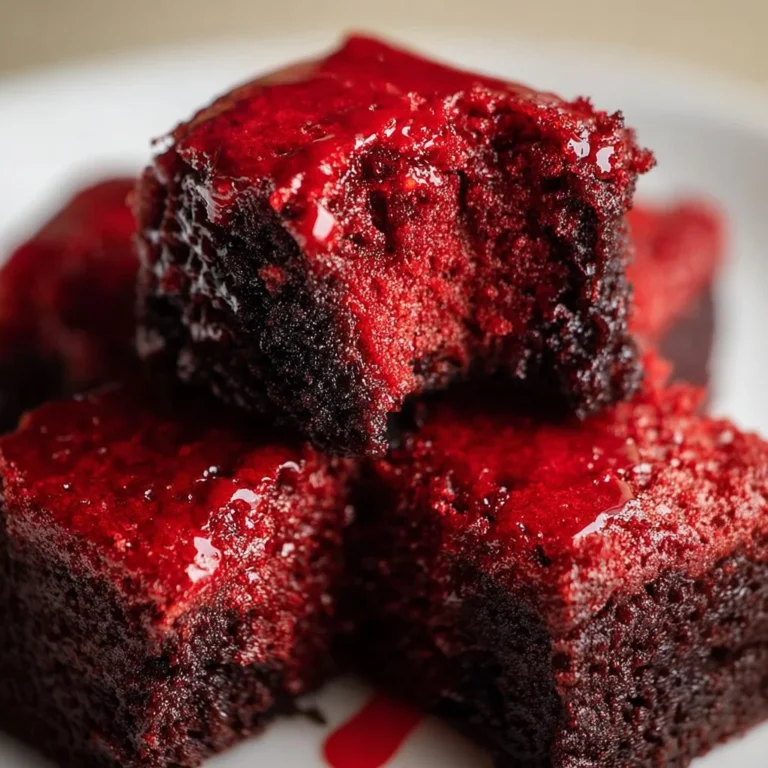
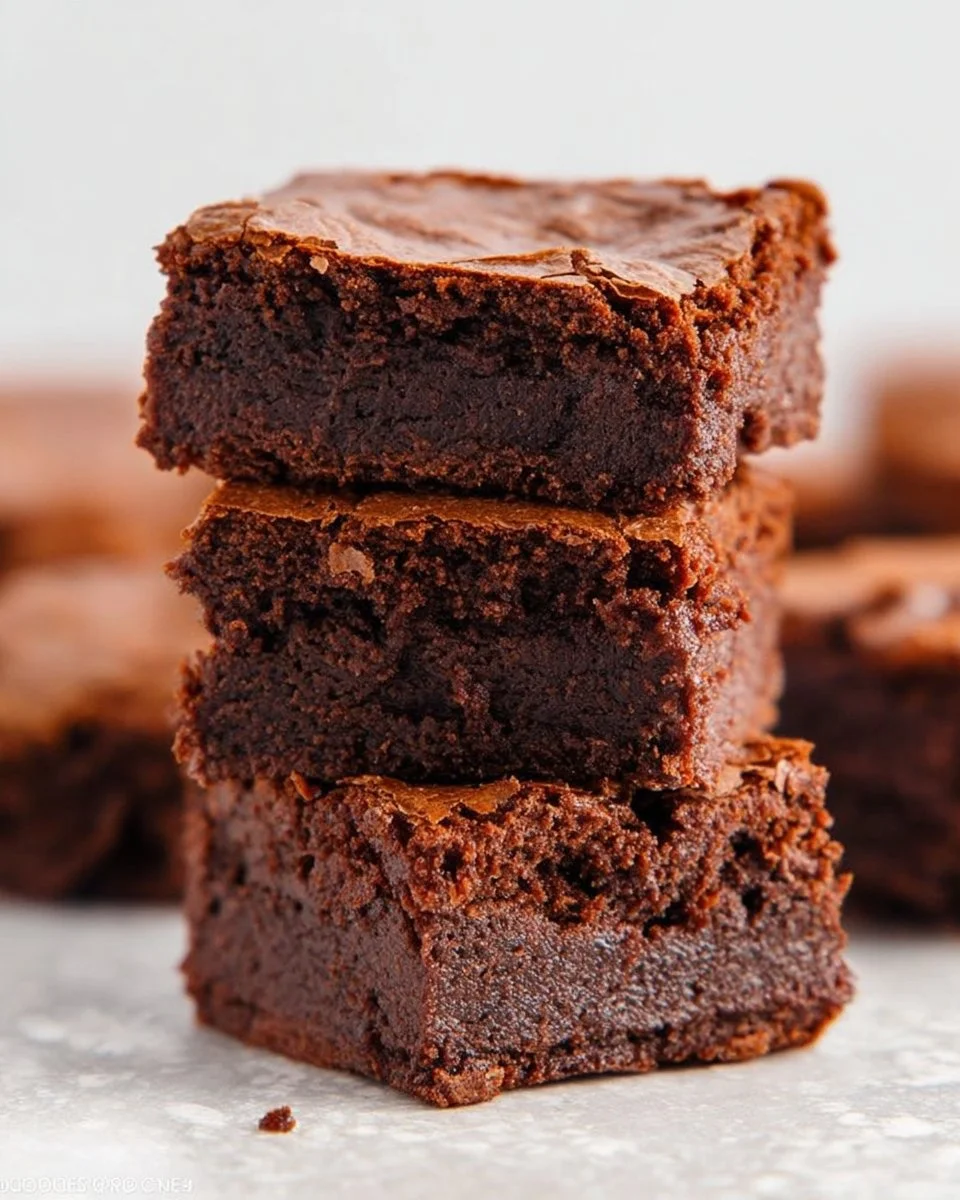
Brownies
As we navigate through our busy lives, there are times when the joy of baking gets lost in the chaos. Whether it’s after a long day at work or juggling family responsibilities, the idea of making something sweet can often feel overwhelming. This simple Brownies recipe shines as a beacon of hope, offering you a delicious dessert that’s easy to whip up and perfect for any occasion. With just a handful of ingredients and a few simple steps, you can create a decadent treat that brings warmth to your home and satisfies your family’s sweet tooth.
Kitchen Frustration That Makes This Recipe a Lifesaver
We’ve all been there: you come home tired and realize it’s been days since you’ve baked. The thought of pulling out numerous ingredients and dirtying up the kitchen can be daunting. You want something that will bring back the joy of baking without the stress. This Brownies recipe is the ultimate lifesaver, combining minimal effort with maximum reward. The allure of a warm, fudgy brownie fresh out of the oven is one we all crave, and this recipe makes it achievable, even on the busiest days.
The secret lies in its simplicity. With just a few pantry staples, you can make a batch that delights the whole family. Plus, brownies are incredibly versatile; you can enjoy them plain or dress them up with nuts, frosting, or even ice cream. Here’s a practical tip: keep a stash of brownie mix handy for those spontaneous baking moments. Life is unpredictable, but a delicious treat shouldn’t be!
Why This Brownie Recipe Works So Well
Featured Snippet: This brownie recipe is a crowd-pleaser that combines simplicity with rich flavor, resulting in a fudgy texture that melts in your mouth.
One of the best things about this Brownies recipe is the balance of flavors and textures. As soon as you take your first bite, the rich chocolate flavor envelops your taste buds, while the fudgy interior offers a satisfying chew. The use of unsalted butter, quality chocolate chips, and a perfect blend of cocoa powder works together to ensure every bite is a delight.
Not only is this brownie recipe time-saving, coming together in just a few steps, but it also caters to various dietary preferences. Whether you’re meal planning for the family or looking for a comforting dessert, these brownies have got you covered. They’re still remarkably budget-friendly too, making them accessible for all.
{image_template}
Ingredients, Substitutions & Foolproof Tips
- 1 cup unsalted butter, melted: Provides moisture and richness. For a healthier option, you can substitute with coconut oil.
- 1/2 cup chocolate chips: Enhances chocolate flavor; use dark chocolate for a richer taste or dairy-free for allergy-friendly brownies.
- 2 cups granulated sugar: Sweetness to balance the cocoa; consider using a sugar substitute for a lower-calorie version.
- 1/4 teaspoon table salt: Enhances flavors; don’t skip this for a well-balanced sweet.
- 3/4 cup cocoa powder: The star ingredient; ensures that deep chocolate flavor.
- 3 large eggs: Binds the ingredients together; using flax eggs can work for a vegan option.
- 2 teaspoons vanilla extract: Adds depth to the brownie flavor; use high-quality extract for the best results.
- 1 1/2 cups all-purpose flour: Gives structure to the brownies; you can substitute with whole wheat for added nutrition.
Step-by-Step Directions
- Preheat your oven to 325 degrees Fahrenheit. This step ensures even baking and helps create that perfect fudgy texture right from the start.
- Prepare the pan by lining an 8 by 8 inch baking pan with parchment paper or spraying it with cooking spray. Proper greasing prevents brownies from sticking, allowing for easy removal later.
- Melt the butter and chocolate chips together in a small saucepan over medium-low heat. Stir until smooth, creating a luxurious base for your brownies.
- Mix together the butter mixture with the granulated sugar and salt in a large bowl. Stir until well combined; this step infuses sweetness and flavor throughout the batter.
- Incorporate the cocoa powder into the mixture by mixing thoroughly. This brings out the rich chocolate flavor that makes these brownies irresistible.
- Add in the eggs and vanilla extract, mixing until fully incorporated. The eggs will create a luscious structure and chewy texture.
- Add the flour gradually, mixing until just combined. Avoid over-mixing to keep your brownies tender.
- Pour the batter into the prepared pan, spreading it evenly. This helps in even baking and a lovely rise.
- Bake for 30 to 35 minutes or until a toothpick inserted in the middle comes out with only a few crumbs. Don’t overbake; you want them fudgy!
- Let cool completely in the pan on a wire rack before cutting into squares. This ensures cleaner cuts and better texture.
Common Mistakes to Avoid & Pro Tips
- Overmixing the batter: This creates tough brownies. Mix only until ingredients are just combined.
- Underbaking: Fudgy brownies can be deceiving. Ensure you use the toothpick test for doneness.
- Not using parchment paper: This can lead to sticking. Use parchment for easy removal and cleanup.
Pro Tips:
- For added texture, sprinkle nuts or chocolate chips on top of the batter before baking.
- Pouring a layer of melted chocolate on top after baking can elevate your brownies even more.
- To check doneness, remember: if a toothpick comes out with moist crumbs, they’re perfect.
Serving, Storage & Freezer Guide
How to Serve Brownies
These brownies are delightful served warm with a scoop of vanilla ice cream or a dollop of whipped cream on top. They also shine as a standalone treat accompanied by a glass of cold milk or warm coffee for a cozy afternoon indulgence. For gatherings, place brownies on a decorative platter and watch them disappear!
How to Store Brownies
Store your brownies in an airtight container at room temperature for up to two weeks. This helps maintain their fudgy texture and flavor. For longer freshness, consider cutting them into squares and storing them with parchment paper in between each piece to prevent sticking.
Can You Freeze Brownies?
Absolutely! Brownies freeze beautifully. Wrap them tightly in plastic wrap and then in aluminum foil, or place them in a freezer-safe bag. They can be stored in the freezer for up to three months. Thaw them overnight in the fridge, or enjoy them straight from the freezer for a fun frozen treat.
Frequently Asked Questions
What can I add to enhance the flavor of the brownies?
You can add mix-ins like walnuts, pecans, or a swirl of peanut butter for extra flavor and texture. You can even experiment with different types of chocolate.
Are there any alternatives to sugar in this recipe?
Yes, you can use stevia or a granulated sugar alternative that measures cup-for-cup like erythritol if you’re looking for a lower sugar option.
Can this recipe be made gluten-free?
Absolutely! Substitute the all-purpose flour with a gluten-free flour blend. Make sure to choose one that’s designed for baking for the best results.
How do I know when the brownies are done baking?
Check for doneness by inserting a toothpick in the center; it should come out with a few moist crumbs. For fudgy brownies, underbake slightly; for cake-like brownies, bake until a toothpick comes out clean.
Conclusion
These brownies encapsulate comfort and nostalgia, effortlessly tying together memories of family gatherings and nostalgic moments spent in the kitchen. They’re not just a dessert but a solution to cooking fatigue and a sweet escape from daily stress. If this recipe reminds you of someone you love, share it with them. Your memories keep recipes alive.

Brownies
Ingredients
Method
- Preheat your oven to 325 degrees Fahrenheit.
- Prepare an 8 by 8 inch baking pan by lining it with parchment paper or spraying it with cooking spray.
- Melt the butter and chocolate chips together in a small saucepan over medium-low heat. Stir until smooth.
- In a large bowl, combine the butter mixture with granulated sugar and salt. Stir until well mixed.
- Thoroughly mix in the cocoa powder.
- Add eggs and vanilla extract, mixing until fully incorporated.
- Gradually add flour while mixing until just combined.
- Pour the batter into the prepared pan, spreading it evenly.
- Bake for 30 to 35 minutes or until a toothpick inserted in the center comes out with only a few crumbs.
- Let cool completely in the pan on a wire rack before cutting into squares.