Creating a delightful dessert that satisfies everyone without the hassle of baking can feel like a challenge. Enter the No-Bake Cheesecake, a simple yet luxurious recipe that promises to become a staple in your meal planning. This recipe is perfect for those evenings when you want something sweet but don’t have the time or energy to turn on the oven. Plus, the creamy texture and rich flavor will please your taste buds while keeping you aligned with your health goals. A win-win solution awaits with this easy-to-follow recipe that is also budget-friendly.
Kitchen Frustration That Makes This Recipe a Lifesaver
We’ve all been there—navigating the demands of a busy household while trying to adhere to health-conscious meal plans can lead to cooking fatigue. Between juggling work, family, and errands, finding time to whip up a baked dessert often feels impossible. The No-Bake Cheesecake is a solution to these everyday kitchen frustrations. This recipe blends convenience and comfort, allowing you to create a delicious treat without the wait of traditional baking.
Imagine bringing this creamy delight to your next family gathering or a potluck. It’s a nostalgia-driven choice that caters to diverse palates while ensuring that you remain focused on your nutrition goals. As you prepare this No-Bake Cheesecake, rest assured that with minimal effort, you can satisfy your family’s cravings without sacrificing quality. A practical tip: prepare it the night before to not only save time but also allow it to set perfectly overnight—a crucial factor in achieving that ideal creamy texture.
Why This No-Bake Cheesecake Works So Well
Quick Answer: The No-Bake Cheesecake blends the richness of cream cheese with the lightness of whipped cream, creating an incredibly smooth and satisfying dessert that is simple to prepare.
This No-Bake Cheesecake stands out not just for its ease of preparation but also for its luscious texture and flavor. Using quality cream cheese ensures that the cheesecake has that silky smooth feel, while the combination of granulated and powdered sugar creates just the right amount of sweetness and structure.
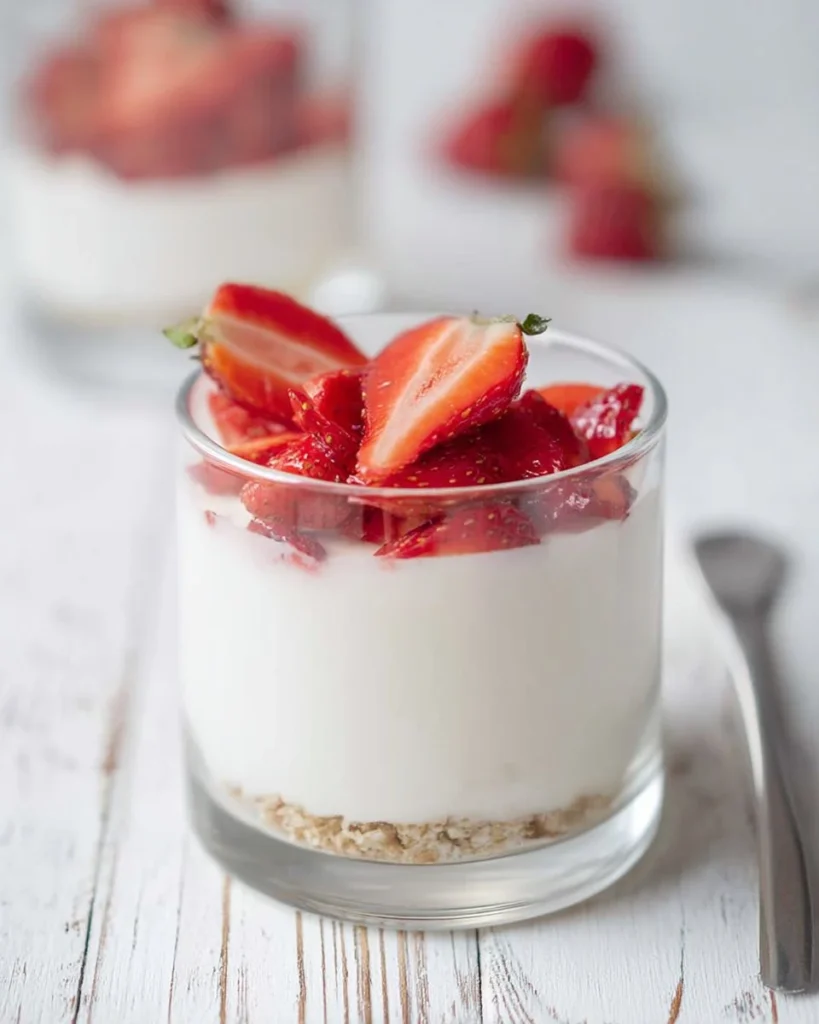
The graham cracker crust provides a delightful crunch, expertly contrasting the creamy filling and making each bite a satisfying experience. Additionally, this recipe is time-saving, requiring no baking, which means you get more time to socialize and enjoy the moment, rather than checking on the oven. It’s also a perfect fit for calorie-conscious or macro-balanced meal plans—enjoying a slice of cheesecake doesn’t mean sacrificing your health.
{image_template}
Ingredients, Substitutions & Foolproof Tips
- 2 cups graham cracker crumbs: Forms the base of the cheesecake; consider using whole-grain crumbs for added fiber.
- 1/2 cup unsalted butter, melted: Binds the crust together; ensure it’s fully melted to avoid clumping.
- 1 cup granulated sugar: Sweetens the filling without overpowering it; can substitute with coconut sugar for a lower glycemic index.
- 16 oz cream cheese, softened: Gives a rich, creamy texture; light cream cheese can be used for a lighter option.
- 1 tsp vanilla extract: Enhances the flavor; opt for pure vanilla for the best taste.
- 1 cup heavy whipping cream: Creates the fluffy texture; can substitute with a dairy-free version for a vegan option.
- 1/4 cup powdered sugar: Sweetens the whipped cream; can also use a sugar alternative for a diabetic-friendly version.
Step-by-Step Directions
- Prepare the crust: In a mixing bowl, combine the graham cracker crumbs and melted butter until well combined. Press the mixture into the bottom of a springform pan to create the crust. This forms the perfect foundation, so ensure it’s tightly packed for stability.
- Mix the filling: In a separate bowl, beat the cream cheese and granulated sugar until smooth and creamy. Add the vanilla extract and mix well. This is where you’ll achieve that velvety filling; take your time to cream it thoroughly.
- Whip the cream: In another bowl, whip the heavy cream with powdered sugar until stiff peaks form. Properly whipped cream is key to the cheesecake’s fluffiness, so ensure your bowl and beaters are cold for best results.
- Combine mixtures: Gently fold the whipped cream into the cream cheese mixture until well combined. Be careful not to deflate the whipped cream; this step keeps your cheesecake airy.
- Pour and smooth: Pour the filling over the crust in the springform pan and smooth the top. It should be level for an even set.
- Chill the cheesecake: Refrigerate for at least 4 hours or overnight until set. Patience is key—allowing it to chill overnight results in the best texture.
- Serve: Remove from the springform pan and serve as desired. You can garnish it with fruit or chocolate drizzle for a delightful touch.
Common Mistakes to Avoid & Pro Tips
- Mistake: Not softening the cream cheese before mixing.
- Fix: Allow cream cheese to sit at room temperature for an hour before using.
- Mistake: Overwhipping the cream.
- Fix: Stop whipping as soon as stiff peaks form to maintain airiness.
- Mistake: Not packing the crust firmly enough.
- Fix: Use the bottom of a measuring cup to press the crust evenly.
- Mistake: Cutting too soon before the cheesecake is fully set.
- Fix: Chill for a minimum of 4 hours, preferably overnight.
Pro Tips:
- Use fresh ingredients for maximum flavor and texture.
- Experiment with flavorings, such as lemon zest or chocolate, to personalize your cheesecake.
- If using a store-bought crust for convenience, ensure it’s compatible with the rest of the flavors.
Serving, Storage & Freezer Guide
How to Serve No-Bake Cheesecake
This cheesecake can be served naked, or you can dress it up with fresh fruit, chocolate shavings, or a drizzle of caramel. The options are endless, allowing you to cater to different preferences in the family. A dollop of whipped cream adds an inviting touch for guests or family during special occasions, making it look as good as it tastes.
How to Store No-Bake Cheesecake
To store your No-Bake Cheesecake, cover it tightly with plastic wrap or aluminum foil after it has set in the refrigerator. It can last up to five days in the refrigerator, maintaining its luscious texture throughout. If necessary, cut the cheesecake into individual slices, making it easier to grab a quick dessert on the go while supporting portion control.
Can You Freeze No-Bake Cheesecake?
Yes, you can freeze No-Bake Cheesecake for up to three months. To do so, ensure it’s well covered with plastic wrap and additional foil to prevent freezer burn. When ready to enjoy, allow it to thaw in the refrigerator overnight.

Frequently Asked Questions
Can I use a different crust instead of graham crackers?
Yes! You can use crushed cookies like Oreos or vanilla wafers, or even make a nut-based crust for a gluten-free version.
Is it ok to use low-fat cream cheese?
Yes, low-fat cream cheese can be used, but it may alter the texture slightly, making it less creamy than the regular version.
How can I make this recipe diabetic-friendly?
Substitute granulated and powdered sugar with suitable sugar alternatives like erythritol or stevia, and ensure any mix-ins align with your health goals.
What is the best way to serve leftovers?
Leftovers can be served chilled directly from the fridge or removed an hour prior to serving to soften slightly for optimal texture.
Conclusion
The No-Bake Cheesecake is more than just a dessert; it’s a celebration of family, connection, and indulging in the simple pleasures of life. By making this recipe an integral part of your culinary repertoire, you embrace a solution that caters to many challenges, from saving time to pleasing a crowd. If this recipe reminds you of someone you love, share it with them. Your memories keep recipes alive.
No-Bake Cheesecake
Ingredients
Method
- In a mixing bowl, combine the graham cracker crumbs and melted butter until well combined. Press the mixture into the bottom of a springform pan to create the crust.
- In a separate bowl, beat the cream cheese and granulated sugar until smooth and creamy. Add the vanilla extract and mix well.
- In another bowl, whip the heavy cream with powdered sugar until stiff peaks form.
- Gently fold the whipped cream into the cream cheese mixture until well combined.
- Pour the filling over the crust in the springform pan and smooth the top.
- Refrigerate for at least 4 hours or overnight until set.
- Remove from the springform pan and serve as desired.