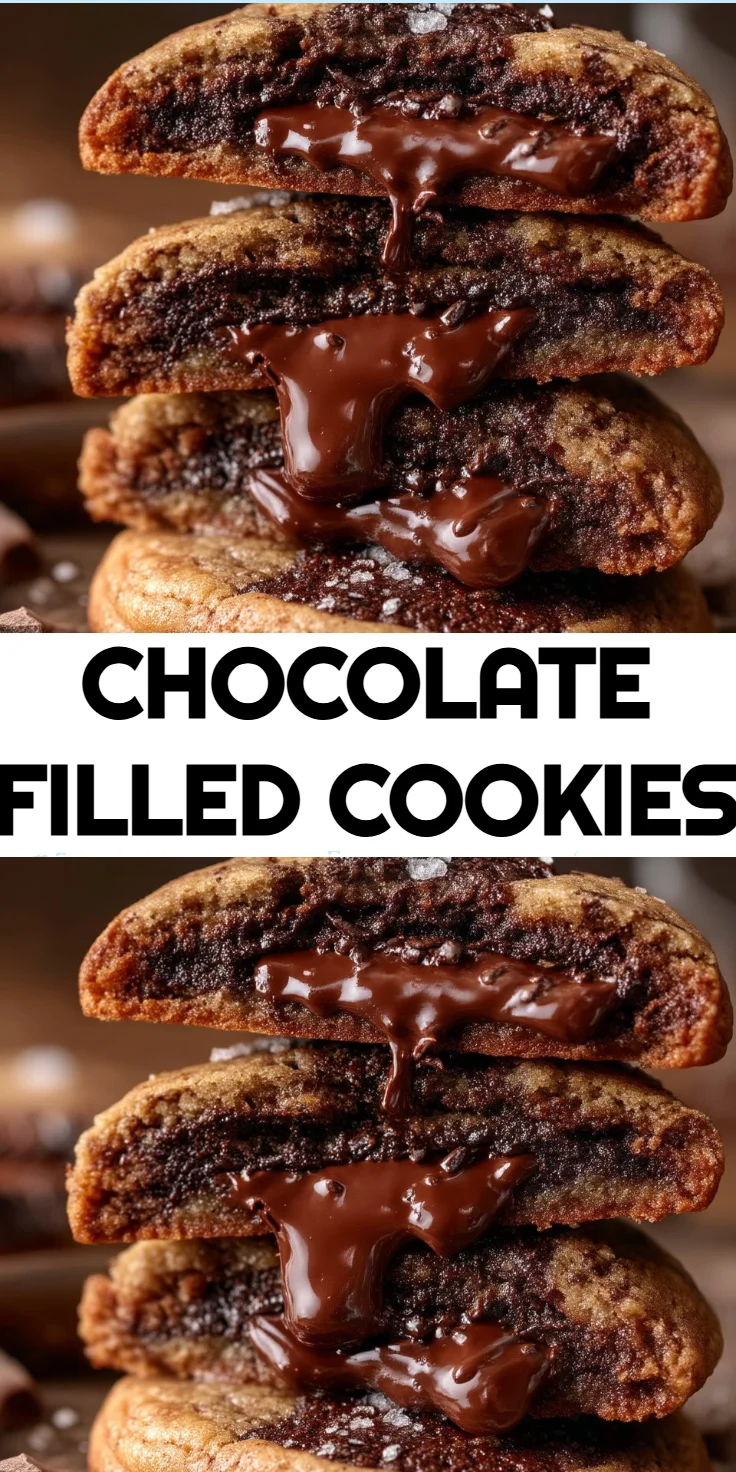
Chocolate Filled Cookies
Chocolate Filled Cookies are not just a treat; they’re a solution for those tired, busy days when even the thought of cooking feels daunting. If you’re juggling a family, work, and a myriad of responsibilities, you know how overwhelming it can be to stick to your meal plan or appease everyone’s sweet tooth. This recipe offers a delicious escape that balances indulgence with ease, making it the perfect remedy for cooking fatigue. This treat packs a punch with flavor, texture, and chocolatey joy, and it could help enrich your family kitchen.
Kitchen Frustration That Makes This Recipe a Lifesaver
There was a time when I felt overshadowed by the daily grind, facing mealtime battle fatigue as hunger pangs echoed through the halls. All too often, I’d find myself staring into an empty fridge, wondering how to satisfy the family’s cravings without stretching the budget or sacrificing nutrition. This is when these Chocolate Filled Cookies became my saving grace.
Imagine a kitchen filled with laughter, the sweet scent of butter and chocolate wafting through the air, bringing everyone together after a long day. With each cookie, you can create not just a dessert, but memories. The beauty of this recipe lies within its simplicity; it’s made with common ingredients found in most U.S. homes, making it both budget-conscious and comforting. Whether you’re looking to spoil your family or treat yourself, these cookies will save you from the dreaded “what’s for dessert?” dilemma.
Tip for success: When you feel the kitchen blues creeping in, remember this recipe. Prepare a batch in advance to have on hand for quick snacks or desserts, thereby alleviating some of that daily meal planning stress.
Why This Chocolate Filled Cookies Works So Well
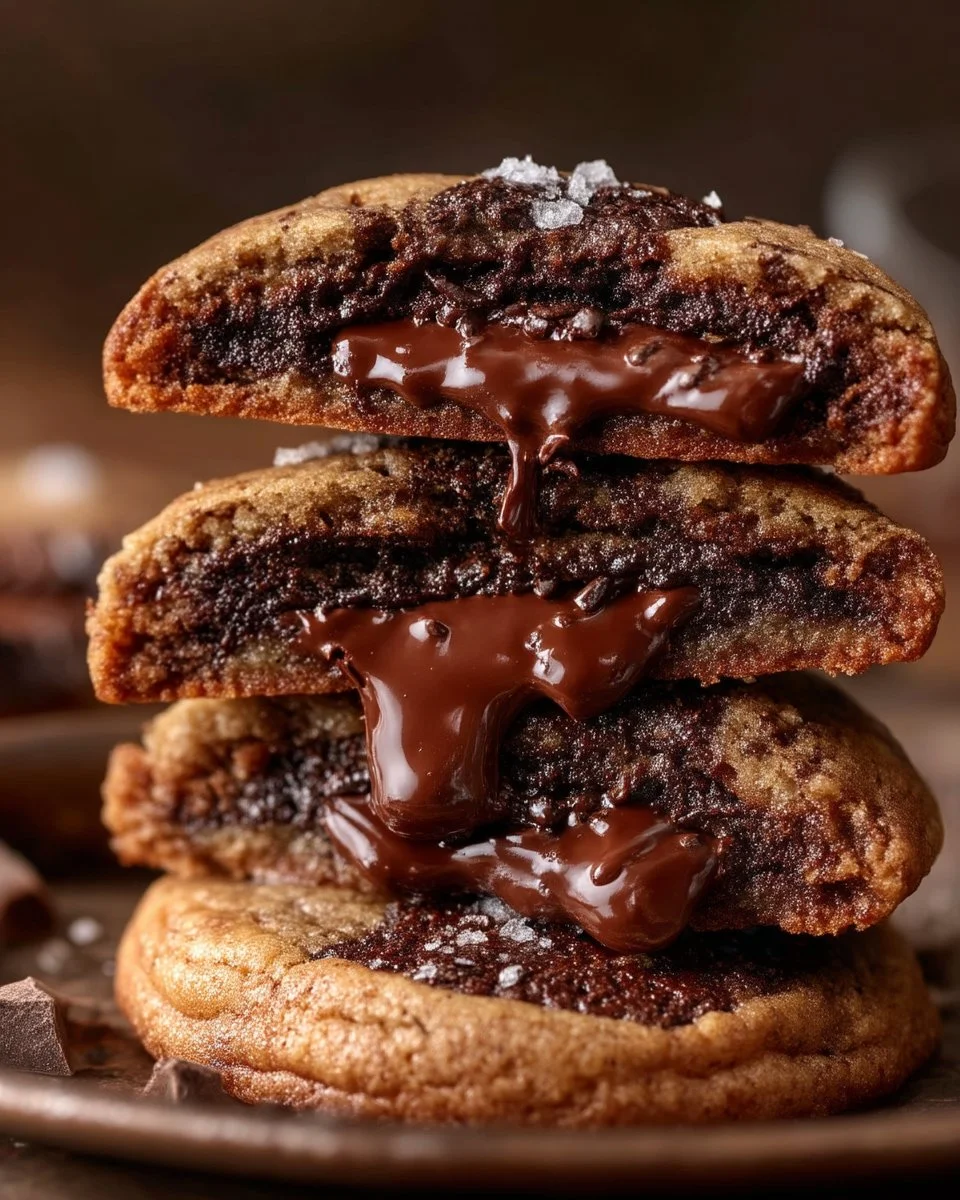
Quick Answer: This recipe combines the softness of a classic cookie with a rich, gooey center, providing an irresistible flavor and texture contrast.
These Chocolate Filled Cookies are not only delicious, but they’re designed to cater to your lifestyle. They’re perfect for any family gathering, and their ease makes them a staple recipe for novice and experienced bakers alike. The chocolate hazelnut spread forms a delightful surprise inside each cookie, satisfying those chocolate cravings while keeping them under control.
The blend of unsalted butter, sugars, and eggs creates a rich base, while the all-purpose flour and chocolate chips give just the right amount of chewiness. Imagine sinking your teeth into a freshly baked cookie that’s warm and filled with gooey chocolatey goodness. Each bite evokes nostalgic memories of simpler times; it’s not just about the flavors but the feelings these cookies conjure.
Ingredients, Substitutions & Foolproof Tips
- 1 cup unsalted butter, softened – Provides rich flavor and tenderness.
- 1 cup granulated sugar – Sweetens and enhances the cookies’ texture.
- 1 cup brown sugar, packed – Adds depth with a slight caramel flavor.
- 2 large eggs – Binds the ingredients together.
- 2 teaspoons vanilla extract – Infuses a warm, nostalgic flavor.
- 3 cups all-purpose flour – Forms the cookie structure.
- 1 teaspoon baking soda – Aids in the rising process.
- 1/2 teaspoon salt – Balances the sweetness.
- 2 cups chocolate chips – For added chocolate delight.
- 1 cup chocolate hazelnut spread – The star filling, offering a creamy surprise.
Substitutions: If you’re looking for a healthier alternative, you can use coconut oil instead of butter or a sugar substitute for a lower-calorie version.
Step-by-Step Directions
- Preheat your oven. Preheat the oven to 350°F (175°C) to ensure your cookies bake evenly.
- Cream the butter and sugars. In a large bowl, cream together the softened butter, granulated sugar, and brown sugar until smooth and fluffy—about 2-3 minutes.
- Incorporate the eggs. Beat in the eggs one at a time, then stir in the vanilla extract, blending until fully combined.
- Mix the dry ingredients. In another bowl, combine the flour, baking soda, and salt. Gradually mix this dry blend into the creamed mixture until well blended.
- Add chocolate chips. Gently stir in the chocolate chips, ensuring they’re evenly distributed throughout the dough.
- Shape the cookies. Drop rounded tablespoons of dough onto ungreased baking sheets, allowing room for spreading.
- Create filling space. Make an indent in the center of each cookie and fill with a teaspoon of chocolate hazelnut spread—this is the heart of your cookies!
- Bake to perfection. Bake for 10-12 minutes or until the edges are lightly golden and the middle appears set.
- Cool and enjoy. Let cool on baking sheets for a few minutes before transferring them to wire racks to cool completely.
Common Mistakes to Avoid & Pro Tips
- Not softening the butter. Using hard butter can lead to dense cookies. Always ensure your butter is at room temperature before starting.
- Overmixing the dough. This can lead to tough cookies. Mix just until combined.
- Skipping the cooling time. Cookies continue to cook slightly after being removed from the oven. Let them cool for optimal texture.
Pro Tips:
- Use a cookie scoop for evenly sized cookies for uniform baking.
- Consider chilling the dough for 30 minutes before baking to enhance the flavor and texture.
- For extra indulgence, sprinkle a little sea salt on top before baking.
Serving, Storage & Freezer Guide
How to Serve Chocolate Filled Cookies
These cookies are delightful served warm with a glass of milk, coffee, or tea. Consider assembling them into a charming cookie platter for gatherings, showcasing their inviting look. They’re also perfect for lunchbox treats, making them ideal for individuals seeking a sweet yet sensible indulgence.
How to Store Chocolate Filled Cookies
Store your cookies in an airtight container at room temperature for up to a week. For longer freshness, keep them in the refrigerator. Layer the cookies with parchment paper to prevent sticking.
Can You Freeze Chocolate Filled Cookies?
Absolutely! Chocolate Filled Cookies freeze beautifully. Place the cookies in a single layer in a freezer-safe container, separating layers with parchment paper. They can be stored for up to three months. To enjoy, simply let them thaw at room temperature or warm them slightly in the microwave.
Frequently Asked Questions
Can I use gluten-free flour in this recipe?
Yes, you can substitute a gluten-free all-purpose flour blend in this recipe. Just make sure it contains a binding agent like xanthan gum for best results.
How can I make these cookies more indulgent?
For an extra chocolatey flavor, add cocoa powder to the dough or mix in chunks of dark chocolate along with the chocolate chips for added texture.
Can I reduce the sugar in this recipe?
Yes, you can reduce the sugar slightly, but this may impact the texture and flavor. Start by reducing it by 1/4 cup to see if the result meet your preferences.
Can I add nuts to the cookies?
Certainly! Chopped nuts like walnuts or pecans will add a delightful crunch to the cookies. Just be sure to consider any allergies of those you’ll be serving.
Conclusion
These Chocolate Filled Cookies not only provide a delicious treat but also serve as a fond reminder of the warmth and joy of sharing baked goods with loved ones. Embrace the comfort and nostalgia they bring to your kitchen with every gooey bite.
If this recipe reminds you of someone you love, share it with them. Your memories keep recipes alive.

Chocolate Filled Cookies
Ingredients
Method
- Preheat your oven to 350°F (175°C) to ensure your cookies bake evenly.
- In a large bowl, cream together the softened butter, granulated sugar, and brown sugar until smooth and fluffy—about 2-3 minutes.
- Beat in the eggs one at a time, then stir in the vanilla extract, blending until fully combined.
- In another bowl, combine the flour, baking soda, and salt. Gradually mix this dry blend into the creamed mixture until well blended.
- Gently stir in the chocolate chips, ensuring they’re evenly distributed throughout the dough.
- Drop rounded tablespoons of dough onto ungreased baking sheets, allowing room for spreading.
- Make an indent in the center of each cookie and fill with a teaspoon of chocolate hazelnut spread.
- Bake for 10-12 minutes or until the edges are lightly golden and the middle appears set.
- Let cool on baking sheets for a few minutes before transferring them to wire racks to cool completely.