Dairy Queen Chocolate Ice Cream Cake
Creating desserts that bring joy to family gatherings can sometimes feel daunting, especially when you’re juggling a busy lifestyle and trying to stick to calorie-conscious meal plans. The Dairy Queen Chocolate Ice Cream Cake not only offers a solution to cooking fatigue and pressure but also delivers a creamy and delightful experience. With layers of rich chocolate and smooth vanilla ice cream nestled between moist chocolate cake, it offers the perfect solution for those looking to serve something spectacular without spending hours in the kitchen.
Kitchen Frustration That Makes This Recipe a Lifesaver
Living a busy life while managing a family can lead to a sense of cooking fatigue, particularly during special occasions. You may reminisce about the delightful cakes from Dairy Queen but feel overwhelmed at the thought of recreating something similar. The secret to making exceptional desserts lies in simplifying the process without sacrificing flavor—and that’s where this Dairy Queen Chocolate Ice Cream Cake shines.
Rather than being intimidated by intricate baking processes—and to help you stick to your meal plan—I’m thrilled to share a recipe that combines ease with nostalgia. By harnessing prepared ingredients like cake mix and ice cream, you can craft a show-stopping dessert that tastes like it came from a beloved ice cream shop. With this recipe, you can turn frustration into fabulous with just a few steps.
Why This Dairy Queen Chocolate Ice Cream Cake Works So Well
Quick Answer: This Dairy Queen Chocolate Ice Cream Cake combines the decadence of chocolate cake with the creamy sweetness of ice cream, creating a delightful dessert that appeals to all ages.
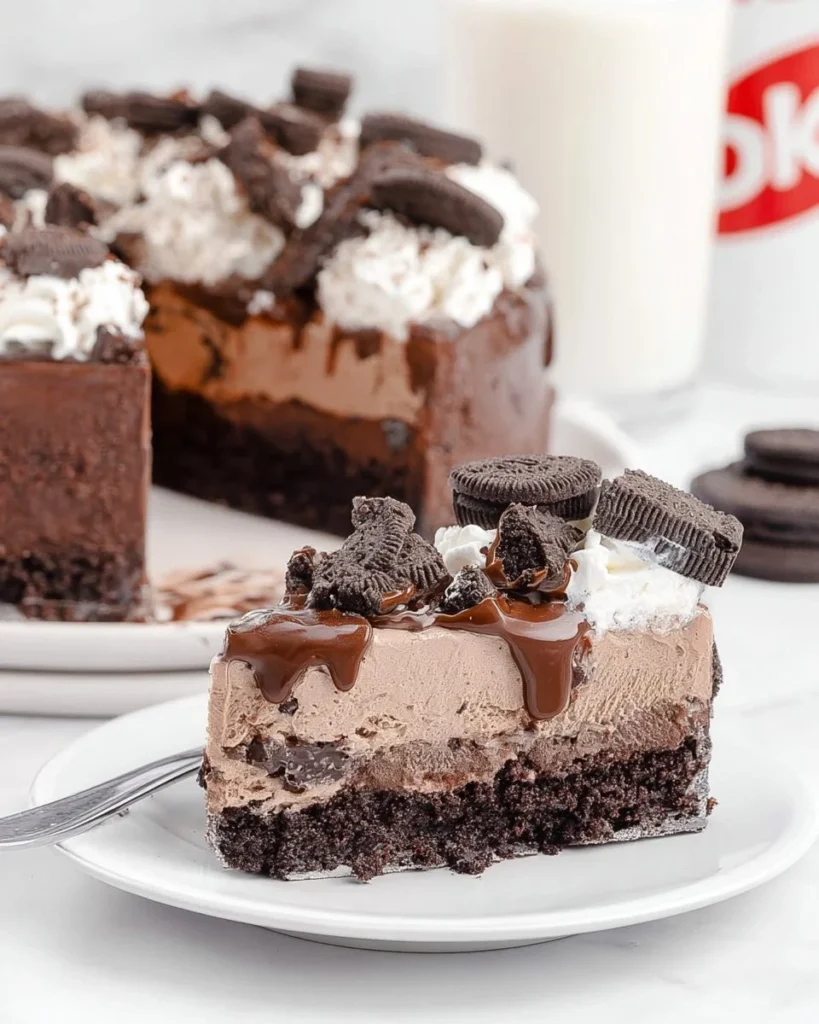
This recipe stands out for several compelling reasons. First, the texture and flavor are utterly indulgent; the chocolate cake is moist and rich, providing a hearty base, while the cold ice cream layers deliver a creamy contrast that is simply irresistible. It’s a feel-good treat that many of us remember fondly from our childhood, reimagined in a way that suits today’s health-conscious desires.
Moreover, time is always of the essence, especially for families on a budget. This dessert is a time-saving delight that can be assembled in less than an hour, then simply frozen until it’s ready to serve. You save money while simultaneously offering a dessert that feeds a crowd. It’s also a meal prep-friendly solution, perfect for gatherings or birthday parties, evoking those nostalgic memories without a long-term commitment in the kitchen.
{image_template}
Ingredients, Substitutions & Foolproof Tips
- 1 package chocolate cake mix: For a rich and moist cake base.
- 1/2 cup vegetable oil: Adds moisture and helps the cake rise.
- 3 large eggs: Essential for binding and structural integrity.
- 1 cup water: Needed for the cake mix preparation.
- 1 quart chocolate ice cream: Provides delicious decadence and a creamy layer.
- 1 quart vanilla ice cream: Offers a classic contrast to chocolate.
- 1 jar hot fudge sauce: Sweet and rich topping that enhances flavor.
- 1 container whipped topping: Airy texture for a light finish.
- Chocolate shavings or crumbs for garnish: Adds aesthetic appeal and a burst of chocolate flavor.
Tips: Make sure the cake is completely cooled before layering with ice cream to prevent melting. For added flavor, consider using different types of ice cream or sauces based on your preference.
Step-by-Step Directions
Preheat the oven and bake the cake: Preheat your oven to the temperature specified on the cake mix package. Prepare the cake mix by combining it with the water, oil, and eggs, then bake according to package instructions, usually around 30-35 minutes.
Allow the cake to cool: Once baked, remove from the oven and let the cake cool in the pan for about 10 minutes before transferring it to a wire rack to cool completely.
Cut the cake: When the cake is fully cooled, carefully slice it in half horizontally to create two layers.
Layer chocolate ice cream: Place the bottom layer of cake on a serving plate and spread a layer of chocolate ice cream evenly on top. Ensure it’s smooth for easy stacking.
Add the vanilla ice cream: Follow with a layer of vanilla ice cream over the chocolate, making sure to spread it evenly.
Top with the second half of cake: Gently place the second half of the cake on top of the ice cream layers.
Prepare the hot fudge sauce: Heat the hot fudge sauce in the microwave for about 30 seconds, or until warm and pourable.
Pour the hot fudge: Drizzle the warm fudge over the top of the cake, allowing it to flow down the sides for an enticing look.
Spread whipped topping: Use a spatula or knife to spread whipped topping over the entire cake, giving it a beautiful and inviting appearance.
Garnish and freeze: Finally, sprinkle chocolate shavings or crumbs on top for a decorative touch, then place the cake in the freezer for at least 4 hours before serving.
Common Mistakes to Avoid & Pro Tips
Common Mistakes:
- Not allowing cake to cool thoroughly: This can lead to melting ice cream.
- Overspreading hot fudge: Avoid using too much sauce, as it can make the cake overly sweet.
Pro Tips:
- Use a serrated knife for cutting the cake: This will help achieve clean layers.
- Allow ice cream to soften slightly before layering: This makes it easier to spread.
Serving, Storage & Freezer Guide
How to Serve Dairy Queen Chocolate Ice Cream Cake
When it’s time to serve your Dairy Queen Chocolate Ice Cream Cake, slice it with a warm knife for clean cuts. Pair each slice with a scoop of extra ice cream or drizzle more hot fudge on the plate for an elevated dessert experience. It’s perfect for birthday parties, family gatherings, or simply a sweet treat to enjoy after dinner.
How to Store Dairy Queen Chocolate Ice Cream Cake
To store any leftovers, cover the cake tightly with plastic wrap or aluminum foil to minimize freezer burn and maintain texture. It can be kept in the freezer for up to two weeks, although we doubt it will last that long!
Can You Freeze Dairy Queen Chocolate Ice Cream Cake?
Yes! This cake is perfect for freezing. Just ensure it’s well-wrapped as mentioned, and when you’re ready to enjoy it again, let it thaw in the refrigerator for about an hour before serving for the best texture.

Frequently Asked Questions
What can I use instead of vegetable oil?
You can substitute vegetable oil with melted coconut oil or applesauce for a healthier option in this recipe.
Can I use different flavors of ice cream?
Absolutely! Feel free to mix and match your favorite flavors, such as cookies and cream or mint chocolate chip, for a fun twist.
How long does this cake last in the freezer?
The Dairy Queen Chocolate Ice Cream Cake can last for up to two weeks in the freezer when properly stored.
Can I make this cake ahead of time?
Yes! This cake is ideal to prepare in advance and keep in the freezer until you’re ready to serve it.
Conclusion
The Dairy Queen Chocolate Ice Cream Cake is more than just a dessert; it’s a nostalgic delight that transforms any gathering into a memorable celebration. If this recipe reminds you of someone you love, share it with them. Your memories keep recipes alive.
Dairy Queen Chocolate Ice Cream Cake
Ingredients
Method
- Preheat your oven to the temperature specified on the cake mix package. Prepare the cake mix by combining it with the water, oil, and eggs, then bake according to package instructions, usually around 30-35 minutes.
- Once baked, remove from the oven and let the cake cool in the pan for about 10 minutes before transferring it to a wire rack to cool completely.
- When the cake is fully cooled, carefully slice it in half horizontally to create two layers.
- Place the bottom layer of cake on a serving plate and spread a layer of chocolate ice cream evenly on top. Ensure it’s smooth for easy stacking.
- Follow with a layer of vanilla ice cream over the chocolate, making sure to spread it evenly.
- Gently place the second half of the cake on top of the ice cream layers.
- Heat the hot fudge sauce in the microwave for about 30 seconds, or until warm and pourable.
- Drizzle the warm fudge over the top of the cake, allowing it to flow down the sides for an enticing look.
- Use a spatula or knife to spread whipped topping over the entire cake, giving it a beautiful and inviting appearance.
- Finally, sprinkle chocolate shavings or crumbs on top for a decorative touch, then place the cake in the freezer for at least 4 hours before serving.