Baking can be a double-edged sword. The excitement of mixing, measuring, and watching your creation rise is exhilarating, but the potential for mishaps looms around every turn. Have you ever baked a beautiful cake, only to see it crumble apart when it’s time to serve? Or perhaps it turned out too dry, leaving you with a creation that lacks the joy of a perfect dessert? If these struggles sound familiar, then you’re in for a treat with Cake Pops!
Cake Pops offer the perfect solution for those anxious baking moments. These bite-sized delights encapsulate all the joys of cake but come with the added benefit of being easy to handle and serve. In this article, we will dive into the world of Cake Pops and share a delightful recipe that will delight your taste buds and calm your baking fears.
A Journey in Baking: Overcoming Challenges
Let’s take a stroll down memory lane. When I first started baking, I faced countless frustrations that could fill a cookbook of their own. I remember one fateful birthday where I attempted to bake a multi-layered cake to surprise my niece. The layers were dense, the frosting felt like cement, and the whole thing collapsed the moment I tried to stack it. That was the catalyst for my baking evolution.
Fast forward a few years, and I stumbled upon the magic of Cake Pops while browsing an online forum. The idea of blending cake and frosting, then crafting them into delightful pops really struck a chord with me. The physical transformations—from cake to crumb, to a fun, pop-ified snack—excited my creativity and satisfied my sweet tooth, leading to countless joyful moments.
Today, when I create Cake Pops, I see them as tiny canvases for my imagination. The golden combinations of flavors and whims of decoration make each one a unique work of art. They are the perfect blend of nostalgia and joy, a delightful solution that transforms previous baking woes into sweet triumphs.
Let’s embrace this process together and conjure up your very own cake pops that evoke smiles and laughter.
Why Cake Pops Work Wonders
What makes Cake Pops so special? They embody creativity, fun, and simplicity all in one little bite. They require minimal ingredients while allowing you to express yourself artistically—whether through color or additional flavors. Plus, they store well and are perfect for gatherings, celebrations, or as a treat just for yourself!
The best part? They circumvent many common baking headaches. The secret to perfect Cake Pops is not just narrowing it down to a few key techniques and ingredients; it’s about mastering your process and letting go of rigid expectations.
Quick Answer: The secret to perfect Cake Pops is mastering the balance between cake and frosting for a consistency that holds together and tastes delightful.
The joy of crafting Cake Pops translates beyond just nutrition; it’s about connection and creating memories. From birthday parties to family gatherings, Cake Pops always seem to emerge as a favorite amongst young and old alike. Dive deeper into creative kitchen explorations with our guide to Sweet and Sour Mix: The Ultimate Guide to Cocktails or find inspiration with Cottage Cheese Chips Recipe!
Ingredients, Substitutions & Foolproof Steps
Ingredients List:
- 1 cake (any flavor) — Choose your favorite flavor or whatever you have on hand; chocolate and vanilla work great.
- 1 cup frosting — Store-bought or homemade will do; cream cheese frosting adds a deliciously tangy twist!
- Chocolate or candy melts — Use dark, milk, or white chocolate; melting candy melts is easy and creates vibrant colors.
- Lollipop sticks — These help in serving; you can find them at craft stores or online.
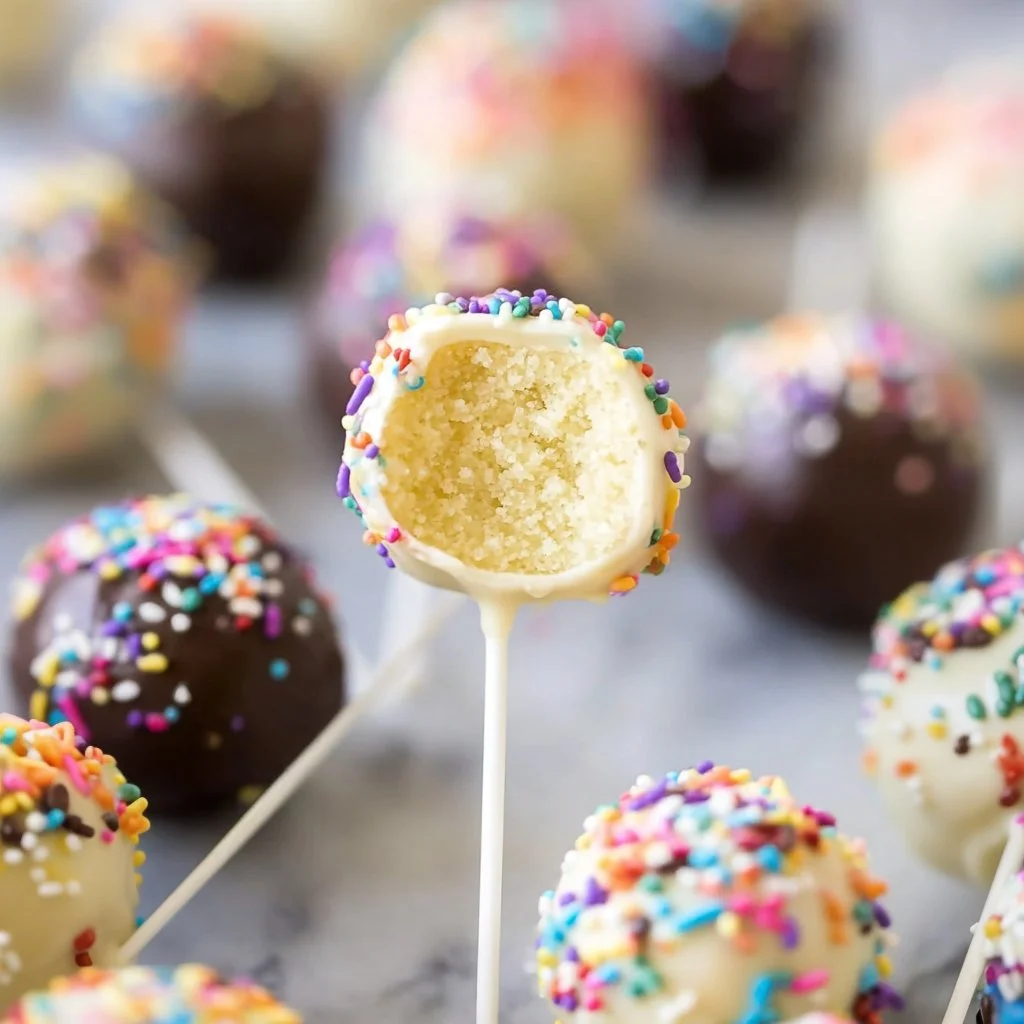
- Sprinkles (optional) — Go wild with colors and shapes to make your Cake Pops visually stunning!

Directions / Steps:
- Bake the cake according to package instructions and let it cool completely.
- Crumble the cooled cake into a large bowl.
- Mix in frosting until well combined, creating a moldable dough-like consistency.
- Form the mixture into small balls and place on a baking sheet lined with parchment paper.
- Insert lollipop sticks into each ball and freeze for about 30 minutes to firm them up.
- Melt the chocolate or candy melts in a microwave or double boiler according to package instructions.
- Dip each cake pop into the melted chocolate, allowing any excess to drip off.
- Decorate with sprinkles if desired while the chocolate is still wet.
- Let the chocolate harden completely before serving.
Common Mistakes to Avoid
- Forgetting to let the cake cool completely before crumbling can lead to runny mixtures.
- Overmixing frosting with cake will yield a gooey mess rather than a malleable dough.
Pro Tips
- Use different flavored cake and frosting combinations for a unique flavor profile.
- If your cake pops are falling off the sticks, ensure they are well chilled before dipping them into chocolate.
Explore a variety of breakfast choices to fuel your day with our recipe for Breakfast Sides for Busy Mornings.
Serving, Storage & Freezer Tips
How to Serve Cake Pops
Serve Cake Pops at room temperature for the best flavor. They can be displayed in a jar, standing upright in floral foam, or arranged on a platter. Feel free to get creative with your presentation!
How to Store Cake Pops
Store uneaten Cake Pops in an airtight container in the refrigerator. They can last for about a week, maintaining their taste and texture.
Can You Freeze Cake Pops?
Absolutely! Once the chocolate has set completely, place the Cake Pops in a single layer in an airtight container, and they’ll be good for up to three months. Just thaw at room temperature before enjoying them!
Creating easy options like these can enhance your weeknight dinners, just like finding the perfect recipe for Baked Chicken Recipes.
FAQ Section
1. Can I omit the frosting in Cake Pops?
While frosting is essential for binding the crumbled cake, you can explore flavors and use alternatives such as cream cheese or even whipped cream to get a different texture and taste.
2. What types of candy melts should I use?
You can use any color or flavor candy melts, including seasonal varieties. Choose what matches your theme or personal preference!
3. Can I use gluten-free cake for Cake Pops?
Yes! You can use a gluten-free cake mix and frosting to create delicious Cake Pops that cater to dietary restrictions.
4. How do I make my Cake Pops look professional?
Ensure your chocolate is well-tempered for a smooth finish and use quality sprinkles to add that final touch. A dipping tool can also enhance your presentation!
Conclusion
Baking can often feel like an emotional roller coaster, but with Cake Pops, you find the sweet triumphs that make it all worthwhile. When you create these delightful snacks, your kitchen transforms into a place of joy and fun. If this recipe reminds you of someone you love, share it with them. Your memories keep recipes alive.
Cake Pops
Ingredients
Method
- Bake the cake according to package instructions and let it cool completely.
- Crumble the cooled cake into a large bowl.
- Mix in frosting until well combined, creating a moldable dough-like consistency.
- Form the mixture into small balls and place on a baking sheet lined with parchment paper.
- Insert lollipop sticks into each ball and freeze for about 30 minutes to firm them up.
- Melt the chocolate or candy melts in a microwave or double boiler according to package instructions.
- Dip each cake pop into the melted chocolate, allowing any excess to drip off.
- Decorate with sprinkles if desired while the chocolate is still wet.
- Let the chocolate harden completely before serving.