As the leaves begin to change and the air turns crisp, it’s the perfect time to think about cozy, comforting desserts. If you’re like most of us, you probably have busy days filled with long to-do lists and little time for complex recipes. The thought of whipping up a delicious treat can feel overwhelming, but what if I told you that you can create an irresistible dessert with just a handful of ingredients? Let me introduce you to my beloved Easy Baked Pears. These fragrant, warm fruits, drizzled with maple syrup and a hint of cinnamon, create a delightful experience that brings comfort and sweetness to any meal.
Why Baking Pears is the Perfect Solution
One of the most common frustrations in the kitchen is dealing with more complicated recipes that require unnecessary ingredients or time you simply don’t have. On one particularly overwhelming afternoon, I found myself staring at a bowl of ripe pears that I had planned to use in a salad. With dinner looming and a long list of tasks still ahead of me, I felt the stress creeping in. Instead of tossing those beautiful pears into a salad, I decided to turn them into something warm and comforting—a dessert that required minimal effort but delivered maximum flavor.
This journey into the world of Easy Baked Pears taught me an invaluable lesson: sometimes, the simplest recipes can evoke the warmest memories. With just a few ingredients, you can transform an everyday fruit into a warm hug for your taste buds. In those moments, I realized that cooking should be an easy pleasure, not a burden. If you’re interested in other simple recipes, check out our guide on Breakfast Sides for Busy Mornings.
Why Easy Baked Pears Work
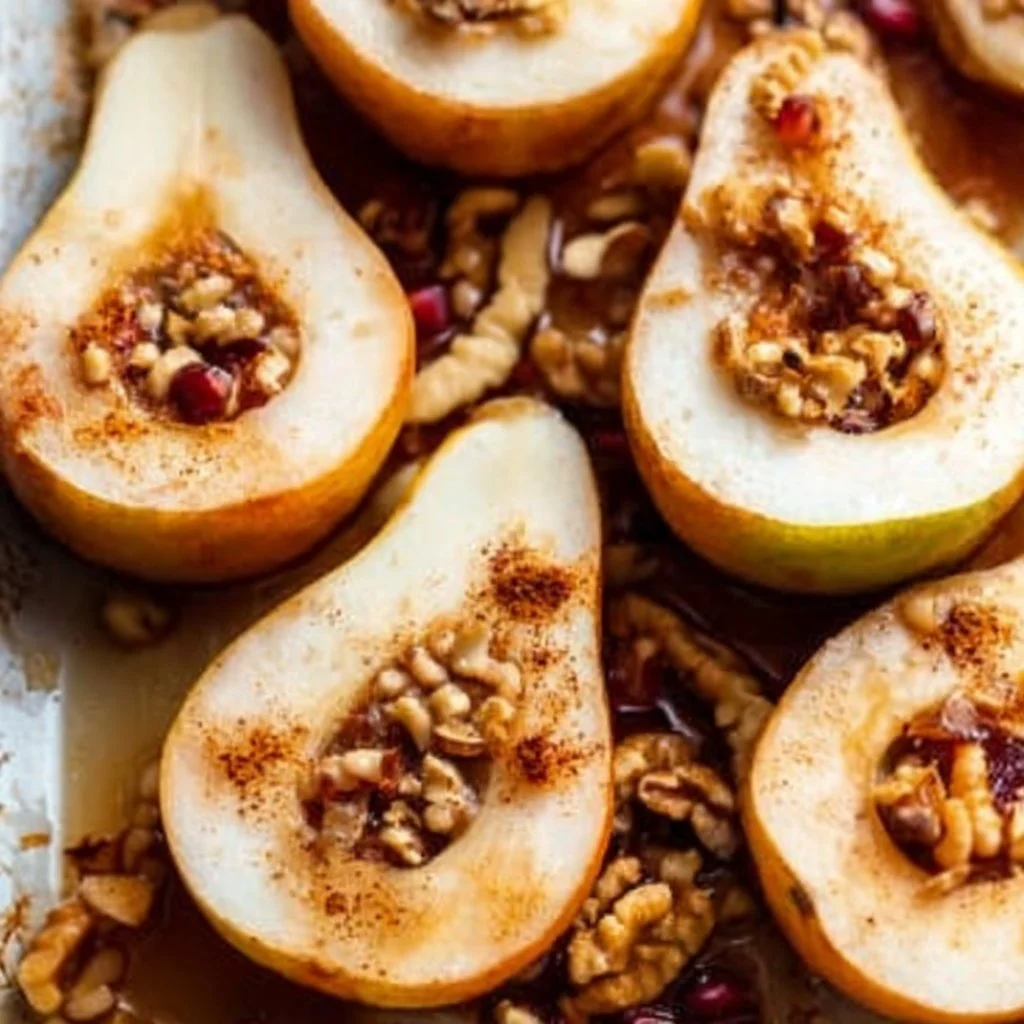
The beauty of Easy Baked Pears lies in their simplicity and versatility. Baking pears unlocks their natural sweetness and enhances their flavors, allowing each bite to melt effortlessly in your mouth. The addition of maple syrup complements the pears, while a sprinkle of ground cinnamon adds warmth and a hint of spice.
Quick Answer: The secret to perfect Easy Baked Pears is to use ripe pears and drench them in a delightful mixture of maple syrup and vanilla extract before baking.
Beyond the basic recipe, these pears work beautifully with a variety of toppings. I often indulge in pairing them with creamy plain Greek yogurt or crunchy maple almond granola for added texture. The combination is a sensation not just for your taste buds but also for your heart. For another delightful way to spice up your desserts, take a look at our Chocolate Pudding Recipe.
Ingredients, Substitutions & Foolproof Steps
Now let’s delve into the ingredients you’ll need to create these fabulous baked pears. Here’s a clean, narrative list to make your shopping easier:
- 4 large pears (or 6 medium pears) — Ripe pears are perfect; for best results, choose varieties like Bartlett or Anjou for their sweetness.
- 1/4 teaspoon ground cinnamon — This adds warmth; feel free to adjust the amount based on your preference.
- 1/2 cup (120 ml) pure maple syrup — For a natural sweetness; agave syrup or honey can be used as substitutes.
- 1 teaspoon pure vanilla extract — Enhances flavor; vanilla bean paste works as a fantastic alternative.
- Optional toppings: maple almond granola & plain Greek yogurt — These add creaminess and crunch; you can also use whipped cream for a sweeter twist.
Directions / Steps:
- Preheat the oven to 375°F (190°C). Lightly spray a large baking pan or line a baking sheet with parchment paper for easy cleanup.
- Cut the pears in half and core them using a melon baller or spoon, ensuring you create a nice cavity for the filling.
- Arrange the pear halves in the prepared baking pan, cut side up.
- Sprinkle the cinnamon evenly across the pears, and don’t be afraid to add a bit more if you love that spicy flavor!
- In a small bowl, whisk together the maple syrup and vanilla extract, then drizzle this decadent mixture over the arranged pears.
- Bake uncovered for about 25 minutes. If your pears are firm, check for doneness after 30 minutes. They should be soft and lightly browned at the edges.
- Remove from the oven and serve warm. Top with granola and yogurt if desired.
- Store leftovers covered in the refrigerator for up to 5 days.
Common Mistakes to Avoid
- Using unripe pears: Make sure your pears are sufficiently ripe for the best sweetness.
- Overbaking: Keep an eye on your pears – they should be soft but not mushy.
Pro Tips:
- Experiment with different types of pears for varied flavors.
- A splash of lemon juice can enhance the taste if you use very sweet varieties.
- Don’t skip the toppings; they make a world of difference!
Nutrition Highlights
NutrientPer Serving Protein7g Carbs12g Fat6g You can learn more about how to incorporate fruits and healthy options into your meals in our Gluten and Dairy-Free Breakfast Ideas.
Serving, Storage & Freezer Tips
How to Serve Easy Baked Pears
Serve these baked pears warm straight from the oven. They shine brightest alongside a dollop of Greek yogurt or a sprinkle of granola for that extra crunch. You can also drizzle on extra maple syrup if you’re feeling indulgent.
How to Store Easy Baked Pears
For storage, let the pears cool completely before covering them with plastic wrap or placing them in an airtight container. They will stay fresh in the refrigerator for about five days.
Can You Freeze Easy Baked Pears?
Baked pears are best enjoyed fresh, but if you have extra, you can freeze them! Place cooled pears in a freezer-safe container or bag, and they’ll be good for a couple of months. To reheat, simply bake them again at a low temperature until warmed through.
Every time I make these delightful Easy Baked Pears, I think back to my grandmother’s kitchen, filled with the smells of sweet fruits and spices. This dessert brings back those cherished memories, warming my heart as they do my stomach.
FAQ Section
1. Can I use other sweeteners instead of maple syrup? Yes! Honey, agave syrup, and brown sugar are excellent alternatives if you prefer a different sweetness.
2. What is the best type of pear for baking? Bartlett and Anjou pears are ideal for baking due to their sweetness and tender texture.
3. Can I make these baked pears in advance? Absolutely! Prepare the pears and store them covered in the refrigerator. You can reheat them before serving.
4. What can I serve with Easy Baked Pears? Consider pairing with ice cream, whipped cream, or even a rich cheese like Brie for a savory touch.
Conclusion
Easy Baked Pears are more than just a dessert; they’re a celebration of simplicity and warmth. If this recipe reminds you of someone you love, share it with them. Your memories keep recipes alive.
You May Also Like:
- Peanut Butter Chicken Recipe: The Ultimate Comfort Food Dish
- Homemade Garlic Bread
- Pumpkin Cheesecake Recipe

Easy Baked Pears
Ingredients
Method
- Preheat the oven to 375°F (190°C). Lightly spray a large baking pan or line a baking sheet with parchment paper.
- Cut the pears in half and core them using a melon baller or spoon.
- Arrange the pear halves in the prepared baking pan, cut side up.
- Sprinkle the cinnamon evenly across the pears.
- In a small bowl, whisk together the maple syrup and vanilla extract, then drizzle this mixture over the pears.
- Bake uncovered for about 25 minutes. Check for doneness after 30 minutes if pears are firm.
- Remove from the oven and serve warm topped with granola and yogurt if desired.