
When it comes to baking, few things can be as frustrating as trying to create a dessert that not only looks stunning but also tastes divine. Many home bakers pull out their hair over delicate cake recipes, but today we’re diving into a classic that defies expectations: Easy Red Velvet Cake. It’s a treat that’s more approachable than you might think yet still manages to steal the show at any gathering. Let’s explore how this beloved recipe can transform your baking experience into something delightful and memorable.
A Sweet Victory in the Kitchen
We’ve all been there: you enthusiastically embark on a baking adventure, only to face a kitchen disaster that has you questioning your culinary skills.
Let me take you back to my early baking days. I remember the first time I attempted a Red Velvet Cake—it was a dizzying blend of excitement and anxiety. I’d just bought all the ingredients, each one seeming essential, and stood in my cozy kitchen staring at a bowl of batter that looked nothing like the glorious cake I’d seen in pictures. The idea of adding the vibrant red food coloring made me nervous, but I pressed on. When I pulled that vibrant, fluffy cake out of the oven, I couldn’t believe it! It was beautiful, and the rich, moist taste was better than I had imagined. The joy that day encouraged me to master baking, and I quickly learned that with a little patience and a few key tricks, anyone can recreate that success.
The first step to feeling confident while you bake an Easy Red Velvet Cake is understanding its magic. This delightful cake, characterized by its striking red color and unique flavor, blends together the warmth of cocoa and a hint of tanginess from buttermilk. That balance creates an indulgent yet light dessert that simply sings. If you’re looking to turn your kitchen frustrations into sweet victories like mine, you’re in for a treat. You can check out our tips for achieving biscuit perfection in our Homemade Buttermilk Biscuits recipe, allowing you to build your biscuit skills alongside your cake-baking expertise.
Why Easy Red Velvet Cake Works
Have you ever pondered why Easy Red Velvet Cake holds such a cherished spot in our hearts? The allure of that rich hue combined with the moist texture and velvety crumb beckons everyone, bringing smiles and joy to any celebration.
The secret, my friends, lies in the synergy of unique ingredients that create the perfect cake. Not only does the red food coloring give it that iconic look, but the combination of baking powder and baking soda ensures a light and airy cake. The cake’s tanginess from the buttermilk contrasts beautifully with the sweetness of granulated sugar.
Quick Answer: The secret to perfect Easy Red Velvet Cake is the balance of acids from buttermilk and vinegar, which enhances the beautiful red hue and adds moisture.
However, remember that baking is an art! Paying attention to the wet-to-dry ratio is essential. You can read more about getting the balance just right in our article about One-Pot Ground Beef Stroganoff.
Additionally, don’t forget about the importance of temperature! Ensuring your ingredients are at room temperature, particularly the buttermilk and eggs, can significantly influence your cake’s texture. The warm ingredients blend more thoroughly, creating a uniform batter and a beautifully risen cake.
Ingredients, Substitutions & Foolproof Steps
- All-purpose flour — Provides the necessary structure; for gluten-free alternatives, use 1:1 gluten-free flour blend.
- Granulated sugar — Sweetens the cake; coconut sugar is a great, lower-glycemic substitute.
- Baking powder — Helps the cake rise; ensure it’s fresh for the best outcome.
- Baking soda — Activates the reaction in the acidic buttermilk; don’t skip this!
- Salt — Enhances the flavor; kosher salt works beautifully here.
- Vegetable oil — Keeps the cake moist; can be replaced with melted coconut oil or applesauce for a lighter take.
- Buttermilk — Adds moisture and a lovely tang; opt for dairy-free yogurt mixed with water for a plant-based alternative.
- Eggs — Bind the batter together; for egg-free options, use flax eggs or applesauce.
- Red food coloring — Gives that iconic red hue; natural beet juice can be a lovely substitute.
- Vanilla extract — Adds depth of flavor; use pure vanilla extract for the best results.
- White vinegar — Works with the baking soda for leavening; lemon juice can be a suitable alternative.
Directions / Steps:
- Preheat your oven to 350°F (175°C). Grease and flour two 9-inch round cake pans.
- In a large bowl, whisk together the flour, sugar, baking powder, baking soda, and salt.
- In another bowl, combine the vegetable oil, buttermilk, eggs, food coloring, vanilla extract, and vinegar.
- Mix the wet ingredients into the dry ingredients until just combined.
- Divide the batter evenly between the prepared pans and bake for 25-30 minutes, or until a toothpick inserted in the center comes out clean.
- Let the cakes cool before removing them from the pans and serving.
Common Mistakes to Avoid
- Overmixing the batter, which can lead to a dense cake.
- Using cold ingredients straight from the fridge, which can inhibit proper rising.
Pro Tips
- Allow your cakes to cool entirely before frosting to prevent melting.
- For an added twist, use cream cheese frosting to enhance the classic flavor.
Nutritional Highlights Table:
NutrientPer Serving Protein7g Carbs12g Fat6g For more delicious baking ideas, explore the comforting flavors of our Peanut Butter Chicken Recipe for inspiration in the kitchen.
Serving, Storage & Freezer Tips
How to Serve Easy Red Velvet Cake
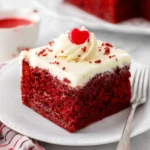
Serving your Easy Red Velvet Cake is all about presentation. Place a slice on a beautiful plate and drizzle it with cream cheese frosting or a simple dusting of powdered sugar. Consider adding fresh berries for a tart contrast against the sweet cake!
How to Store Easy Red Velvet Cake
Store any leftover cake in an airtight container at room temperature for up to three days. For prolonged freshness, refrigerate it for up to a week.
Can You Freeze Easy Red Velvet Cake?
Absolutely! Wrap your unfrosted cake layers tightly in plastic wrap and store them in the freezer for up to three months. Thaw in the fridge overnight before frosting and enjoying.
As I reflect on the simplicity of baking, I can’t help but feel a wave of nostalgia wash over me. This cake brings back memories of family gatherings, laughter, and the sweet aroma filling my home. It’s not just about the cake; it’s about the love it represents.
FAQ SECTION
What makes Red Velvet Cake different from chocolate cake?
Red Velvet Cake is distinct due to its vibrant color and unique flavor profile, primarily from the buttermilk acidity and slight cocoa notes, giving it a taste that’s both rich and refreshing.
Can I use cake flour instead of all-purpose flour?
Yes! Cake flour will yield a softer and lighter cake. Just remember that it may alter the texture slightly, so adjust your liquid ingredients if needed.
How can I color my cake naturally?
Some bakers use beet juice or pomegranate juice for a natural red hue, but adjust the recipe slightly to account for added liquid.
Can I make this cake ahead of time?
Definitely! You can prepare the cake layers in advance and store them properly. Just frost them on the day you plan to serve for the best taste.
Conclusion
Baking an Easy Red Velvet Cake can transform your cooking experience from daunting to delightful. If this recipe reminds you of someone you love, share it with them. Your memories keep recipes alive, and this cake is sure to create moments that last a lifetime.
You May Also Like:
- Cinnamon Roll Cheesecake: Like a Pro
- Classic New York Cheesecake Recipe
- Pumpkin Chocolate Chip Muffins
Easy Red Velvet Cake
Ingredients
Method
- Preheat your oven to 350°F (175°C). Grease and flour two 9-inch round cake pans.
- In a large bowl, whisk together the flour, sugar, baking powder, baking soda, and salt.
- In another bowl, combine the vegetable oil, buttermilk, eggs, food coloring, vanilla extract, and vinegar.
- Mix the wet ingredients into the dry ingredients until just combined.
- Divide the batter evenly between the prepared pans.
- Bake for 25-30 minutes, or until a toothpick inserted in the center comes out clean.
- Let the cakes cool before removing them from the pans.