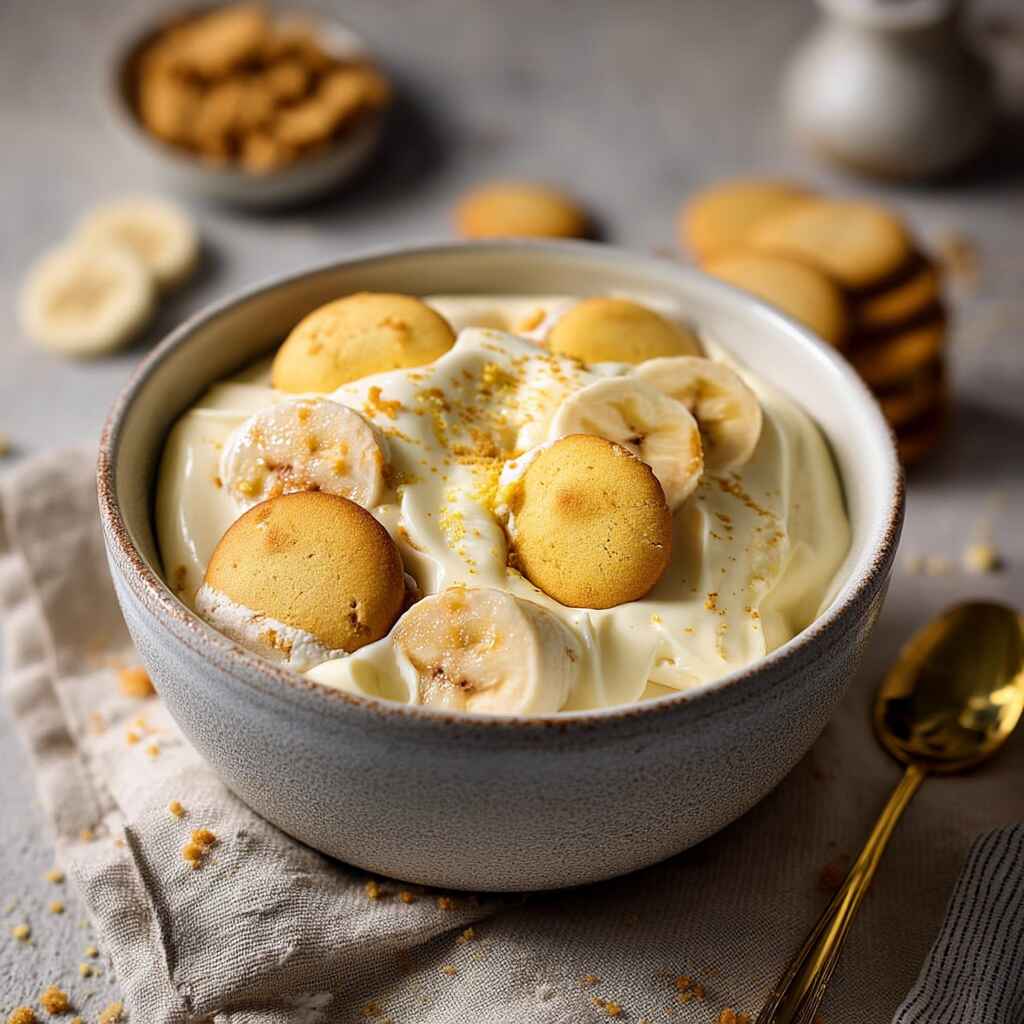
Have you ever craved the creamy, dreamy layers of banana pudding only to be let down by gluten-filled wafers? That’s exactly the struggle I faced when my daughter begged for her grandmother’s Southern banana pudding but couldn’t enjoy it because of her gluten sensitivity. This gluten free banana pudding recipe saves the day with velvety vanilla pudding, soft clouds of whipped cream, and perfectly ripe bananas, all layered with crunchy gluten free wafers. It’s proof that comfort food doesn’t have to come with compromise just pure flavor, rich tradition, and a dessert that everyone at the table can love.
Memories in a Bowl: My First Gluten Free Banana Pudding
I still remember the first time I made banana pudding without gluten. It was late summer, the kind of warm evening when you want something sweet but light enough to share on the porch. My mother had always made banana pudding in her trifle dish, with golden wafers stacked high like a crown on top. But now, I needed something my whole family could enjoy, especially my daughter who had just been diagnosed with celiac.
The first attempt was clumsy I grabbed any gluten free cookie I could find, thinking it wouldn’t matter. But when I spooned it into bowls, the cookies had turned soggy, and the taste just wasn’t the same. That’s when I discovered Kinnikinnick gluten free vanilla wafers. They held their shape, soaked up just the right amount of pudding, and gave me that nostalgic crunch I’d been missing. Suddenly, my daughter’s eyes lit up — she was tasting her grandmother’s recipe for the very first time.
That moment changed everything for me. Food isn’t only about flavor; it’s about memories carried forward in each bite. By finding the right gluten free substitutions, we didn’t lose the story we gained a new tradition.
If you’ve struggled with recipes that feel “almost right” but not quite there, trust me this one delivers. With the right balance of pudding, cream, bananas, and those crisp gluten free wafers, every spoonful feels like home. And the best part? Nobody at your table will notice it’s gluten free.
Why This Gluten Free Banana Pudding Works Every Time
The magic of this gluten free banana pudding isn’t in fancy tricks but in the balance of textures and flavors that create harmony with each spoonful. Traditional banana pudding often struggles when made gluten free, but this recipe keeps the structure firm, the bananas fresh, and the cream perfectly airy.
The secret lies in patience and quality. Allowing the pudding to chill for a full 3–4 hours gives it the body it needs to layer without sinking. Folding in freshly whipped cream (instead of using frozen topping) adds a lightness that makes each bite melt in your mouth. And of course, the choice of wafers matters Kinnikinnick gluten free vanilla wafers stay crisp just long enough to hold their shape, then soften into a cake-like texture as they rest.It’s also a forgiving recipe. You can prepare it in a grand trifle bowl for gatherings, or assemble it in individual cups for picnics and school lunches. Unlike many desserts that don’t hold well, this pudding actually improves after a few hours in the fridge, as the layers blend into one another.
For those who like experimenting, you can take inspiration from our 3 ingredient banana pancakes to add a fruity breakfast twist or go decadent by serving pudding alongside a slice of classic New York cheesecake. Both highlight how simple ingredients can become something extraordinary when treated with care.
What makes this recipe timeless is that it doesn’t feel “gluten free” it feels like dessert the way it should be. Comforting, nostalgic, and so good that everyone at the table will ask for seconds.
Ingredients, Substitutions & Foolproof Steps
A recipe is only as strong as its ingredients. With gluten free banana pudding, each layer plays an important role from the pudding base to the bananas you choose. Let’s break it down:
Key Ingredients & Substitutions
| Ingredient | Substitution |
|---|---|
| 1 (14 oz) can sweetened condensed milk | Coconut condensed milk for dairy free |
| 1 ½ cups ice cold water | Almond milk or oat milk for dairy free |
| 1 (3.4 oz) box vanilla instant pudding mix | Gluten free banana or cheesecake pudding mix |
| 3 cups heavy cream | Coconut cream (chilled, whipped) |
| 4 cups sliced barely ripe bananas | Use bananas with no spots to prevent browning |
| 2 (6.3 oz) boxes gluten free vanilla wafers | Kinnikinnick is best, or Schär as backup |
Nutrition Highlights
| Nutrient | Per Serving |
|---|---|
| Protein | 6g |
| Carbs | 56g |
| Fat | 33g |
Foolproof Steps
- Make the Pudding: Whisk condensed milk and water, then beat in pudding mix. Chill 3–4 hours until firm.
- Whip the Cream: Beat heavy cream into stiff peaks.
- Fold Together: Gently combine pudding with whipped cream.
- Layer: In a trifle dish or cups, add wafers, bananas, pudding mixture. Repeat three times.
- Chill: Refrigerate 4–8 hours before serving.
Common Mistakes to Avoid
- Using ripe bananas with spots they brown too fast.
- Skipping the chill step pudding will be watery.
- Over-mixing whipped cream into pudding it will deflate.
Pro Tips:
- Sprinkle bananas with lemon juice or soak briefly in club soda to slow browning.
- Use a glass trifle bowl to show off beautiful layers.
- Chill your mixing bowl before whipping cream for faster peaks.
If you love layered comfort food desserts, you’ll also enjoy our how to make cinnamon roll cheesecake like a pro equally indulgent, with foolproof steps.
Serving, Storage & Freezer Tips
How to Serve Gluten Free Banana Pudding
The beauty of this pudding is in its layers. If you’re making it for a holiday or dinner party, assemble in a clear glass trifle dish so guests can see the stripes of wafers, bananas, and creamy pudding. For a more casual touch, serve in small mason jars or dessert cups they’re portable, pretty, and perfectly portioned. Garnish the top with extra wafer crumbs, a slice of banana, or even a swirl of whipped cream. Pairing it with a light side like our seven layer taco salad makes for a complete and balanced gathering spread.
How to Store
Banana pudding is best eaten within 24 hours, but it can last up to 2 days in the refrigerator if stored correctly. Always cover tightly with plastic wrap or an airtight lid to keep air from reaching the bananas. This slows down browning and helps maintain the wafers’ tender texture. If making ahead, prepare the pudding and whipped cream in advance, but don’t assemble until a few hours before serving.
Can You Freeze Gluten Free Banana Pudding?
Technically yes, but I don’t recommend it. The bananas will turn mushy and watery once thawed, and the wafers lose their bite. If you need a make-ahead dessert, stick with chilling in the fridge for up to 8 hours. For a freezer-friendly alternative, try our cottage cheese chips recipe crisp, satisfying, and perfect for planning ahead.
Food is more than flavor it’s the memory of serving it. I’ll never forget the first time my daughter and I scooped into this pudding after waiting all afternoon for it to chill. The layers were soft but distinct, the bananas just right, and the joy in her eyes made the patience worth it. Recipes like this remind us that waiting often makes the reward even sweeter.
FAQ: Gluten Free Banana Pudding
1. Can I make gluten free banana pudding ahead of time?
Yes! In fact, this recipe tastes even better after chilling for several hours because the wafers soften into a cake-like texture. The best window is to assemble it 4–8 hours before serving. I don’t recommend making it more than a day ahead, since the bananas will start to brown and the wafers may become too soft.
2. What are the best gluten free vanilla wafers for banana pudding?
Not all gluten free cookies hold up in pudding. Kinnikinnick gluten free vanilla wafers are my top choice they stay crisp long enough to layer beautifully, then soften just right in the fridge. Schär makes a good backup option. Both brands give that classic banana pudding feel without the gluten.
3. How do I keep bananas from turning brown in banana pudding?
The trick is to use barely ripe bananas, ones that are firm with no brown spots. These ripen more slowly, so they hold their color and texture longer. You can also lightly brush slices with lemon juice or dip them in club soda before layering both help preserve the pale yellow color without affecting the flavor.
4. Can I make gluten free banana pudding dairy free as well?
Absolutely. Replace the condensed milk with coconut condensed milk, heavy cream with chilled coconut cream, and use almond or oat milk instead of dairy milk. Just make sure your pudding mix is both gluten free and dairy free. This way, you can enjoy the same creamy, indulgent layers without dairy.
Conclusion
There’s something timeless about gluten free banana pudding. It carries the comfort of tradition while welcoming everyone at the table no matter their dietary needs. Each spoonful is silky, layered with flavor, and rooted in memories of family kitchens and celebrations. When I make this recipe, I’m reminded that food is more than ingredients; it’s a gift of togetherness. If this pudding brings someone you love to mind, share it with them. Recipes like this aren’t just eaten they’re remembered, retold, and cherished. Your memories are the secret ingredient that keeps them alive.
Recipe written by Jacqueline – from our kitchen to yours.
You May Also Like
If you loved this gluten free banana pudding, you might also enjoy:
Gluten Free Banana Pudding
Ingredients
Equipment
Method
- In a large bowl, beat together sweetened condensed milk and cold water with a hand mixer for 1 minute. Add pudding mix and beat for 2 more minutes. Cover and refrigerate 3–4 hours until set.
- Whip heavy cream with a stand or hand mixer until stiff peaks form.
- Fold whipped cream into pudding until smooth and streak-free.
- Layer wafers, bananas, and pudding mixture in a trifle dish. Repeat twice more. Garnish with wafer crumbs.
- Cover with plastic wrap and refrigerate 4–8 hours before serving.