Life can often feel like a whirlwind of responsibility, leaving little room for sweet moments of joy. Remember the carefree days of your childhood when a visit to grandma’s kitchen meant an indulgence in nostalgic treats? It’s those very memories that often fill our hearts, making us long for the simple pleasures of life—like the homemade sweetness of Pistachio Rice Krispie Treats.
As you delve into this delightful recipe, it reminds us that we can still create beautiful experiences, even amidst our busy lives. These treats not only serve as a delicious dessert but also offer a moment to connect with loved ones. With their delightful crunch and rich flavor, these treats will flock you back to your childhood in no time, wrapping you in a blanket of warm memories.
Finding Joy in the Kitchen
I remember daydreaming in my childhood home, where the scent of something sweet wafted through the air. My grandmother would often have us in the kitchen, transforming simple ingredients into edible treasures. It was here that I learned the love of cooking and, more importantly, sharing. One of our favorite recipes was her Pistachio Rice Krispie Treats.
The delight in making these treats wasn’t just in the flavors but in the stories we shared while cooking. The laughter, the playful banter, and the sheer joy of creating something together made every mundane kitchen task feel enchanting. With just a few ingredients, we could create something extraordinary.
Now, when I whip up a batch of these sweet squares, I’m reminded of those moments spent with her. It’s about the love that goes into cooking, the care we take in sharing, and the bonds we forge in the kitchen. These Pistachio Rice Krispie Treats are more than just a dessert; they’re a celebration of life’s little joys.
The Magic Behind Pistachio Rice Krispie Treats
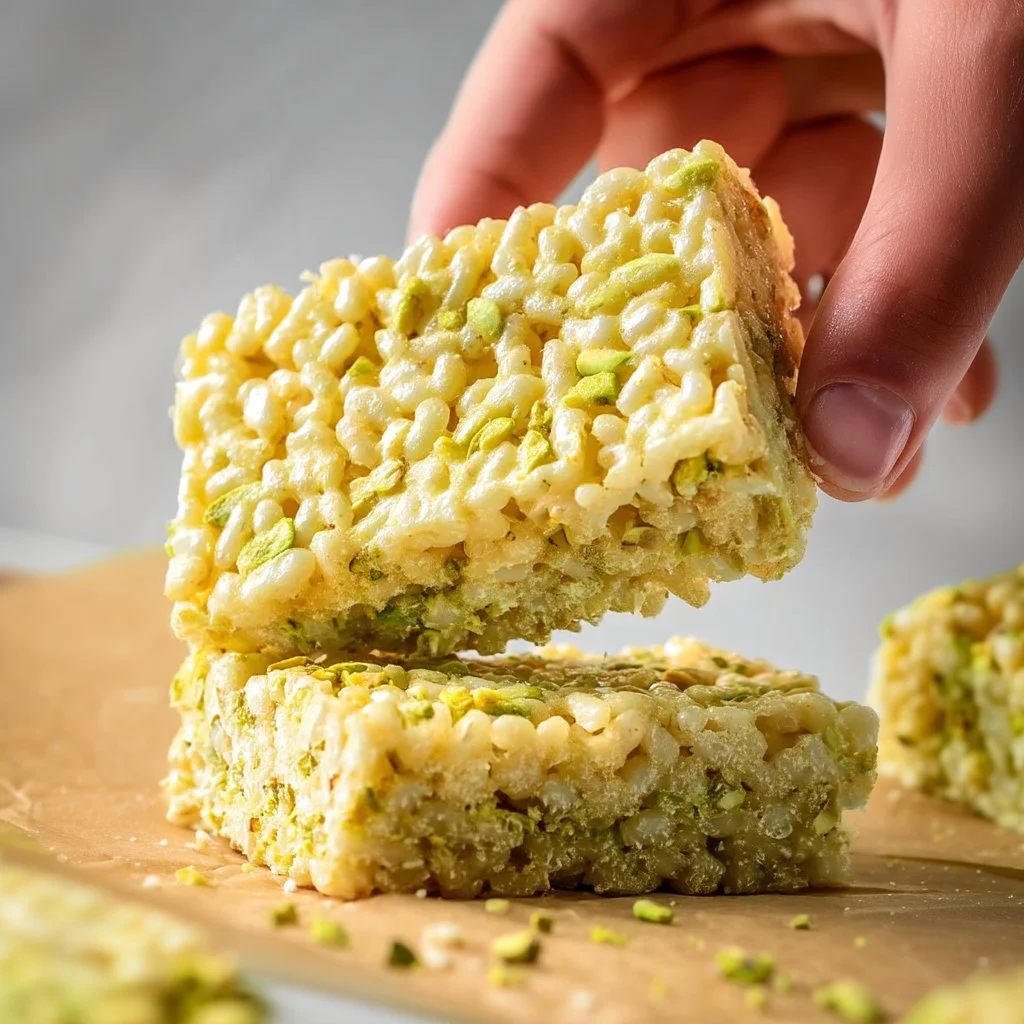
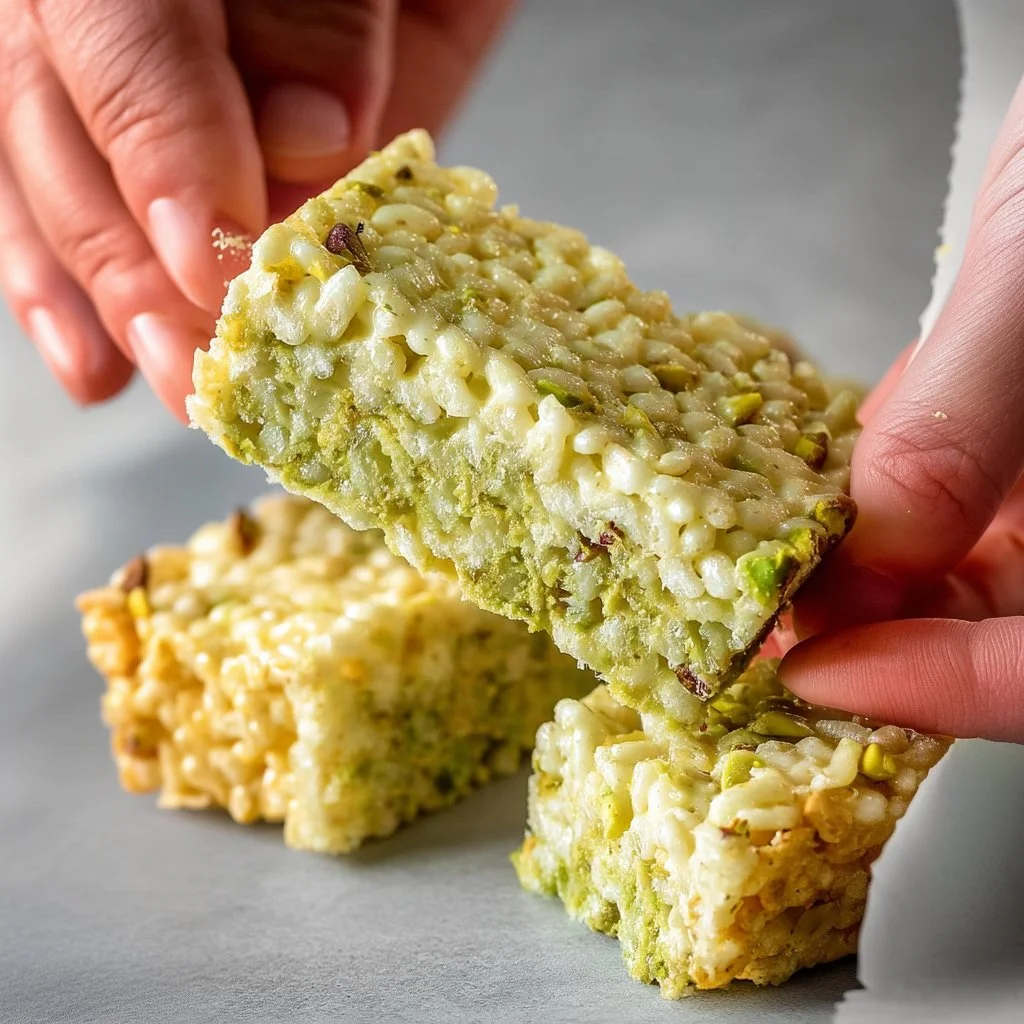
So, why do Pistachio Rice Krispie Treats work so well? The combination of crispy cereal, sweet marshmallows, and nutty pistachios creates a delightful texture and flavor explosion that leaves you craving more. The saltiness of the pistachios perfectly balances the sweetness of the marshmallows, making each bite a delicious contrast.
Quick Answer: The secret to perfect Pistachio Rice Krispie Treats is using fresh, high-quality pistachios to enhance the overall flavor and texture.
Additionally, this recipe is incredibly versatile. You can easily tweak it to suit seasonal occasions or personal preferences. Adding a touch of green food coloring not only evokes memories of St. Patrick’s Day but also makes it visually appealing for kids’ parties or holiday gatherings.
Before diving into the details of how to make these scrumptious treats, it’s important to ensure that you have the right ingredients on hand. Let’s make this a foolproof endeavor.
Ingredients, Substitutions & Foolproof Steps
- Rice Krispies cereal — 4 cups; provides the base crunch. If you prefer a gluten-free option, look for gluten-free cereal alternatives.
- Marshmallows — 1 package (10 oz); these create the gooey texture. Mini marshmallows work just as well.
- Butter — 3 tablespoons; helps bind and adds flavor. For a healthier version, try using coconut oil.
- Vanilla extract — 1 teaspoon; enhances the sweetness and rounds out the flavors.
- Chopped pistachios — 1/2 cup; adds a lovely crunch and nutty flavor, providing healthy fat too. You can swap these for any nut you prefer.
- Green food coloring — optional; gives a visual pop for themes or holidays. You can omit it if you prefer a more natural look.
Directions:
- In a large pot over low heat, melt the butter. Add in the marshmallows and stir continuously until completely melted.
- Remove from heat. Now is the time to add the vanilla extract and any food coloring if you’re using it.
- Stir in the Rice Krispies and chopped pistachios until everything is well-coated and sticky.
- Press the mixture into a greased 9×13 inch pan to shape it.
- Allow to cool completely before cutting into squares and enjoying their deliciousness.
Common Mistakes to Avoid
- Not melting the marshmallows completely — This can lead to uneven mixture and texture.
- Pressing too hard — While it’s essential to pack the mixture, pressing too hard can lead to a dense treat that’s not as enjoyable.
- Using stale ingredients — Always check the freshness of your marshmallows and cereal for the best flavor.
Pro Tips
- Use a silicone spatula for easy mixing and cleanup.
- Allowing the treats to sit at room temperature for an extra hour will enhance the flavors.
- For a twist, drizzle melted chocolate over the top once cooled for an added layer of flavor.
Serving, Storage & Freezer Tips
How to Serve Pistachio Rice Krispie Treats
These treats are perfect for any occasion—from birthday parties to a cozy night in. Serve them as a fun dessert option or a snack during movie nights. You can even cut them into fun shapes using cookie cutters for a festive twist.
How to Store Pistachio Rice Krispie Treats
Store any leftover treats in an airtight container at room temperature to keep them fresh. They’ll stay delicious for about 3 days. If you want to maintain their delightful texture, avoid refrigerating them, as the cold can harden the marshmallows.
Can You Freeze Pistachio Rice Krispie Treats?
Yes! These treats freeze beautifully. Just wrap them tightly in plastic wrap and place them in a freezer-safe bag. Enjoy them within 1 month for the best quality, and let them thaw at room temperature before munching!
Reflecting on the joy of making Pistachio Rice Krispie Treats, I realize that these simple bites carry more than just flavor; they carry memories. Each square becomes a vessel for nostalgia and laughter, perfect for sharing with family and friends.
FAQ Section
- Can I use different nuts in Pistachio Rice Krispie Treats? Absolutely! Almonds, walnuts, and pecans can be delightful alternatives if you want to change up the flavor while keeping the crunch.
- Are there gluten-free options for this recipe? Yes! Opt for gluten-free Rice Krispies, and you’ll have a safe treat for those with gluten sensitivities.
- What can I add for extra flavors? Consider incorporating mini chocolate chips or dried fruits for a delicious twist. They complement the marshmallows and enhance the texture.
- How can I make these treats more festive? Besides adding food coloring, sprinkle some edible glitter or edible confetti on top before they set to give them a fun and colorful look for celebrations.
Conclusion
As we embrace memories and flavors, these Pistachio Rice Krispie Treats remind us of cherished moments spent in the kitchen. With every bite, we relive the laughter, love, and warmth that mirrors our childhood. If this recipe reminds you of someone you love, share it with them. Your memories keep recipes alive, breathing life into the sweet moments of the past.
Pistachio Rice Krispie Treats
Ingredients
Method
- In a large pot over low heat, melt the butter.
- Add in the marshmallows and stir continuously until completely melted.
- Remove from heat and add the vanilla extract and any food coloring, if using.
- Stir in the Rice Krispies and chopped pistachios until well-coated and sticky.
- Press the mixture into a greased 9×13 inch pan to shape it.
- Allow to cool completely before cutting into squares.