Soft Red Velvet Cake: A Deliciously Unforgettable Experience
Have you ever felt the joy of indulging in a slice of Soft Red Velvet Cake? It’s an experience that brings back fond memories of birthday parties, holiday celebrations, or simply a cozy afternoon at home. But here’s the truth: many struggle to perfect this classic dessert, often left disappointed and uncertain in the kitchen. Today, I’ll guide you through crafting the perfect Soft Red Velvet Cake that not only impresses your guests but warms their hearts as well. Get ready to create a cake that’s as delightful to behold as it is to devour!
Why Baking Red Velvet Cake Can Be Challenging
Picture this: it’s your best friend’s birthday, and you’ve promised to bake a gorgeous Soft Red Velvet Cake. But as you whip up the ingredients, doubts creep in. “Is my batter supposed to be this thick?” or “Did I use enough food coloring?” I vividly recall one such occasion when my version of this iconic cake resembled more of a pint-sized mud pie than the lovely dessert I envisioned. The rich cocoa and vibrant red were nowhere to be found, leaving me frustrated and craving that quintessential taste.
Creating the perfect Soft Red Velvet Cake can be an art, requiring the right balance of flour, sugar, and a few personal touches. My many attempts have taught me that patience is crucial. Each failure brought me one step closer to mastering this delectable cake, and the final result was a symphony of flavors and textures that could make anyone smile.
In a nutshell, while perfecting a Soft Red Velvet Cake may feel daunting, it’s entirely achievable with the right guidance, resilience, and love. You’ll find that baking is equal parts science and heartfelt connection. To know how this extraordinary dessert fits beautifully into all celebrations, consider reading our journey through the Peanut Butter Chicken Recipe: The Ultimate Comfort Food Dish.
The Secrets to a Soft Red Velvet Cake
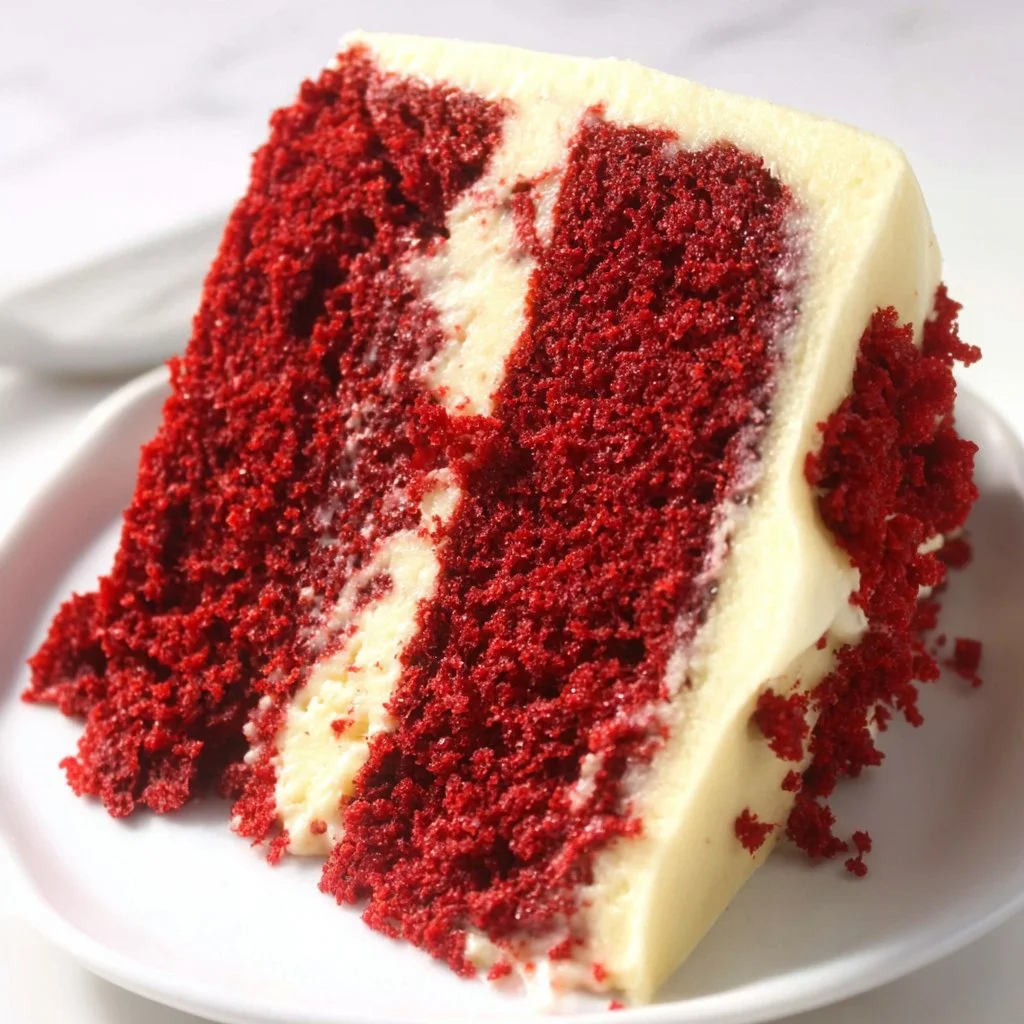
Red Velvet Cake holds a special place in our hearts and palates for several reasons, transcending mere flavor to evoke rich historical significance. Its deep crimson color, often associated with love and passion, captures our emotions. But beyond aesthetics, we must consider why this cake works so harmoniously.
First, the foundation of a successful Soft Red Velvet Cake lies within its farming secrets: the combination of vinegar and buttermilk. This mixture not only balances the cocoa’s bitterness but also contributes to the cake’s distinctive moistness. The acid from the vinegar activates baking soda, leading to that signature soft crumb we all adore. But here’s the reality check—those pivotal ingredients must be carefully measured.
Quick Answer: The secret to perfect Soft Red Velvet Cake is the balance between buttermilk and vinegar, creating that iconic tenderness.
Another secret ingredient worth mentioning is the right type of cocoa powder. Using a high-quality cocoa powder enhances the chocolatey flavor profile and fortifies the vibrant red color, drawing guests to your cake like moths to a flame.
Many home bakers overlook the importance of allowing the cake to cool completely before frosting. This step ensures a smooth, luscious finish when applying cream cheese frosting, arguably the crowning glory of any Soft Red Velvet Cake. Want more tips on baking? Dive into our guide on the Classic Chicken Salad Recipe for more insights!
Ingredients, Substitutions & Foolproof Steps
Now that we’ve set the stage, let’s gather our ingredients to create this luscious cake:
- All-purpose flour — the backbone of any cake, providing structure.
- Cocoa powder — enhances the cake’s subtle chocolate flavor; Dutch-processed cocoa can deepen the taste.
- Baking soda and baking powder — these leavening agents help the cake rise perfectly.
- Salt — a pinch highlights the cake’s sweetness.
- Sugar — granulated sugar sweetens and tenderizes the cake.
- Butter and vegetable oil — the combination ensures a moist and rich texture.
- Eggs — they provide richness and structure; at room temperature, they blend better.
- Buttermilk — adds moisture and acidity for tender cake layers; you can substitute with regular milk and a touch of lemon juice if needed.
- White vinegar — a small amount elevates the cake’s rise and adds flavor.
- Vanilla extract — for that lovely aromatic note.
- Red liquid food coloring — this gives the cake its characteristic color.
Directions / Steps:
- Preheat your oven to 350°F (177 °C) and grease two 8-inch cake tins.
- In a bowl, sift together your flour, cocoa powder, baking soda, baking powder, and salt. Whisk to combine and set aside.
- In another bowl, cream together the butter, vegetable oil, and sugar for 2-3 minutes until light and fluffy.
- Add the eggs one by one, mixing well after each addition.
- Mix the buttermilk, vinegar, vanilla extract, and food coloring into the wet mixture.
- Fold in half of your dry ingredients, followed by the remaining dry ingredients and buttermilk, alternating as you go.
- Be cautious not to overmix; you want just combined.
- Distribute the batter evenly into the prepared tins. Bake for 30 minutes, or until a toothpick inserted in the center comes out clean.
- Once baked, allow the cakes to cool in their tins before transferring to a wire rack.
Common mistakes to avoid:
- Not using room-temperature ingredients.
- Overmixing the batter.
- Forgetting to adjust oven temperatures; every oven can be a little different.
Pro tips:
- For extra moisture, brush the baked layers with simple syrup before frosting.
- Store any leftovers in an airtight container to prevent drying out.
Nutrition Highlights:
NutrientPer Serving Protein7g Carbs12g Fat6g For a creamy delicious treat, pair your cake with our Homemade Alfredo Sauce Recipe to taste culinary dreams come true.
Serving, Storage & Freezer Tips
How to Serve Soft Red Velvet Cake
Serve your decadent cake with generous dollops of cream cheese frosting and garnished with fresh berries or a dusting of powdered sugar. A warm cup of coffee or tea brings everything together, creating an indulgent moment worth sharing.
How to Store Soft Red Velvet Cake
Keep the cake in an airtight container at room temperature for up to 3 days for maximum freshness. If you plan to store it longer, wrap it in plastic and refrigerate for 4-5 days.
Can You Freeze Soft Red Velvet Cake?
Absolutely, you can freeze it! Wrap the entire cake or individual slices tightly in plastic wrap and then place in a freezer bag. Enjoy it within two months for optimal taste. Thaw in the refrigerator overnight before serving.
Soft Red Velvet Cake takes on a nostalgic role, evoking cherished memories of laughter and togetherness shared over dessert. I find joy in each slice because it reminds me of special occasions that deserve to be celebrated.
FAQ Section
1. Why is my Soft Red Velvet Cake dry?
A dry cake often results from overbaking or excessive flour. Always keep an eye on the baking time and use a toothpick to check for doneness.
2. Can I use gel food coloring instead of liquid?
Yes! Gel food coloring provides a more vibrant color without altering the cake’s consistency. Just remember to use only a few drops as gel is more concentrated.
3. How can I make my cake more chocolatey?
For a more intense chocolate flavor, slightly increase the cocoa powder in your recipe or use dark cocoa for richer taste.
4. Can I make this cake gluten-free?
Yes! Use a gluten-free flour blend in place of all-purpose flour, and you’ll achieve an equally delightful cake.
Conclusion
Reflecting on the process of baking Soft Red Velvet Cake fills my heart with warmth and anticipation. It’s not just about the cake; it’s about the moments we create through food, the connections we make, and the joy we share with those we love.
Remember, each time you bake, you’re not just making a cake—you’re creating memories. If this recipe reminds you of someone you love, share it with them. Your memories keep recipes alive.
You May Also Like:
Soft Red Velvet Cake
Ingredients
Method
- Preheat your oven to 350°F (177 °C) and grease two 8-inch cake tins.
- In a bowl, sift together your flour, cocoa powder, baking soda, baking powder, and salt. Whisk to combine and set aside.
- In another bowl, cream together the butter, vegetable oil, and sugar for 2-3 minutes until light and fluffy.
- Add the eggs one by one, mixing well after each addition.
- Mix the buttermilk, vinegar, vanilla extract, and food coloring into the wet mixture.
- Fold in half of your dry ingredients, followed by the remaining dry ingredients and buttermilk, alternating as you go.
- Be cautious not to overmix; you want just combined.
- Distribute the batter evenly into the prepared tins.
- Bake for 30 minutes, or until a toothpick inserted in the center comes out clean.
- Once baked, allow the cakes to cool in their tins before transferring to a wire rack.