The BEST Red Velvet Cake Recipe. Easy. Moist. Homemade.
When you think of celebration, what comes to mind? Maybe it’s the laughter of friends gathered around a table, or perhaps it’s the sweet scent of vanilla and cocoa wafting through your kitchen. And then there’s red velvet cake—there’s something undeniably inviting about its rich, crimson hue. It doesn’t just look decadent; it elevates any occasion. Today, I’m thrilled to share The BEST Red Velvet Cake Recipe. Easy. Moist. Homemade. Let’s embark on a journey that will not only satisfy a craving but also revive cherished memories and put smiles on faces.
Section 1: The Joy and Challenge of Baking
Let’s face it. Baking can feel like a juggling act. You measure, mix, and hope for the best, but sometimes, it turns into a flop. I remember the first time I tried to make a red velvet cake. I was bursting with excitement, confident my creation would be the belle of the ball. Instead, I produced a dry brick that barely resembled cake. Deflated, I sulked as my friends described it as more of an “art installation” than a dessert.
My love for baking made me apprehensive yet determined, so I went on a mission. After countless experiments, I finally crafted The BEST Red Velvet Cake Recipe. Easy. Moist. Homemade. It’s a foolproof way to bring joy and a sprinkle of sweet magic into your kitchen. And yes, failure is part of the process. Each misstep taught me the nuances of baking until I embraced my passion fully.
A great tip? Don’t be afraid of mistakes; celebrate them! Every baker has their own story of trial and error. You can read more about overcoming recipe mishaps here. Trust the power of creativity, passion, and a love of desserts. You’ll find joy on the other side.
Section 2: Why This Recipe Works
So, what makes The BEST Red Velvet Cake Recipe. Easy. Moist. Homemade. stand out among the many versions out there? It’s all about the balance of flavors and textures. Traditional red velvet cakes are known for their subtle chocolate infusion and fragrant notes of vanilla, which offers a flavor experience unlike any other.
Family gatherings often call for cakes that create a sensory experience. This recipe strikes a harmonious balance between rich cocoa and a velvety crumb that melts in your mouth. Here’s a quick answer:
Quick Answer: The secret to perfect The BEST Red Velvet Cake Recipe. Easy. Moist. Homemade. is the use of buttermilk and a hint of cocoa powder, which creates a tender and moist cake.
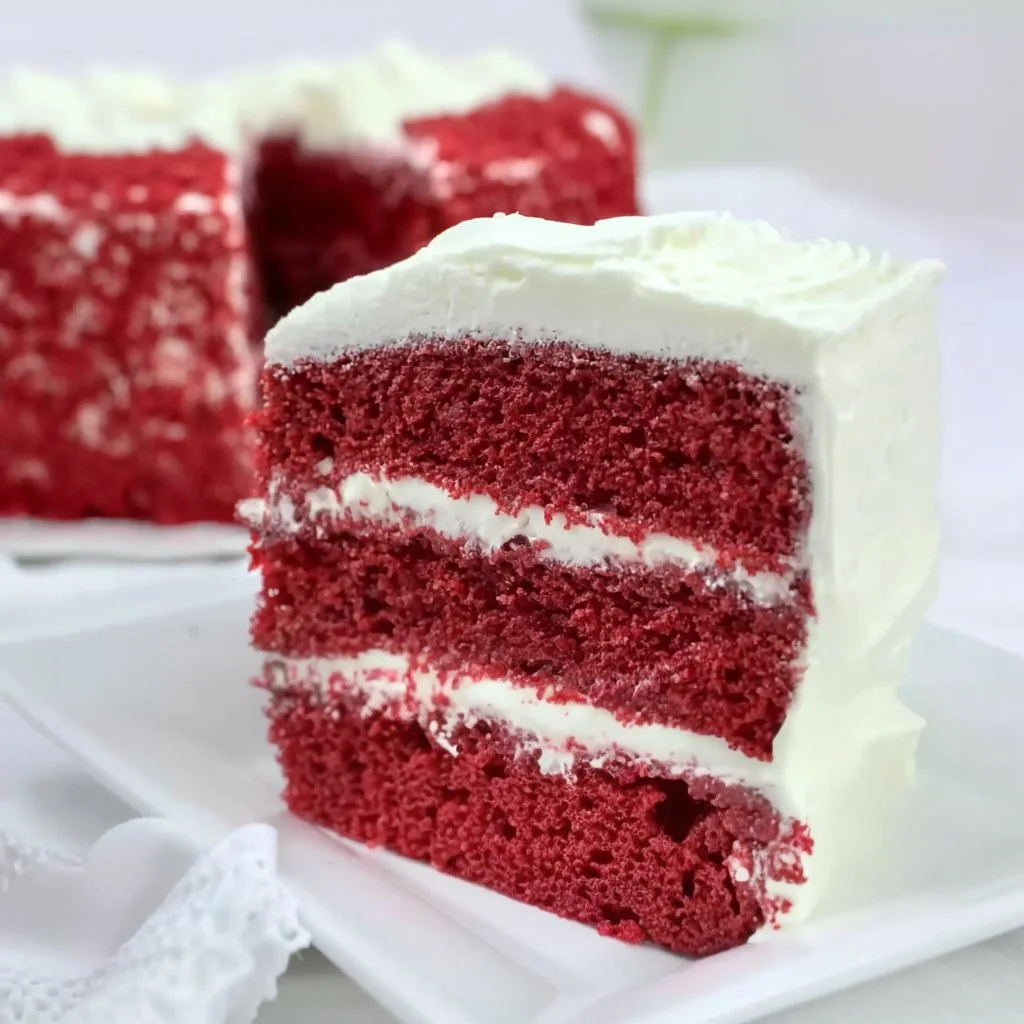
Using buttermilk gives this cake its signature moistness, while the cocoa powder adds just enough chocolate flavor without overpowering the dish. Topped with a luscious cream cheese frosting, this cake becomes an irresistible centerpiece that draws people together.
By incorporating the right ingredients and techniques, anyone can create a masterpiece. If you’re curious about why certain ingredients matter in baking, don’t miss our guide on what makes the perfect cake. And remember, patience is key; let the cake cool completely before frosting for the best results.
Section 3: Ingredients, Substitutions & Foolproof Steps
Ingredients
- All-purpose flour — The backbone of your cake; (for gluten-free, substitute with almond flour).
- Baking soda — Provides leavening, helping the cake rise.
- Baking powder — Additional rise; ensures even texture.
- Unsweetened cocoa powder — Adds a subtle chocolate flavor; (can be omitted for a spicier version).
- Salt — Balances sweetness; never skip!
- Granulated sugar — Sweetens the cake; brown sugar can work as a nice alternative.
- Vegetable oil — Keeps the cake moist; melted butter works too for added flavor.
- Eggs — Binds everything together; aquafaba can be a replacement for a vegan option.
- Buttermilk — Creates tenderness; skim milk with a splash of lemon juice works as a substitute.
- Vanilla extract — Adds depth of flavor; in a pinch, flavored syrups can be used.
- Red food coloring — Gives the cake its signature hue; alternative methods include beet juice for coloring.
- Coffee — Enhances chocolate flavor; replace with hot water for a caffeine-free option.
- White vinegar — Activates baking soda for a light, fluffy texture.
Directions
- Preheat oven to 325°F. Generously grease and flour (2) 9-inch round cake pans. Set aside.
- In a medium bowl, whisk together flour, baking soda, baking powder, cocoa powder, and salt. Set aside.
- In a large bowl, combine the sugar and vegetable oil.
- Mix in the eggs, buttermilk, vanilla, and red food coloring until combined.
- Stir in the coffee and white vinegar.
- Combine the wet ingredients with the dry ingredients a little at a time, mixing after each addition, just until combined. (Batter will be thin).
- Pour the batter evenly into each pan.
- Bake in the middle rack for 30-40 minutes or until a toothpick inserted in the center comes out with moist crumbs clinging to it. Do not overbake as the cake will continue to cook as it cools.
- Let pans cool on a cooling rack until the pans are warm to the touch.
- Slide a knife or offset spatula around the inside of the pans to loosen the cake from the pan.
- Gently remove the cakes from the pan and let them finish cooling (the warm cake will be very delicate).
- Frost the cake with cream cheese frosting when the cakes have cooled completely.
Common Mistakes to Avoid
- Overmixing the batter can create a dense cake.
- Not cooling completely can result in frosting melting off.
Pro Tips
- Always use room temperature ingredients for more even mixing.
- If your cake domes when baking, slice the top for a flat surface before frosting.
Nutrition Highlights
NutrientPer Serving Protein7g Carbs12g Fat6g For more delightful treats, don’t miss our cinnamon roll cheesecake!
Section 4: Serving, Storage & Freezer Tips
How to Serve The BEST Red Velvet Cake Recipe. Easy. Moist. Homemade.
Serve this beautiful cake at room temperature, ideally with a generous spread of cream cheese frosting. Garnish with a handful of fresh berries or chocolate shavings for a touch of elegance.
How to Store The BEST Red Velvet Cake Recipe. Easy. Moist. Homemade.
Keep cake slices in an airtight container in the refrigerator for up to one week. Allow the cake to come to room temperature before serving.
Can You Freeze The BEST Red Velvet Cake Recipe. Easy. Moist. Homemade.?
Yes! Wrap cakes (before frosting) in plastic wrap and then again in aluminum foil. Freeze for up to three months. Thaw overnight in the refrigerator before frosting and serving.
Taking a moment to enjoy a slice of this cake is like reliving childhood memories—those priceless moments shared over dessert can bring back laughter and warmth. Baking this cake allows you to weave those memories into the fabric of your family traditions, one slice at a time. Explore even more sweet ideas in our guide to breakfast sides for busy mornings.
FAQ Section
What makes red velvet cake red?
The vibrant red color typically comes from red food dye. Traditional recipes used cocoa powder and vinegar reactions, but many opt for food coloring for consistency and brightness.
Can I use whole wheat flour instead of all-purpose flour?
You can, but the texture may change. Whole wheat flour can be denser; consider using a blend of both for better results.
Why does my red velvet cake turn out dry?
Ensure you’re measuring flour correctly; too much can dry out the batter. Also, avoid overbaking, as this leads to a crumby texture.
Can I use oil instead of butter for frosting?
Using oil is not recommended for cream cheese frosting, as it will alter the texture. Stick to a solid fat (butter or margarine) for the best results.
Conclusion
The BEST Red Velvet Cake Recipe. Easy. Moist. Homemade. is not just a dessert; it’s an experience, a family bonding moment, and an emotional journey through flavors and aromas. If this recipe reminds you of someone you love, share it with them. Your memories keep recipes alive.
You May Also Like:
Red Velvet Cake
Ingredients
Method
- Preheat oven to 325°F (163°C). Grease and flour (2) 9-inch round cake pans.
- In a medium bowl, whisk together flour, baking soda, baking powder, cocoa powder, and salt. Set aside.
- In a large bowl, combine the sugar and vegetable oil.
- Mix in the eggs, buttermilk, vanilla, and red food coloring until combined.
- Stir in the coffee and white vinegar.
- Combine the wet ingredients with the dry ingredients a little at a time, mixing after each addition.
- Pour the batter evenly into each pan.
- Bake in the middle rack for 30-40 minutes or until a toothpick inserted in the center comes out with moist crumbs.
- Let the pans cool on a cooling rack until warm to the touch.
- Slide a knife around the inside of the pans to loosen the cake from the pan.
- Gently remove the cakes from the pan and let them finish cooling.
- Frost the cake with cream cheese frosting when completely cooled.