Picture this: you host a gathering, perhaps it’s game night or a cozy get-together with friends, and you are excited to serve a dish that’s not only delicious but also widely adored. You decide on hummus. But when you lift the lid off your carefully prepared dip, your heart sinks. Instead of the creamy, velvety spread you envisioned, you’re met with a chunky, grainy concoction. Frustrating, right? If you’ve ever found yourself in this situation, you’re not alone. Many have been there, staring at what should be a celebratory dish, wondering where it all went wrong.
I remember my first attempt at making hummus. It was years ago, and I was newly married. I wanted to impress my husband, who had previously raved about his mother’s hummus. With all the zest and enthusiasm, I grabbed a can of chickpeas, some garlic, and a bottle of tahini. What I didn’t realize was that the key to that silky-smooth texture is not just about ingredients. It’s about technique. Fast forward to today, and I’ve learned the ins and outs of making the perfect Hummus Recipe: Easy, Authentic, Creamy and Smooth, a journey filled with lessons, trials, and ultimately, triumphs.
Long ago, I discovered that instead of simply tossing ingredients into a blender, taking the time to peel the chickpeas and add in a few secret elements made all the difference. This process transformed my hummus from mediocre to extraordinary, and now, I’m excited to share that knowledge with you.
Let me assure you: with the right techniques, a bit of patience, and this Hummus Recipe, you too can create a dish that sparks joy, celebrates flavors, and impresses everyone who takes a bite.
Why This Hummus Recipe Works
The journey to perfecting the Hummus Recipe: Easy, Authentic, Creamy and Smooth is not only about the ingredients; it’s about understanding the science behind them. For instance, soaking and peeling the chickpeas leads to a smoother texture, while the addition of ice cubes creates that creamy consistency we all crave. But why do these steps matter?
Flavor and Texture: The balance of tahini, lemon juice, and garlic creates a delightful burst of flavor that dances on your palate. Peeling the chickpeas and adding ice may seem like extra steps, but they are crucial nuances in building that coveted creaminess.
Quick Answer:
Quick Answer: The secret to perfect Hummus Recipe: Easy, Authentic, Creamy and Smooth is to properly prepare your chickpeas by soaking and peeling them, and to blend with ice cubes and tahini to achieve that velvety texture.
When you take a bite of homestyle hummus, it should evoke warmth—a memory, a place, or a person treasured in your heart. Let’s dive into the ingredients that will get you there.
Ingredients, Substitutions & Foolproof Steps
Here’s what you’ll need to create this Hummus Recipe: Easy, Authentic, Creamy and Smooth:
3 cups cooked chickpeas — The base of our hummus; you can use canned for convenience or dried for authenticity. 1 1/2 teaspoons baking soda — Optional but highly recommended for peeling chickpeas; it helps soften them. 1 to 2 garlic cloves (minced) — Adds depth; adjust based on your preference for garlic. 2 ice cubes — This unusual ingredient keeps the hummus cool while blending, resulting in a creamy texture. 1/3 cup tahini — Essential for that nutty richness; substitute with sunflower seed butter if you need a nut-free option. 1/2 teaspoon kosher salt — Enhances flavor; be cautious when using table salt as it’s saltier. Juice of 1 lemon — Brightens the flavor; adjust according to your taste; lime works as a nice alternative. Arbequina extra virgin olive oil — Provides richness and smoothness; feel free to substitute with any high-quality olive oil. Sumac, to serve — Adds a tangy flair; if you can’t find it, paprika is a suitable alternative.
Directions / Steps:
- Soak the chickpeas: If using dried chickpeas, place them in a large bowl, cover with water, and soak overnight.
- Cook the chickpeas: The next day, drain the soaked chickpeas and cover them with about 2 inches of water. Bring to a boil over high heat, then reduce to a simmer for 1 1/2 to 2 hours or until tender.
- Remove the skins: Add 1 1/2 teaspoons of baking soda to the pot with the chickpeas. Leave for a few minutes, then turn off the heat. Drain and rinse under cold water while gently rubbing the chickpeas to remove the skins.
- Puree the chickpeas: In a food processor, combine the cooked chickpeas with minced garlic. Process until you achieve a powder-like consistency.
- Finish the hummus: With the processor running, add the ice cubes, tahini, salt, and lemon juice. Process for 4-5 minutes until smooth. If the mix is too thick, add water one tablespoon at a time until desired consistency is reached.
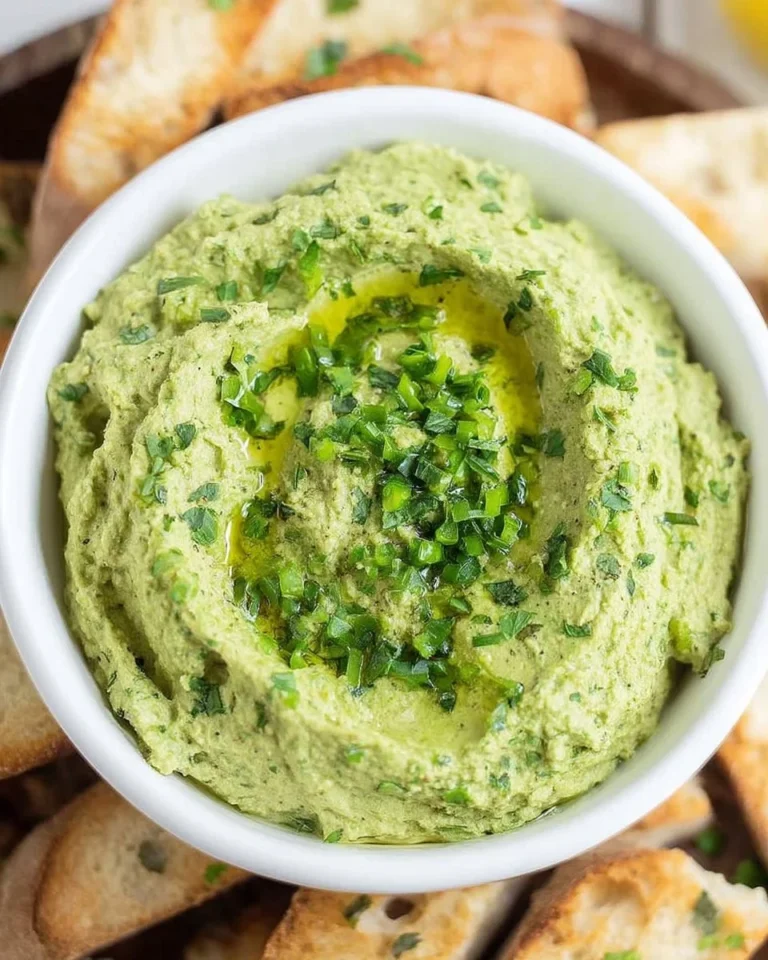
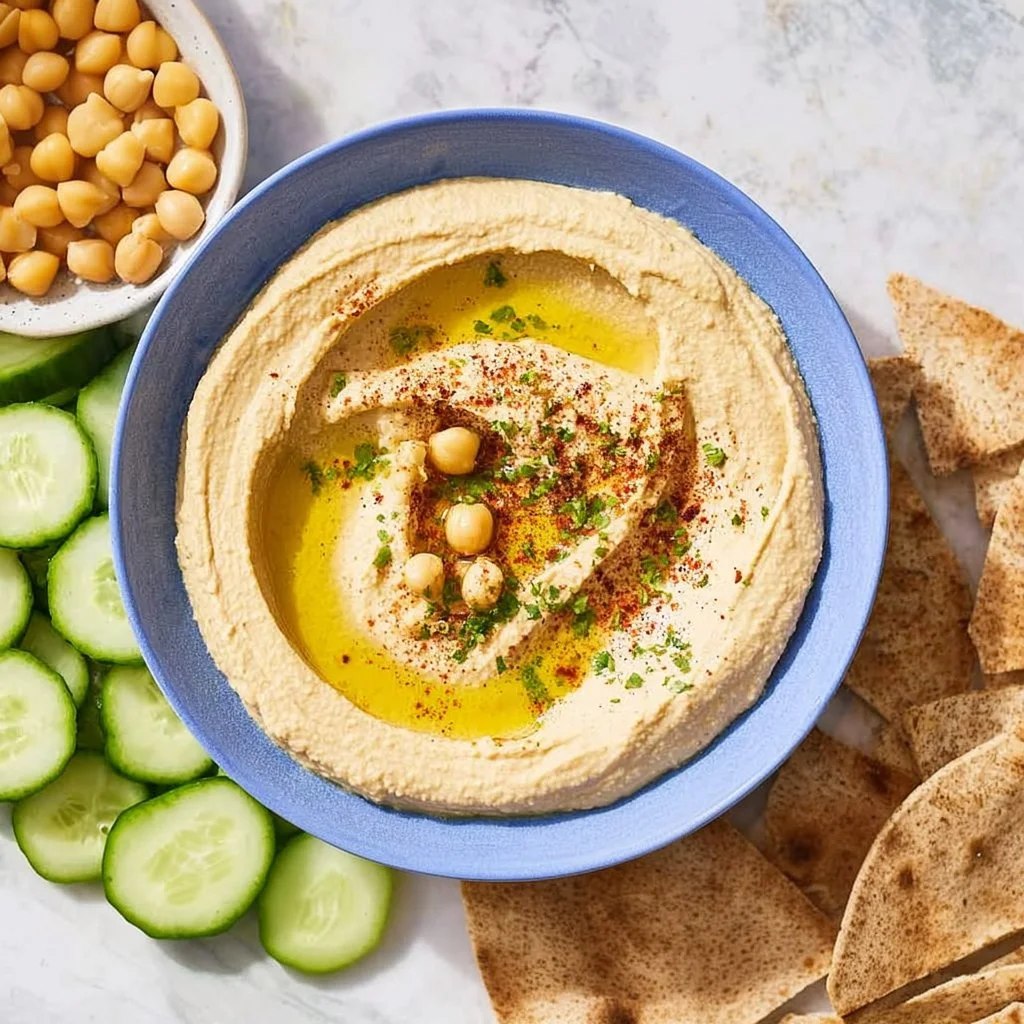
- Garnish and serve: Spread the hummus in a bowl, drizzle with olive oil, and sprinkle with sumac. Enjoy with fresh veggies and warm pita.
Common Mistakes to Avoid
- Not peeling chickpeas: This is the most common mistake; skipping this step results in a coarser texture.
- Over or under-blending: Keep an eye on the blending time; blending for too long or not enough can affect the texture.
- Too much water: Be conservative when adding water; start small and gradually increase for the best results.
Pro Tips
- Use high-quality tahini for the best flavor.
- Always taste and adjust seasoning before serving.
- Experiment with additional spices to create your unique twist.
Serving, Storage & Freezer Tips
How to Serve Hummus Recipe: Easy, Authentic, Creamy and Smooth
Hummus is versatile. You can serve it as a dip with warm pita bread, fresh veggies, or as a spread on sandwiches. Consider pairing with olives and lemon wedges for an elegant touch.
How to Store Hummus Recipe: Easy, Authentic, Creamy and Smooth
Store in an airtight container in the fridge for up to a week. Just give it a stir before serving, as the olive oil may separate.
Can You Freeze Hummus Recipe: Easy, Authentic, Creamy and Smooth?
Absolutely! You can freeze hummus for up to three months. Just remember to leave space in your container for expansion.
Reflectively, every time I prepare this hummus, I think back to that first disaster and smile! The process itself has become a ritual, filled with anticipation and a dash of nostalgia. When that creamy spread comes out of the food processor, it’s a celebration of flavors and memories.
FAQ Section
Can I use canned chickpeas instead of dried?
Yes, you can use canned chickpeas for convenience, but the flavor and texture of using dried chickpeas can be worth the extra effort.
What can I substitute for tahini?
If you’re looking for a substitution, sunflower seed butter works well and is nut-free. Just keep in mind it may alter the flavor slightly.
Why do I need to soak the chickpeas?
Soaking the chickpeas helps to soften them, resulting in a smoother texture when blended. It also reduces cooking time.
How can I make this hummus spicier?
You can add spices like cayenne pepper, smoked paprika, or even a couple of slices of jalapeño during blending for an extra kick.
Conclusion
Making the perfect Hummus Recipe: Easy, Authentic, Creamy and Smooth is not just a cooking endeavor; it’s a journey filled with memories waiting to be shared. The lessons learned along the way will transform your kitchen experiences.
If this recipe reminds you of someone you love, share it with them. Your memories keep recipes alive.
Hummus
Ingredients
Method
- Soak the chickpeas: If using dried chickpeas, place them in a large bowl, cover with water, and soak overnight.
- Cook the chickpeas: The next day, drain the soaked chickpeas and cover them with about 2 inches of water. Bring to a boil over high heat, then reduce to a simmer for 1 1/2 to 2 hours or until tender.
- Remove the skins: Add 1 1/2 teaspoons of baking soda to the pot with the chickpeas. Leave for a few minutes, then turn off the heat. Drain and rinse under cold water while gently rubbing the chickpeas to remove the skins.
- Puree the chickpeas: In a food processor, combine the cooked chickpeas with minced garlic. Process until you achieve a powder-like consistency.
- Finish the hummus: With the processor running, add the ice cubes, tahini, salt, and lemon juice. Process for 4-5 minutes until smooth. If the mix is too thick, add water one tablespoon at a time until desired consistency is reached.
- Spread the hummus in a bowl, drizzle with olive oil, and sprinkle with sumac. Enjoy with fresh veggies and warm pita.