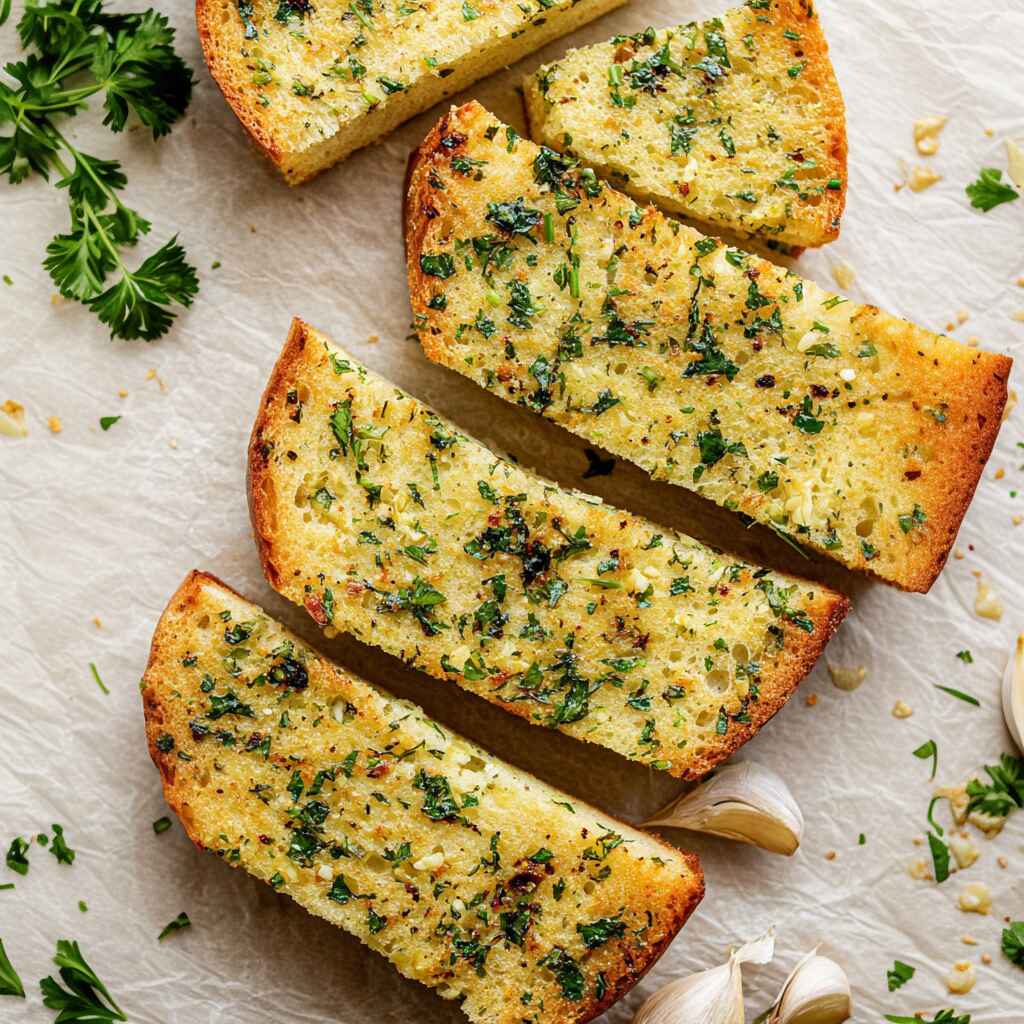
There’s something heartbreakingly disappointing about tearing into garlic bread that looks golden and crisp only to find it bland, dry, or rubbery. We’ve all been there. You deserve better. You deserve homemade garlic bread that fills the kitchen with real roasted garlic, creamy butter, and fresh herbs. Not the kind that comes wrapped in foil from the store freezer. I’m Jacqueline, and I believe that garlic bread should be indulgent, soul-warming, and toasted just enough to sink your teeth into but soft enough to soak up every drop of your favorite sauce. Let me show you how to get it right every single time.
Why This Homemade Garlic Bread Works Every Time
You know those kitchen wins where everyone at the table looks up mid-bite and goes, “Wow…”? That’s what this homemade garlic bread delivers. And the magic isn’t just in the ingredients—it’s in how everything comes together.
Real garlic (not the powdered stuff) is gently roasted in butter and spread onto a soft, crusty loaf that toasts to golden perfection. The flavor seeps deep into every nook of the bread. Fresh herbs like parsley or chives don’t just add color they brighten the richness and make each slice taste like it came from a cozy trattoria.
This technique gives you total control. Want it cheesier? Sprinkle parmesan or mozzarella at the end. Want it softer? Wrap the bread in foil. Crave crispier edges? Bake it longer, cut-side up and open to the heat.
What I love most is its reliability. It comes out just right every time. And because it’s so customizable, it fits every meal whether you’re making a rich stew or something as light as Broccoli and Cheese Stuffed Baked Potatoes.
For dipping, you can’t go wrong with French Onion Dip with Greek Yogurt or even a bowl of soup on the side. It’s not just garlic bread it’s comfort food, perfected.
Jacqueline’s Note: If you’re serving this at a dinner party, slice it right before guests arrive. The smell alone will make everyone gravitate toward the kitchen. Trust me.
Ingredients, Swaps & Foolproof Steps for Golden Garlic Bread
This garlic bread wins hearts because it’s simple but still thoughtful. No shortcuts, no flavorless spreads, and absolutely no powdered garlic. Here’s how to get it right every time.
Ingredients You’ll Need
- 1 loaf Italian or French bread – not a baguette; you want a thick, soft interior
- ½ cup softened butter – salted or unsalted both work
- 4 cloves garlic, finely minced
- 1 tbsp fresh parsley, chopped
- ⅛ tsp sea salt
- Optional: ¼ cup parmesan or ½ cup mozzarella
- Garnish: Extra parsley or chives
Ingredient Swaps & Tips
| Ingredient | Substitution Idea | Pro Tip |
|---|---|---|
| Italian/French Loaf | Soft ciabatta or brioche-style loaf | Avoid baguettes they dry out fast |
| Butter | Vegan butter | Make sure it’s room temp |
| Garlic | Roasted garlic paste or black garlic | Avoid garlic powder too sharp |
| Parsley | Chives or basil | Add after baking for freshness |
| Cheese | Nutritional yeast (for vegan) | Add cheese in final 2 mins of bake |
Common Mistakes to Avoid
- Spreading cold butter – won’t melt evenly
- Using garlic powder – tastes flat
- Skipping the parchment or foil – can burn the base
- Overbaking – dry, tough texture
- Adding cheese too early – it will harden instead of melt
Pro Tips
- Always bake cut-side up for best flavor absorption.
- Wrap in foil for soft bread; leave open for crisp edges.
- Add cheese only in the last 2 minutes.
Nutrition Highlights
| Nutrient | Per Serving |
|---|---|
| Protein | 7g |
| Carbs | 12g |
| Fat | 6g |
Foolproof Garlic Bread Steps
- Prep the oven: Preheat to 425°F. Line a baking sheet with parchment.
- Cut the bread: Slice loaf lengthwise and place cut-side up.
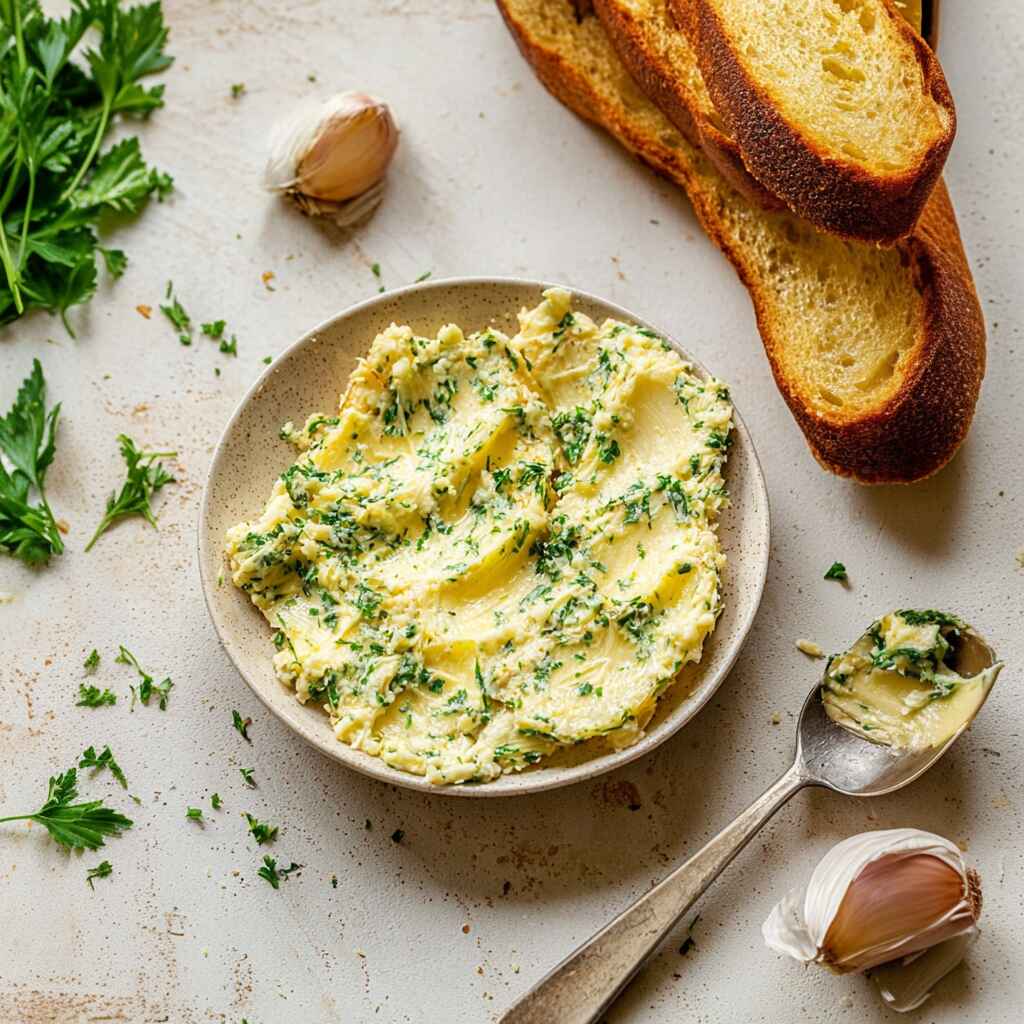
- Make the spread: Mix softened butter, garlic, parsley, and salt in a bowl.
- Spread it: Coat bread evenly with the garlic butter mixture.
- Bake: 10–15 minutes until golden at edges. For cheese, add in last 2 minutes.
- Cool & slice: Let it sit a minute, then cut into 1-inch pieces and serve warm.
Perfect with a cozy meal like Pumpkin Cheesecake Recipe for dessert, or even something comforting like Cottage Cheese Mac and Cheese.
Serving Garlic Bread Like a Pro + How to Store & Freeze It Right
Garlic bread is more than a side it’s the soul of a meal. It brings everyone to the table and makes even a weeknight feel like a special occasion. Here’s how to make it shine, even after the oven cools.
How to Serve Homemade Garlic Bread
Slice it just before serving to preserve the heat and crisp edges. Serve it cut-side up, piled on a board or plate with a small bowl of warm marinara, or even French Onion Dip with Greek Yogurt for a fun twist.
This garlic bread pairs beautifully with bold pasta dishes like Chicken Spaghetti, or something warm and meaty like stew or lasagna. Don’t be afraid to serve it with soup or a giant salad it plays well with just about everything.
Want to get fancy? Brush a little extra melted butter and sprinkle with flaky sea salt just before serving.
How to Store
Got leftovers? Lucky you.
Wrap cooled slices tightly in foil or place them in an airtight container. They’ll stay fresh at room temperature for up to 2 days. For best results, reheat in a 350°F oven for 8–10 minutes wrapped in foil to restore that “just-baked” flavor.
Avoid microwaving it makes the texture rubbery instead of crisp or chewy.
Can You Freeze Homemade Garlic Bread?
Yes,and you absolutely should.
After spreading the garlic butter mixture on your bread, freeze the halves flat in a freezer-safe bag. They’ll keep for up to 3 months.
When you’re ready to enjoy, bake the frozen bread at 425°F for 15–20 minutes. No thawing needed. Just remember to add cheese at the end if using.
Also lovely served next to Roasted Baby Carrots or as a starter with Broccoli and Cheese Stuffed Baked Potatoes.
Jacqueline’s Note: I remember making this for my sister after her first baby. She barely had energy to eat, let alone cook. I showed up with a freezer bag of ready-to-bake garlic bread. Her eyes lit up. It wasn’t just food it was love, in butter and garlic form.
FAQ Section
1. Can I make homemade garlic bread ahead of time?
Yes! You can prepare the garlic butter mixture and spread it on the bread up to 24 hours in advance. Just wrap the prepared bread halves in foil and store them in the fridge until you’re ready to bake. It’s a great way to save time on busy nights or for meal prepping before guests arrive.
2. What’s the best type of bread for garlic bread?
Italian and French loaves work best because they have a soft, airy interior and a crust that toasts beautifully. Avoid baguettes they’re too tough once baked. If you prefer a softer bite, try ciabatta or even sandwich-style rolls.
3. Can I freeze leftover homemade garlic bread?
Absolutely. Wrap slices tightly in foil or store them in a freezer-safe container. Reheat from frozen in a 350°F oven for 10–15 minutes. To freeze uncooked garlic bread, spread the butter mixture on, then freeze before baking for up to 3 months.
4. How can I make this garlic bread vegan?
To make it fully vegan, use a dairy-free butter spread and your favorite plant-based cheese (if you want it cheesy). The texture and flavor still shine through thanks to the roasted garlic and herbs.
Conclusion
This homemade garlic bread isn’t just better than the frozen kind it’s something worth gathering around. It brings back memories of family dinners, quiet evenings, and little moments that matter more than we realize. Whether you’re serving it next to spaghetti, soup, or a roast, it’s the kind of side that steals the spotlight. Try it once, and you’ll never reach for store-bought again.
If this recipe reminds you of someone you love, share it with them. Your memories keep recipes alive.
Recipe written by Jacqueline – from our kitchen to yours.
Homemade Garlic Bread
Ingredients
Equipment
Method
- Preheat oven to 425°F. Line a baking sheet with parchment or foil.
- Slice bread in half lengthwise and place cut-side up on the sheet.
- In a bowl, mix softened butter, garlic, parsley, and salt.
- Spread mixture evenly on bread. Add cheese now if using.
- Bake for 10–15 mins until golden. Add cheese in final 2 mins if not already added.
- Cool slightly, slice, and serve warm with your favorite meal.