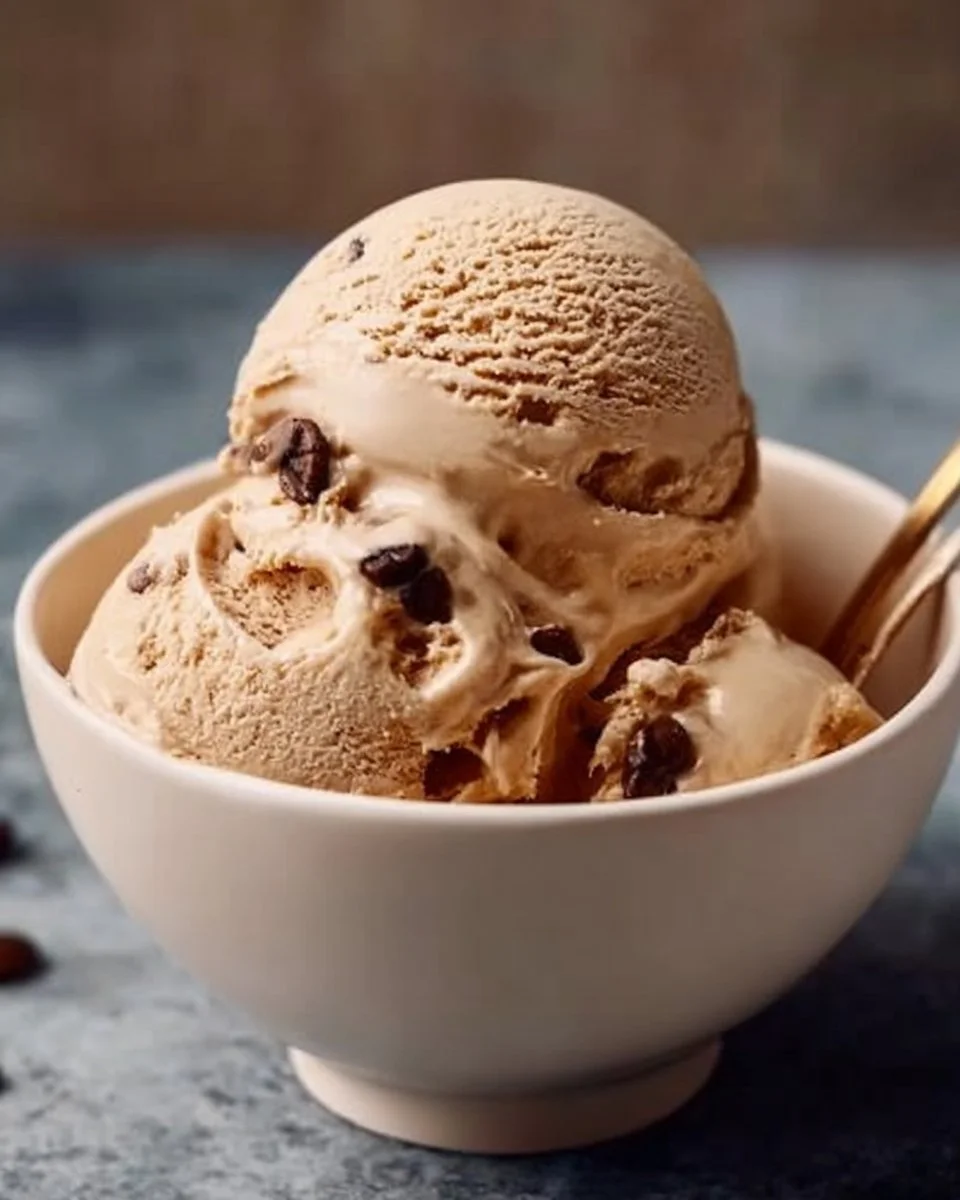
Coffee Ice Cream Recipe
If you’re looking for a delightful way to beat the heat, this Coffee Ice Cream recipe is a must-try. With its creamy texture and rich flavor, it’s the perfect indulgence for coffee lovers. Picture taking a bite of this sweet, frosty treat on a warm day, or serving it as a unique dessert at your next family gathering. Not only does it satisfy your cravings, but it can also be a fun activity to create with the kids during weekends when you’d like to bond over something delicious. Plus, making your own ice cream allows you to control the ingredients, helping you meet your nutrition goals while still enjoying a delicious dessert.
Why You’ll Love Coffee Ice Cream
This Coffee Ice Cream is a flavor-packed delight that’s perfect for any occasion. Its creamy texture and invigorating coffee taste make it an exceptional treat. Whether you’re looking to cool down after a long day or searching for a unique dessert for a gathering, this ice cream is your answer. It’s easy to make and adds a special touch to family meals, snack times, or just as a sweet escape.
- Rich coffee flavor that satisfies cravings
- Creamy and smooth texture
- Perfect for kids and adults alike
- Easy to prepare as part of your meal plan
- Great for sharing at gatherings and parties
- Customizable based on your preferences
- Supports a balanced, healthy lifestyle

Ingredients for Coffee Ice Cream
- Coffee – adds a rich, bold flavor.
- Milk – creates a creamy base.
- Cream – enhances the smooth texture.
- Sugar – sweetens the mix.
- Vanilla – rounds out the flavors.
Ready to cook? See the recipe card for exact measurements below.
How to Make Coffee Ice Cream
Phase 1 – Prep
- Prepare your coffee by brewing a strong cup and allowing it to cool.
- In a mixing bowl, combine the cooled coffee with milk, cream, sugar, and vanilla.
- Mix the ingredients until the sugar is fully dissolved.
Phase 2 – Cook
- Pour the mixture into an ice cream maker.
- Churn according to your ice cream maker’s instructions, usually for about 20-25 minutes.
- When the ice cream reaches a soft-serve consistency, turn off the machine.
Phase 3 – Serve
- Transfer the ice cream to an airtight container.
- Freeze for an additional 2-4 hours for a firmer consistency.
- Scoop and serve in bowls or cones as desired.
Pro Tips for the Best Results
- Use freshly brewed coffee for the best flavor.
- Chill your mixing bowl and utensils before preparing the mixture to help it cool faster.
- Make sure your ice cream maker is properly frozen before use for optimal texture.
- Consider adding chocolate chips or nuts for added texture.
- Store in a shallow container to freeze quickly and evenly.
- Let the ice cream sit at room temperature for a few minutes before scooping for easy serving.
- Enjoy it within a week for the best flavor experience.
Common Mistakes to Avoid
A common mistake when making ice cream is not properly dissolving the sugar. This can lead to a grainy texture. Make sure to mix thoroughly until the sugar is fully incorporated. Another issue is over-churning; this can lead to a hard, icy texture instead of the desired creaminess. Keep an eye on the consistency during the churning process. Lastly, freezing the ice cream mixture too soon can make it difficult to mix properly, resulting in uneven texture. Ensure that everything is at the right temperature before freezing.
Recipe Variations
- Add a splash of espresso for an extra caffeine kick.
- Incorporate chocolate chunks for a mocha twist.
- Replace vanilla with almond extract for a different flavor profile.
- Blend in caramel or fudge swirls for a sweet surprise.
How to Serve Coffee Ice Cream
- Pair with chocolate cake or brownies for a delicious dessert.
- Top with whipped cream for added indulgence.
- Sprinkle with cocoa powder or cinnamon for extra flavor.
- Serve alongside fresh berries for a refreshing contrast.
Make Ahead & Storage
Can I Meal Prep This?
Yes! This Coffee Ice Cream can be made ahead of time, perfect for meal prep or to have on hand for unexpected guests or dessert cravings.
Storing Leftovers
Store any leftovers in an airtight container in the freezer. It’s best enjoyed within a week for optimal freshness and flavor.
Freezing
The texture is best when frozen for up to 1 week. After that, it may start to get icy.
Reheating
This dish doesn’t require reheating, but if you prefer it softer, let it sit for a few minutes at room temperature before serving.
FAQs
Can I use decaf coffee in this recipe?
Absolutely! Decaf coffee works just as well if you’re looking to avoid caffeine.
Is it possible to make this ice cream without an ice cream maker?
Yes! You can pour the mixture into a shallow dish and stir every 30 minutes for a few hours until it reaches the desired consistency.
Can I add flavors other than coffee?
Yes! Feel free to experiment with additional flavors like chocolate or hazelnut by adjusting the main ingredient accordingly.
How can I make it sweeter or less sweet?
You can adjust the amount of sugar based on your personal taste. Start with less and gradually add more until you reach your preferred sweetness.
This Coffee Ice Cream recipe is a delicious way to enjoy a classic dessert with a twist. It’s perfect for families looking to enjoy simple pleasures together while meeting their healthy lifestyle goals. We’d love to hear how your ice cream turns out! Don’t forget to leave a comment and rate the recipe!

Coffee Ice Cream
Ingredients
Method
- Prepare your coffee by brewing a strong cup and allowing it to cool.
- In a mixing bowl, combine the cooled coffee with milk, cream, sugar, and vanilla.
- Mix the ingredients until the sugar is fully dissolved.
- Pour the mixture into an ice cream maker.
- Churn according to your ice cream maker’s instructions, usually for about 20-25 minutes.
- When the ice cream reaches a soft-serve consistency, turn off the machine.
- Transfer the ice cream to an airtight container.
- Freeze for an additional 2-4 hours for a firmer consistency.
- Scoop and serve in bowls or cones as desired.