Garlic Herb Rolls
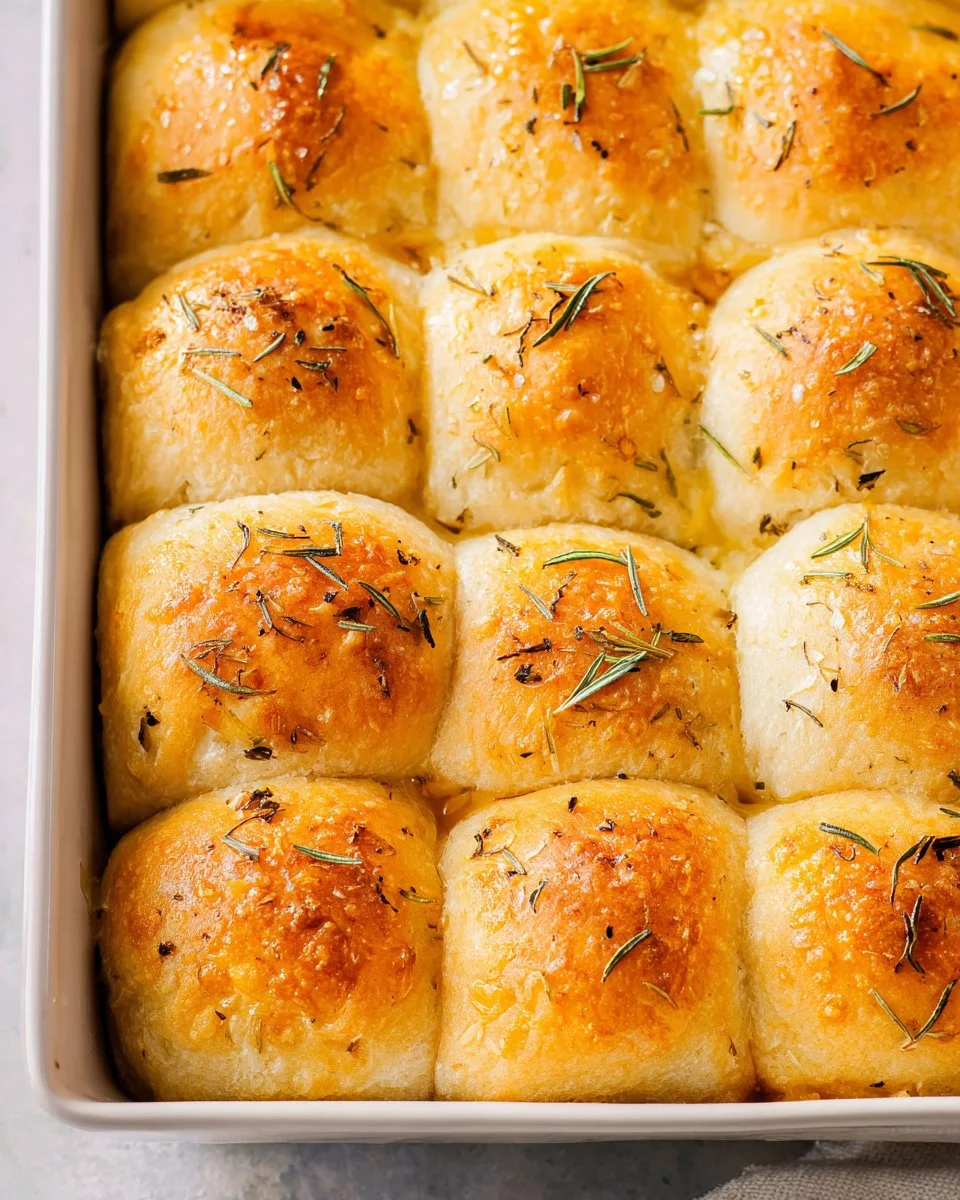
There’s something undeniably comforting about warm, aromatic bread fresh out of the oven. Picture yourself pulling apart a fluffy roll, steam wafting up as you reveal the pillowy inside, ready to be slathered with butter. These delightful creations are the perfect addition to any meal, whether you’re hosting a family dinner or enjoying a quiet night in. The savory blend of garlic and herbs elevates these rolls, making them not just a side but a star of the table. As you feel the texture of the golden-crisp exterior contrasted against the soft and fluffy interior, you’ll be transported to a world of cozy flavors. Perfectly paired with soups, salads, or as a standalone snack, these rolls are irresistible and add a touch of love to your dining experience. They’re easy to make, and you’ll have your loved ones asking for seconds before they even finish their first! Prepare to make your kitchen the most comforting space in your home with these delightful bites of heaven.
Why You’ll Love This Recipe
These rolls combine ease with elegance, making them irresistible to both seasoned bakers and newbies. The simplicity of the ingredients and the straightforward steps ensure anyone can whip them up, while the delightful aroma and irresistible flavor showcase a true touch of culinary finesse. This recipe is a great way to introduce your family to homemade bread without the dread of complicated techniques. These rolls are also incredibly versatile; whether you enjoy them alongside a hearty stew or as a base for a delicious sandwich, they won’t disappoint. The combination of garlic and herbs provides a fragrant profile that elevates any dish, making them a staple for dinner parties or casual meals alike.
What Makes This Recipe Special
What stands out in this recipe is its harmonious balance of flavors infused into each bite. The honey provides a touch of natural sweetness to complement the savory notes of minced garlic and aromatic herbs. You’ll find that the use of fresh rosemary adds a delightful, earthy depth that’s hard to resist. Moreover, the dough is intentionally kept simple, allowing the flavor of the ingredients to shine without being overwhelmed. The texture is equally impressive, with a perfectly crisp crust encasing an incredibly soft interior that beckons for butter or your favorite spread. This balance of flavors and textures makes these rolls truly special and memorable, perfect for any occasion.
Ingredients
water: Essential for activating the yeast and creating the dough’s structure.
whole milk or 2% milk: Adds moisture and richness to enhance the overall flavor.
unsalted butter: Provides a creamy taste and a tender crumb; also used for brushing.
honey: Adds a gentle touch of sweetness, balancing out the savory flavors.
active dry yeast: Vital for the dough to rise, creating light and fluffy rolls.
all-purpose flour: Forms the base of the dough, providing structure and chewiness.
large egg: Adds richness and binds the ingredients together for a cohesive dough.
garlic: Infuses an aromatic, savory flavor that complements the herbs beautifully.
salt: Enhances the overall flavor of the rolls and balances sweetness.
herbs de Provence: A fragrant blend of herbs that adds depth and complexity.
fresh rosemary: Brings a fresh and earthy aroma, intensifying the herbaceous flavor.
How to Make Garlic Herb Rolls
STEP 1. Prepare the yeast mixture. In a microwave-safe bowl, combine water, milk, butter, and honey; heat until the mixture reaches 110°F. Add the active dry yeast and let it proof for 6-8 minutes.
STEP 2. Make the dough. In a stand mixer, combine the proofed milk mixture, flour, egg, minced garlic, salt, and 1/2 teaspoon of herbs de Provence; mix until a smooth dough forms.
STEP 3. First rise. Transfer the dough to a greased bowl, cover with plastic wrap, and let it rise for 20 minutes until it doubles in size.
STEP 4. Divide the dough. Punch down the dough and divide it into 16 equal pieces. Place them in a greased and parchment-lined 9×9-inch baking pan.
STEP 5. Second rise. Cover the pan and let the dough rise again for 20 minutes.
STEP 6. Preheat the oven. Set your oven to 400°F to heat while the rolls complete their second rise.
STEP 7. Brush and season. Melt 1 tablespoon of butter and brush it over the dough balls. Sprinkle with the remaining herbs de Provence and fresh rosemary.
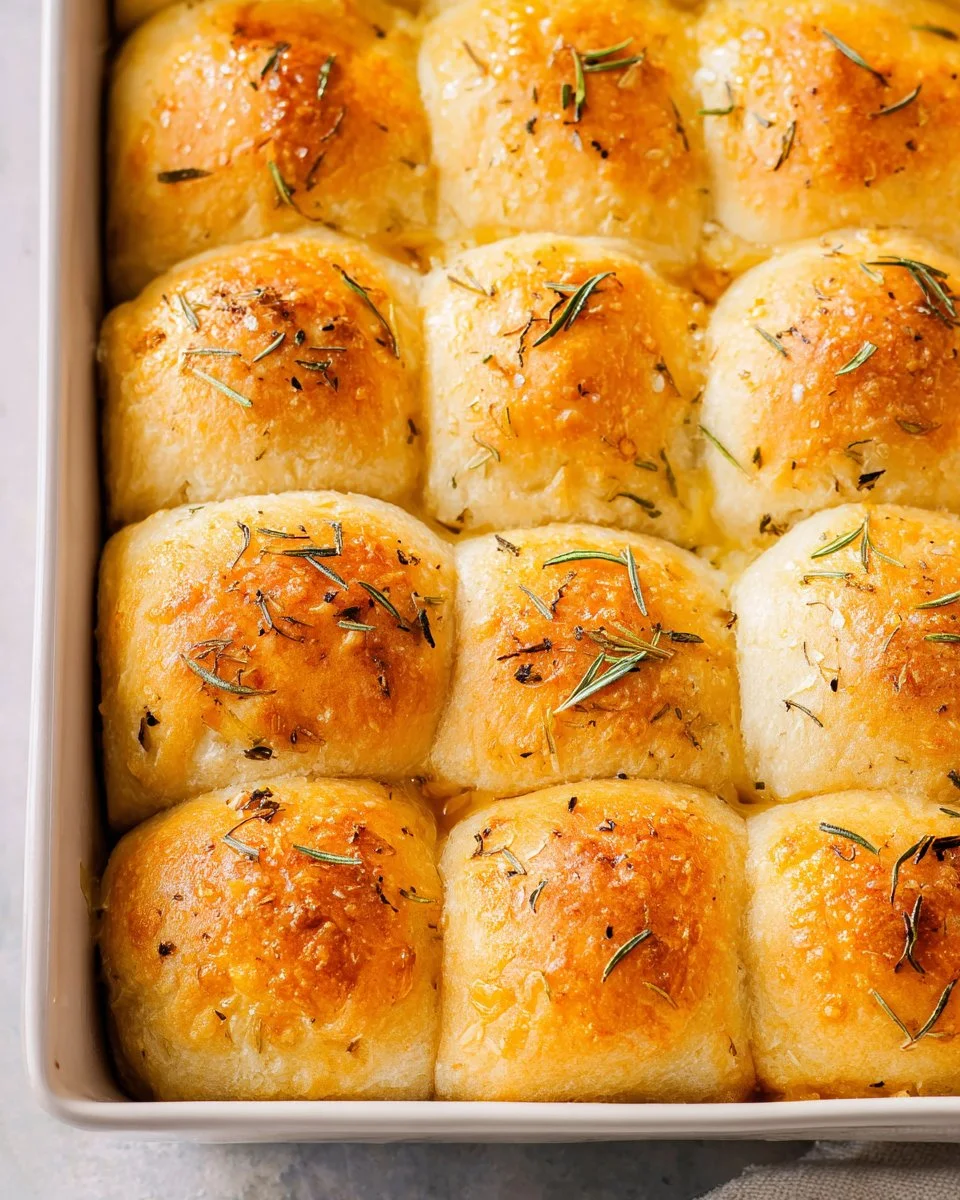
STEP 8. Bake the rolls. Place in the oven and bake for 20-25 minutes until golden brown.
Pro Tips
To elevate your Garlic Herb Rolls even more, use fresh herbs if available for a punch of flavor. Adjust the baking time based on your oven; watch for a golden-brown hue to ensure even cooking. For added richness, experiment with different types of milk, such as whole or buttermilk, to achieve your desired flavor and texture. Allowing the dough to rise in a warm environment can help speed up the process. If you want a softer crust, cover the rolls with a kitchen towel right after baking for a few minutes. Always measure your ingredients accurately, especially flour, to achieve the right dough consistency. Lastly, consider using a kitchen thermometer to ensure that the water and milk don’t exceed the optimal temperature for yeast activation.
Common Mistakes to Avoid
One common mistake is not allowing the yeast to proof properly, which can lead to dense rolls. Be sure to check the temperature of the liquid; it should be warm but not hot, as high heat can kill the yeast. Avoid overworking the dough; mix just until it’s smooth to prevent tough rolls. When dividing the dough, ensure your pieces are even for consistent baking. Don’t skip the second rise as this is crucial for achieving fluffy rolls. When baking, keep an eye on the time; other factors like oven differences can affect doneness, so it’s best to check a few minutes early. Lastly, allow the rolls to cool slightly before serving; cutting them too soon can make them gummy inside.
Variations
• Add cheese for a rich, melty center.
• Replace garlic with minced shallots for a subtle flavor change.
• Experiment with different herbs like thyme or basil for varied taste.
• Use whole wheat flour for a healthier take on the classic.
• Incorporate sun-dried tomatoes for a Mediterranean twist.
Serving Ideas
These irresistible rolls complement many dishes, providing a delightful contrast to heavier meals. Try serving them with a hearty vegetable soup for an inviting, comforting pairing. They also make an ideal accompaniment to roasted meats alongside savory sides. For a simple appetizer, serve them warm with herbed butter or a dipping sauce. You can slice them in half and fill them with your favorite fixings to create delicious mini sandwiches. Their delightful flavor also pairs beautifully with salads, making these rolls both versatile and delicious.
Meal Prep & Storage
For meal prep, these rolls can be made ahead of time and frozen for convenience. Allow them to cool completely before placing in a freezer-safe bag. They can be stored in the freezer for up to three months. To reheat, simply thaw and warm them in the oven until heated through. If you plan to enjoy them within a few days, store them in an airtight container at room temperature to keep them fresh. For longer storage, consider refrigerating them, but note that this may affect their texture. Always warm them back up for optimal enjoyment; nothing beats a warm roll straight from the oven!
FAQs
Can I use instant yeast instead of active dry yeast?
Yes, but you should reduce the amount slightly and add it directly with the flour without needing to proof first.
How can I tell if the rolls are done baking?
Look for a golden brown color on the top, and tap the bottom of the roll; it should sound hollow.
Can I make these rolls gluten-free?
Yes, use a gluten-free all-purpose blend, but be aware that the texture may differ slightly.
How do I adjust the recipe for a larger batch?
Simply multiply the ingredients by the number of batches you desire, ensuring you have enough mixing space and baking pans.
What is the best way to serve these rolls?
These rolls are delicious warm with butter, or you can pair them with your favorite jam or sauce.
Conclusion
Homemade Garlic Herb Rolls bring warmth and comfort to the table, blending delightful flavors with an inviting aroma. They’re perfect for any occasion, ensuring every bite is a celebration of taste and texture. Whether enjoyed as a side or a snack, these rolls are sure to become a favorite in your household. So gather your ingredients, roll up your sleeves, and enjoy the delightful experience of baking these comforting treats!
Garlic Herb Rolls
Ingredients
Method
- In a microwave-safe bowl, combine water, milk, butter, and honey; heat until the mixture reaches 110°F.
- Add the active dry yeast and let it proof for 6-8 minutes.
- In a stand mixer, combine the proofed milk mixture, flour, egg, minced garlic, salt, and 1/2 teaspoon of herbs de Provence; mix until a smooth dough forms.
- Transfer the dough to a greased bowl, cover with plastic wrap, and let it rise for 20 minutes until it doubles in size.
- Punch down the dough and divide it into 16 equal pieces. Place them in a greased and parchment-lined 9x9-inch baking pan.
- Cover the pan and let the dough rise again for 20 minutes.
- Preheat the oven to 400°F.
- Melt 1 tablespoon of butter and brush it over the dough balls. Sprinkle with the remaining herbs de Provence and fresh rosemary.
- Place in the oven and bake for 20-25 minutes until golden brown.