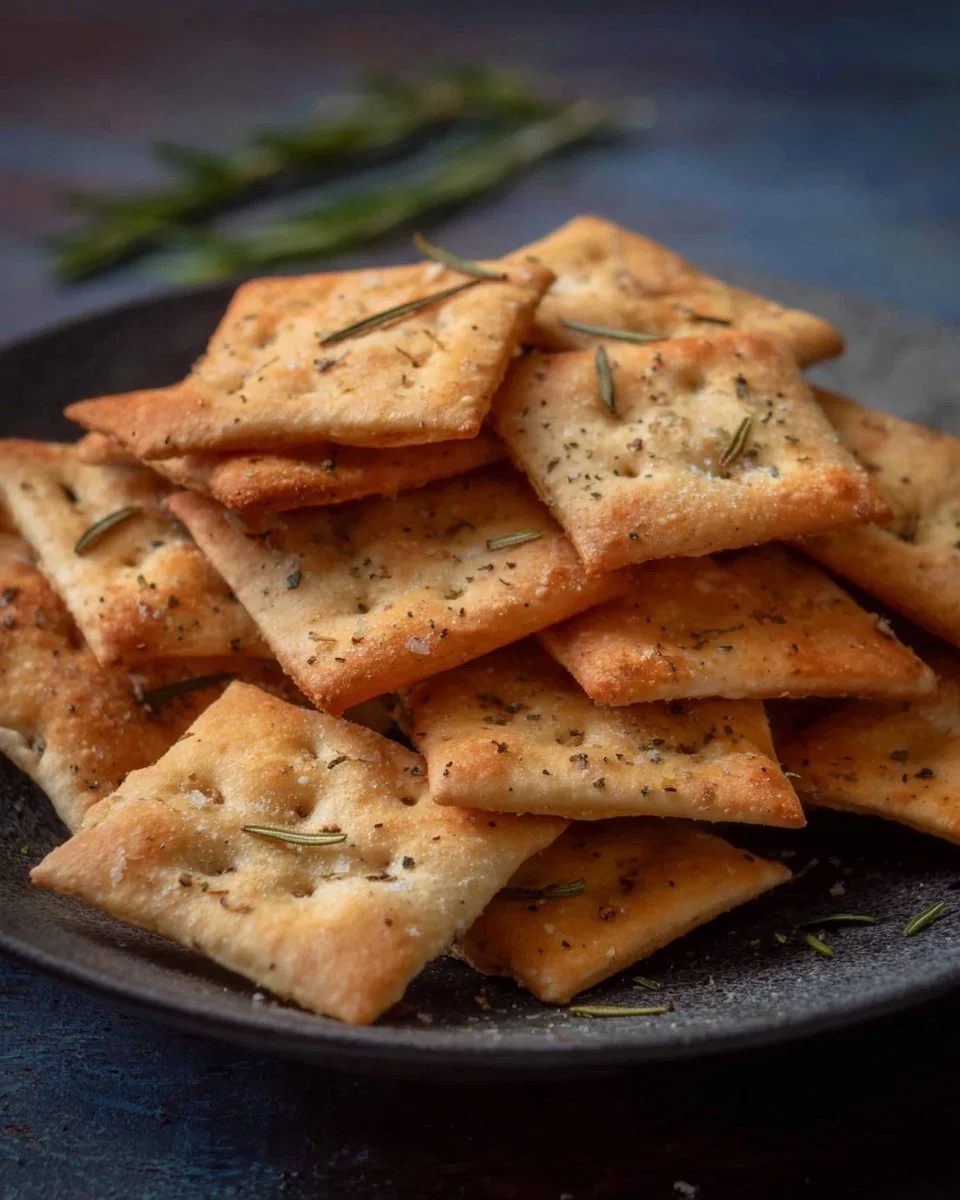
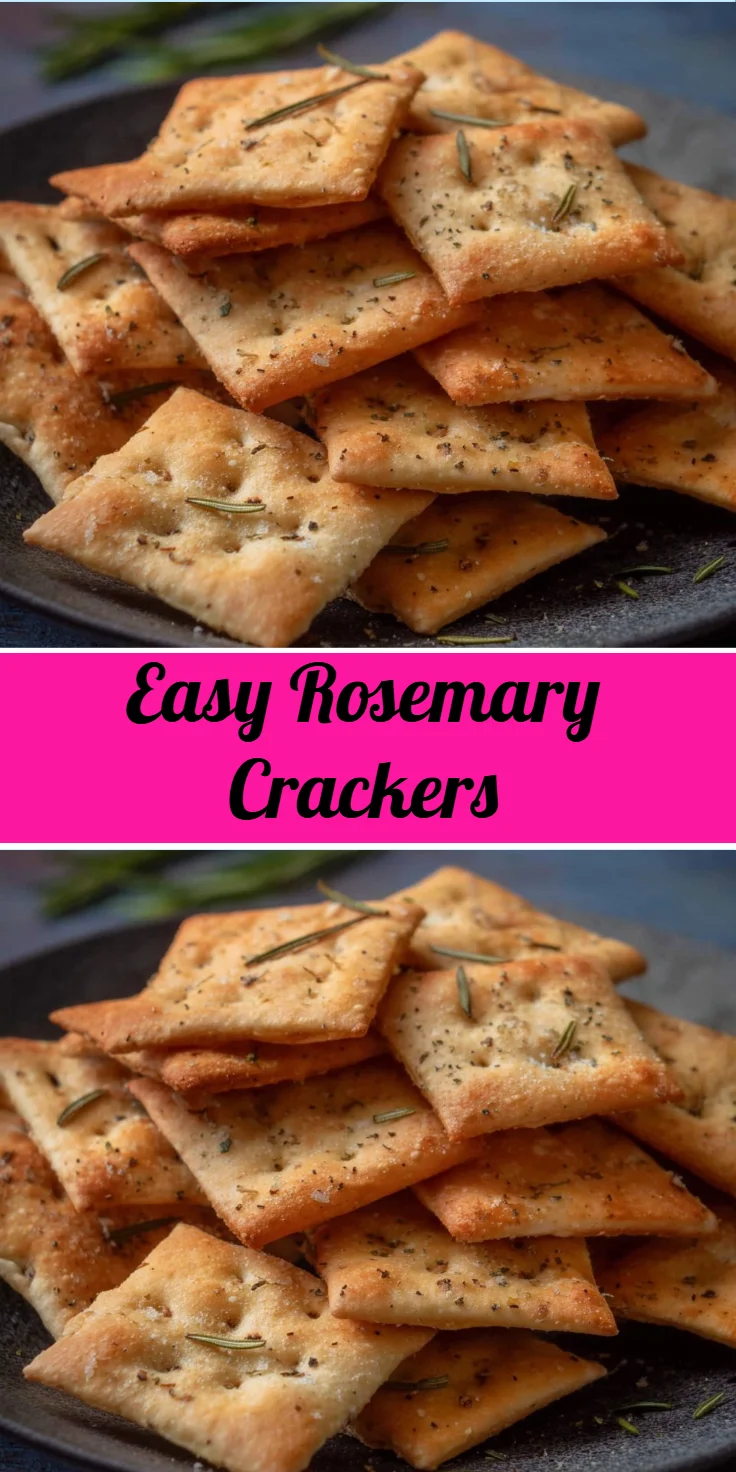
Easy Rosemary Crackers
Imagine the delightful aroma of freshly baked crackers, their warm and crispy texture inviting you to enjoy each bite. Homemade snacks are not just a treat; they offer the wholesome comfort that comes from knowing exactly what goes into them. These rosemary crackers deliver that unique blend of earthy herbaceousness and robust crunch that makes for a perfect accompaniment to cheeses, dips, or simply on their own. Easy to prepare and quicker than you might think, these delightful bites bring a touch of gourmet elegance right into your kitchen. Prep a batch for a cozy night in, serve them at your next gathering, or simply enjoy them as a satisfying snack throughout the week. Once you pull these crackers from the oven, you’ll savor the rich flavors and satisfying texture, making it hard to believe they’re so simple to make!
Why You’ll Love This Recipe
This rosemary cracker recipe is a must-try for anyone looking for an easy yet impressive homemade snack. The subtle infusion of fresh rosemary brings a wonderful depth of flavor, which pairs beautifully with cheese platters or wine. Not only are these crackers quick to whip up, but they also invite creativity; you can shape them in fun, festive designs, making them perfect for parties. Plus, they are a healthier option compared to store-bought varieties, containing no preservatives or artificial flavors. These nutritious bites contribute to your healthy meal prep goals while satisfying all your snacking cravings.
What Makes This Recipe Special
What sets these rosemary crackers apart is the balance of simplicity and flavor. The ingredients are not only easy to find but also work harmoniously to create a delightful snack that feels upscale. Olive oil adds richness while ensuring the crackers remain crispy, and the fresh rosemary elevates the overall taste profile. This recipe offers flexibility, allowing you to adjust herb levels or even incorporate other spices or seeds based on your preferences. The homemade aspect ensures quality control, meaning you can enjoy them fresh from your oven; there’s something satisfying about preparing snacks from scratch that store-bought products can rarely replicate.
Ingredients
olive oil: Adds richness and moisture to the cracker dough.
chopped fresh rosemary: Infuses the crackers with a fragrant, herbal flavor and adds a touch of elegance.
flour: Provides the base and structure for the dough, ensuring a perfect crunch.
water: Hydrates the dough and activates the yeast for a light, airy texture.
active dry yeast: Causes the crackers to rise slightly, creating a delightful texture.
salt: Enhances flavor and balances the overall taste of the crackers.
How to Make Easy Rosemary Crackers
STEP 1. Prepare the herb oil. In a small bowl, mix together olive oil and chopped rosemary; set aside.
STEP 2. Activate the yeast. In a large bowl, add water, sprinkle the yeast on top, and let it sit for 10 minutes before stirring to combine.
STEP 3. Combine ingredients. Using a wooden spoon, add flour and stir a few times, then incorporate the oil mixture and salt, mixing together.
STEP 4. Knead the dough. Move the dough to a flat surface and knead until smooth, approximately 5 minutes, or use a stand mixer.
STEP 5. Let it rise. Place the kneaded dough in a bowl, cover with plastic wrap, and let it rise in a warm, draft-free area until doubled, about 1-2 hours.
STEP 6. Preheat the oven. Set the temperature to 400°F (200°C) to prepare for baking the crackers.
STEP 7. Shape the dough. Knead the risen dough a few times, then roll half of it on a piece of parchment paper until it’s pie pastry thin (1/8 inch).
STEP 8. Cut the crackers. Use a fancy cutter or knife to cut the dough into long thin strips or fun shapes; cut the strips into squares.
STEP 9. Poke and oil. Prick each square once or twice with a fork, then spray or brush with a little olive oil.
STEP 10. Bake the crackers. Place cutouts on a baking sheet and bake in the preheated oven for approximately 15-20 minutes until golden brown.
STEP 11. Cool and serve. Allow the crackers to cool on the pan before serving, then transfer to an airtight container. Cool completely before storing.

Pro Tips
- Use fresh ingredients for the best flavor; dried rosemary can work but lacks vibrancy compared to fresh herbs.
- Kneading can be done by hand or in a stand mixer; both methods produce great results, but a mixer can save time.
- Allow the dough to rise in a warm area; a slightly heated oven turned off can create the perfect environment for rising.
- Watch the baking time closely; depending on your oven, crackers can go from golden to burnt quickly.
- Experiment with additional spices like garlic powder, or parmesan cheese for a flavor boost.
Common Mistakes to Avoid
- Don’t skip the activation step for yeast; allowing it to bubble ensures your crackers will have the desired texture.
- Avoid overworking the dough; knead just until smooth to achieve crispy edges rather than tough crackers.
- Make sure to prick each cracker; this prevents them from puffing up too much during baking, ensuring they remain flat and crisp.
- Be patient while letting the dough rise; rushing this step will lead to denser crackers that lack the desired lightness.
- Don’t neglect to check your oven’s temperature; an oven thermometer can help maintain optimal baking conditions.
Variations
• Add grated cheese for extra flavor and richness.
• Substitute different herbs such as thyme or oregano for a unique twist.
• Incorporate seeds like sesame or poppy for added texture and flavor.
• Make the crackers spicy by adding red pepper flakes or black pepper.
• Experiment with different oils, such as garlic-infused oil for a robust taste.
Serving Ideas
Pair these delightful rosemary crackers with a variety of toppings such as creamy cheese spreads, homemade dips, or a selection of cured meats. They also add a lovely crunch to salads or soups, making them a versatile ingredient to include in any meal. Consider serving them on a charcuterie board alongside fruits, nuts, and assorted cheeses for an elegant presentation at gatherings. Their flavor complements both savory options and sweet accompaniments, offering the perfect base for creative snacking.
Meal Prep & Storage
Once cooled, store these delicious homemade rosemary crackers in an airtight container at room temperature. They can last for about 3-7 days, maintaining their crunchiness. For longer storage, consider freezing the crackers; place them in a freezer-friendly bag or container to prevent freezer burn. They can be easily re-crisped by placing them in a warm oven for a few minutes when ready to enjoy again. With a little planning, you can always have this flavorful snack on hand, making it an ideal addition to your healthy meal prep routine.
FAQs
How can I adjust the recipe for dietary restrictions?
You can substitute gluten-free flour for those needing a gluten-free option. Simply use the same amount, and the method remains the same.
Can I use dried rosemary instead of fresh?
Yes, but fresh rosemary provides a more vibrant flavor. If using dried, reduce the amount slightly as it is more concentrated.
How do I know when the crackers are done baking?
They should be golden brown and firm to the touch. If they seem soft, allow a few additional minutes in the oven.
Can I add toppings before baking?
Absolutely! Consider sprinkling toppings such as coarse salt, seeds, or cheese before placing the crackers in the oven for added flavor.
Is this recipe suitable for meal prep?
Yes! These crackers are great for meal prep and can be stored in an airtight container for up to a week, making them an easy snack to have available.
Conclusion
These crackers are a testament to how simple ingredients can yield extraordinary snacking options. With their herbaceous flavor and satisfying crunch, they make a delightful addition to any occasion. Embrace the joy of homemade snacks and treat yourself to something delicious yet easy to prepare. Whether for casual noshing or special gatherings, these rosemary crackers are sure to impress!

Rosemary Crackers
Ingredients
Method
- In a small bowl, mix together olive oil and chopped rosemary; set aside.
- In a large bowl, add water, sprinkle the yeast on top, and let it sit for 10 minutes.
- Using a wooden spoon, add flour and salt, then incorporate the olive oil mixture.
- Move the dough to a flat surface and knead until smooth, about 5 minutes.
- Place the kneaded dough in a bowl, cover with plastic wrap, and let it rise in a warm area until doubled, about 1-2 hours.
- Preheat the oven to 400°F (200°C).
- Knead the risen dough a few times, then roll half of it on a piece of parchment paper until it's about 1/8 inch thick.
- Cut the dough into long thin strips or fun shapes; cut the strips into squares.
- Prick each square with a fork, then brush with a little olive oil.
- Place cutouts on a baking sheet and bake for 15-20 minutes until golden brown.
- Cool on the pan before serving. Transfer to an airtight container once completely cooled.