Apple Pie Ice Cream (Ninja Creami Recipe)
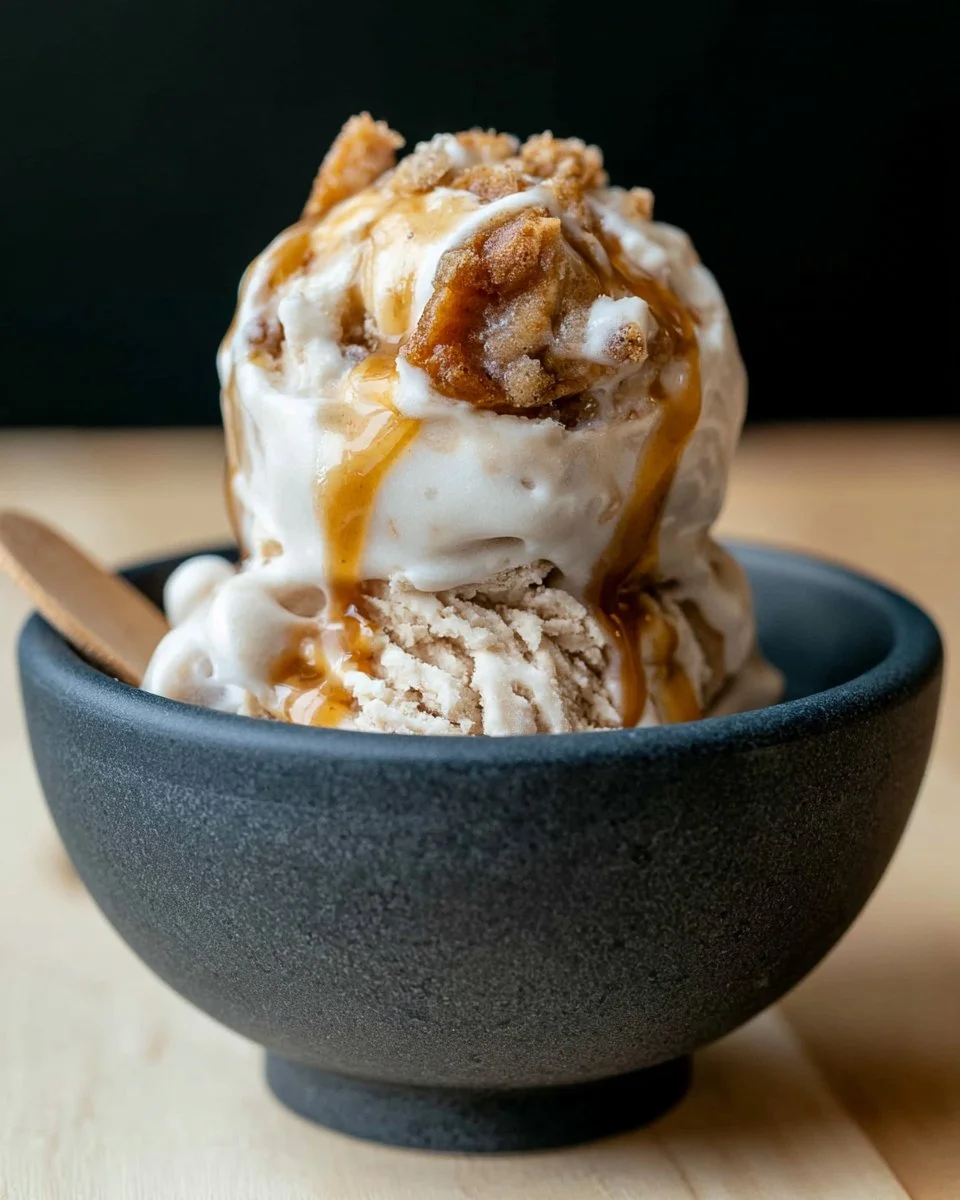
Imagine indulging in a delightful dessert that combines the comforting flavors of classic apple pie with the creaminess of ice cream. Picture yourself enjoying a scoop of sweet, cinnamon-spiced ice cream, studded with tender pieces of apple, all while drizzling it with rich caramel sauce. This is the kind of magical treat that brings back warm memories of family gatherings and cozy autumn afternoons. The best part? You can easily make this creamy apple pie ice cream in your Ninja Creami, transforming your kitchen into an ice cream parlor. Not only does this ice cream scream comfort, but it also offers a healthy twist, making it a guilt-free treat you can enjoy any time of the year. With each spoonful, you’ll experience a harmonious blend of flavors and textures that will leave you craving more. Let’s dive into this scrumptious homemade dessert and discover the simple steps to create this masterpiece.
Why You’ll Love This Recipe
This apple pie ice cream recipe is a game-changer for anyone who loves the rich flavors of fall, no matter the season. It’s incredibly easy to make, allowing you to whip up a delightful dessert in no time with minimal effort. The combination of creamy base ingredients and fresh apples tossed in cinnamon and brown sugar creates a comforting experience that is both nostalgic and refreshing. Plus, using your Ninja Creami makes the process even simpler and more fun, turning a traditional ice cream-making method into a quick and enjoyable activity. This dessert not only satisfies your sweet tooth but also serves as a wonderful addition to any gathering or celebration. Friends and family will be impressed by the homemade touch, making it a perfect conversation starter. Treat yourself and your loved ones to this unique take on ice cream that blends the best of both worlds in every bite.
What Makes This Recipe Special
What sets this recipe apart is its ability to capture the essence of homemade apple pie while transforming it into a creamy, dreamy ice cream. The use of cream cheese and kefir adds a unique tang and richness that enhances the overall flavor profile. The addition of fresh apples, sautéed with butter and brown sugar, infuses the ice cream with warmth and texture, making it a delightful treat that feels like a warm hug. This recipe is not just an ordinary ice cream; it’s a fusion of classic dessert elements, making each serving a celebration of flavors. Furthermore, it adapts to various dietary preferences, allowing for creative substitutions that can accommodate those with different lifestyles. With the ease of the Ninja Creami, you can enjoy homemade ice cream that tastes as if it came straight from an artisan shop, right in the comfort of your own home.
Ingredients
cream cheese: Adds creaminess and depth of flavor.
granulated sugar: Sweetens the base for a delightful treat.
Lifeway Plain Kefir: Offers a tangy taste and creamy texture.
milk: Adds smoothness to the ice cream mixture.
apple: Fresh fruit for a burst of flavor and texture in each scoop.
unsalted butter: Richness and flavor enhancement for the apple filling.
brown sugar: Adds sweetness and a hint of caramel flavor.
ground cinnamon: Provides a warm, comforting spice note.
caramel sauce: An optional topping for extra indulgence.
How to Make Apple Pie Ice Cream (Ninja Creami Recipe)
Phase 1 – Prep
STEP 1. Prepare the ice cream base. In a mixing bowl, blend the cream cheese and granulated sugar until smooth and creamy.
STEP 2. Add the kefir and milk. Incorporate the Lifeway Plain Kefir and milk into the mixture, whisking until fully combined and smooth.
STEP 3. Chill the base. Place the ice cream base in the refrigerator for about 30 minutes to chill thoroughly.
Phase 2 – Cook
STEP 4. Prepare the apple filling. In a skillet, melt the unsalted butter over medium heat.
STEP 5. Cook the apples. Add the diced apples to the skillet and cook for 5-7 minutes, until they begin to soften.
STEP 6. Sweeten the apples. Stir in the brown sugar and ground cinnamon, cooking for an additional 2-3 minutes until the apples are fully caramelized and coated.
Phase 3 – Serve
STEP 7. Combine apple filling with ice cream base. Fold the cooled apple filling into the chilled ice cream base, ensuring an even distribution.
STEP 8. Transfer to Ninja Creami container. Pour the mixture into the Ninja Creami container and freeze for at least 4 hours or until solid.
STEP 9. Blend and serve. Remove the container from the freezer, process the mixture in the Ninja Creami, and scoop into bowls. Drizzle with caramel sauce if desired.
Pro Tips
To ensure the best flavor and texture in your apple pie ice cream, be sure to work with room temperature cream cheese, as this will help achieve a smooth and creamy consistency in your base. When preparing the apple filling, make sure not to overcook the apples; they should be tender but retain some bite for texture. Allowing the ice cream base to chill properly before combining with the apple mixture helps develop flavors and creates a smoother texture once frozen. When using your Ninja Creami, process the mixture until creamy and fluffy; this might take a couple of minutes to achieve the ideal consistency. If you prefer a firmer texture, simply place it back in the freezer for a bit before serving. Experiment with the caramel sauce or consider a sprinkle of sea salt for contrasting flavors that enhance the overall experience. Store any leftovers in an airtight container in the freezer to keep your ice cream fresh and delicious for days to come.
Common Mistakes to Avoid
One common mistake is not letting the ice cream base chill long enough; this can lead to a less creamy texture after freezing. Another mistake is overcooking the apples, turning them into mush rather than leaving them with a slight bite. Be cautious with the ratio of sugar between the ice cream base and the apple filling; taste as you go to find the perfect balance. If the mixture feels too loose before freezing, give it a longer chill time to allow it to thicken. Be sure the Ninja Creami container is filled to the recommended line for the best results; an underfilled container may not process properly. Also, ensure the container is completely frozen before using, as this is necessary for achieving that sought-after creamy ice cream. Lastly, avoid adding too many toppings at once; start with a drizzle of caramel sauce and adjust as you taste.
Variations
• Add nuts for extra crunch and flavor.
• Substitute with pears for a different fruity twist.
• Include a touch of nutmeg for additional spice.
• Use coconut milk for a dairy-free alternative.
• Experiment with different flavored kefirs for unique tastes.
Serving Ideas
Serve this delicious apple pie ice cream in beautifully crafted bowls or waffle cones. Top with crumbled graham crackers or a sprinkle of chopped nuts for added texture. This creamy treat pairs nicely with a warm slice of apple pie or simply enjoyed with a drizzle of homemade caramel sauce. Keep it simple by serving alongside seasonal fruits or with a dollop of whipped cream. Get creative with your presentation, layering the ice cream with apple filling in a parfait glass for an impressive dessert to impress guests during gatherings. This versatile treat can also be offered at fall gatherings, making it a unique addition to a dessert table that highlights comforting seasonal flavors.
Meal Prep & Storage
For optimal freshness, it’s best to prepare the ice cream within a day or two before serving. Store any leftover ice cream in an airtight container to prevent freezer burn and maintain flavor. Ensure the lid fits tightly to keep the ice cream from absorbing unwanted odors from your freezer. If you find the ice cream hard to scoop after storing, let it sit at room temperature for a few minutes before serving to soften it slightly. This creamy delight can be stored for up to two weeks, but for the best flavor and texture, try to consume it within the week. If you plan to batch this recipe, consider portioning it into smaller containers for easy access and to enjoy different flavor combinations at your leisure. Enjoy the delightful experience of savoring homemade apple pie ice cream whenever you wish!
FAQs
Can I make this recipe dairy-free?
Yes, by substituting regular milk and cream cheese with almond milk or a dairy-free cream cheese alternative, you can create a delightful dairy-free version of this ice cream.
How long does it take to freeze the ice cream?
The ice cream needs to freeze for at least 4 hours or until it is firm enough to scoop.
Can I use other fruits besides apples?
Absolutely! You can substitute apples with pears or other fruits you enjoy, but be mindful of their cooking times as they may vary.
What can I serve with apple pie ice cream?
This ice cream pairs excellently with warm apple pie, crumbled graham crackers, or simply enjoyed alone with a drizzle of caramel sauce.
How do I store leftover ice cream?
Keep any leftover ice cream in an airtight container in the freezer, where it can remain fresh for up to two weeks.
Conclusion
Treat yourself to the rich flavors and creamy texture of this delightful dessert that combines the essence of apple pie with the refreshing nature of ice cream. Every scoop will remind you of cherished family moments and cozy gatherings, making it a must-try for any ice cream lover. Enjoy the simple pleasures of homemade recipes right in your kitchen with this enriching and delicious treat!
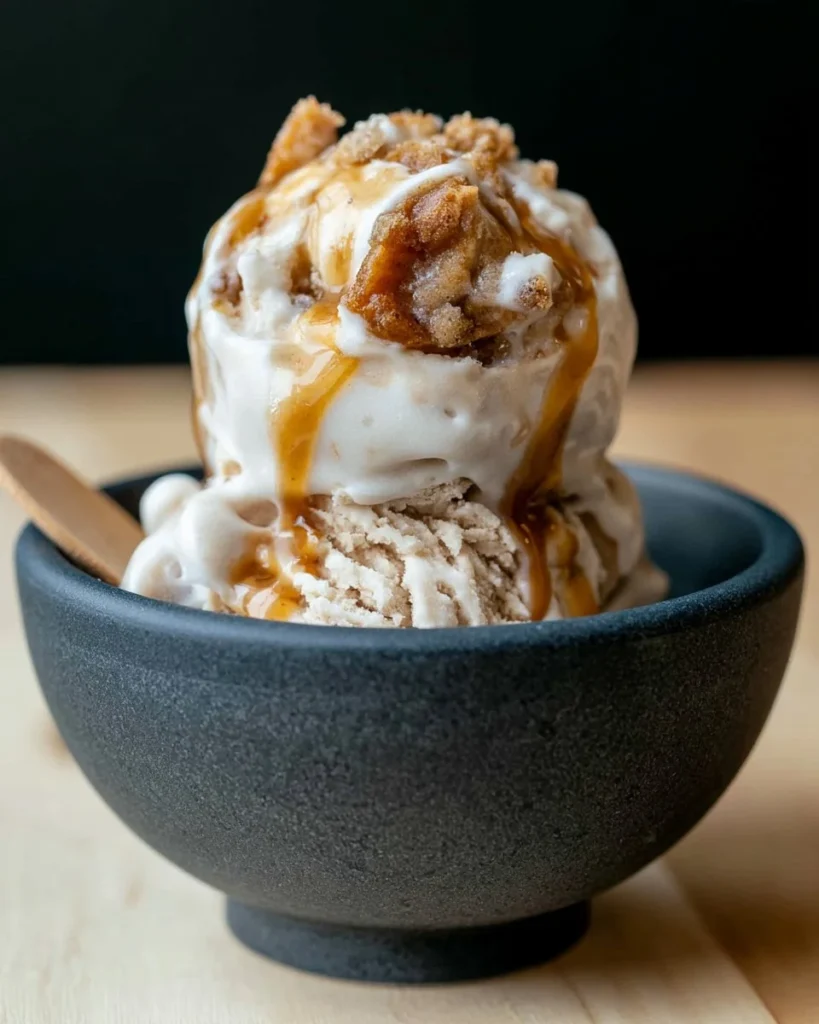
Creamy Apple Pie Ice Cream
Ingredients
Method
- Blend the cream cheese and granulated sugar until smooth and creamy.
- Incorporate the Lifeway Plain Kefir and milk into the mixture, whisking until fully combined.
- Place the ice cream base in the refrigerator for about 30 minutes to chill thoroughly.
- Melt the unsalted butter in a skillet over medium heat.
- Add the diced apples and cook for 5-7 minutes until they soften.
- Stir in brown sugar and ground cinnamon, cooking for another 2-3 minutes until apples are caramelized.
- Fold the cooled apple filling into the chilled ice cream base.
- Pour the mixture into the Ninja Creami container and freeze for at least 4 hours or until solid.
- Remove from freezer, process in the Ninja Creami, then scoop into bowls.
- Drizzle with caramel sauce if desired.