Three-Ingredient Grilled Chicken
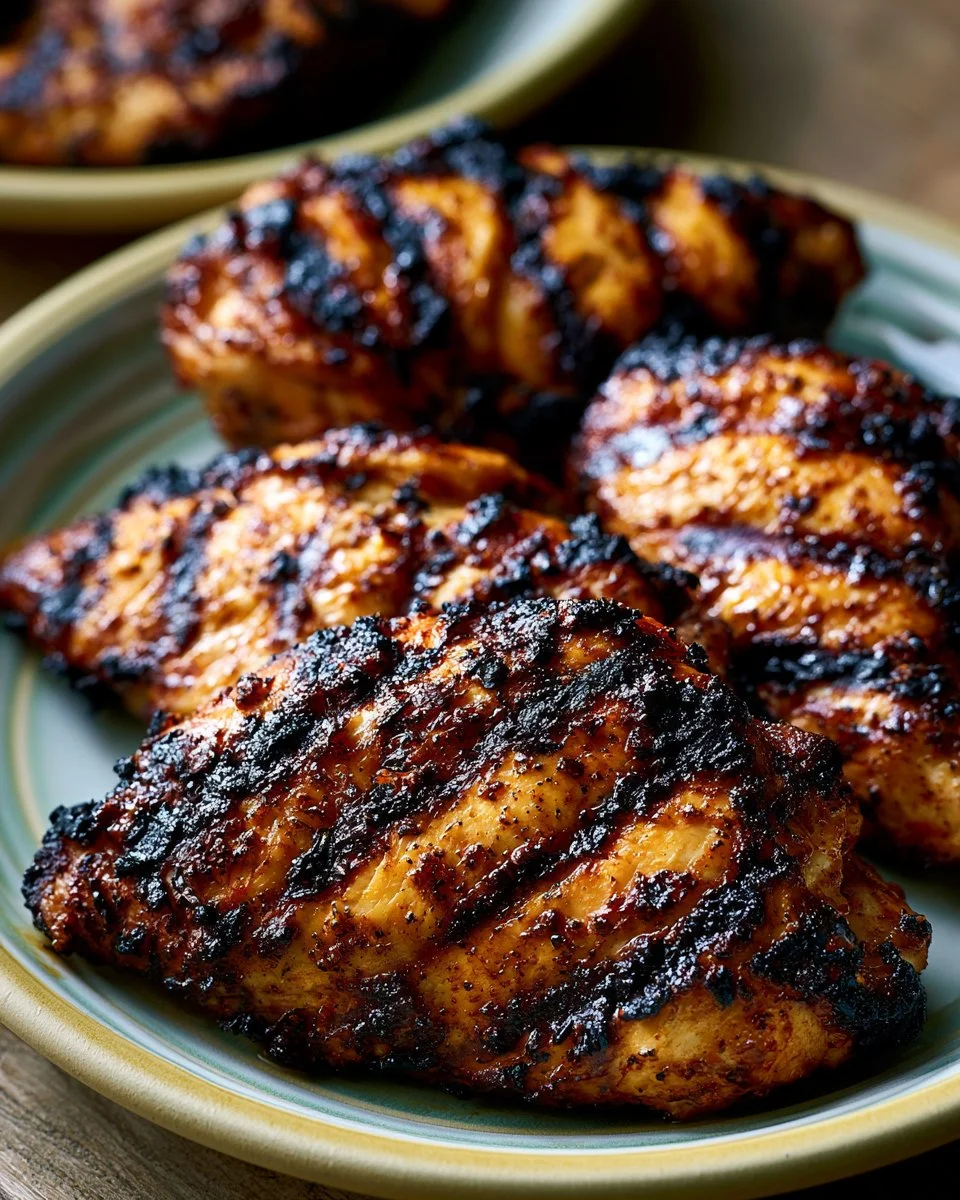
Grilled chicken is one of those culinary staples that transcends seasons, effortlessly bringing people together around the table. Whether you’re hosting a weekend barbecue or looking for a quick weeknight dinner solution, this dish offers simplicity without sacrificing flavor. Picture juicy, perfectly seasoned chicken thighs that get beautifully charred on the grill, each bite bursting with savory taco seasonings. The aroma alone is enough to make your mouth water, making it an ideal choice for family gatherings or meal prep during busy weeks. Not only is this recipe incredibly easy to make with just three ingredients, but it also fits perfectly into a healthy eating plan with its high protein content. Get ready for a grilling experience that will leave everyone asking for seconds!
Quick Answer
For a quick and delicious grilled chicken, combine boneless, skinless chicken thighs with taco seasoning and olive oil. Grill to perfection and enjoy!
Why You’ll Love This Recipe
This simple yet delectable grilled chicken recipe is sure to become a go-to for anyone who values flavor and convenience.
- Minimal ingredients: With just three core ingredients, you can whip this up without a long grocery list.
- Quick preparation: Marinate for as little as one hour or grill right away if you’re pressed for time.
- Flavorful seasoning: The taco seasoning elevates the dish with an explosion of spices and zest.
- Juicy texture: Boneless, skinless chicken thighs stay moist and tender, perfect for grilling.
- Versatile pairing: These grilled thighs pair well with a variety of sides or can be used in wraps and salads.
- Great for meal prep: Ideal for batch cooking, ensuring you have tasty protein ready throughout the week.
- Family-friendly: Easy to make and a hit with both adults and kids, satisfying everyone’s hunger.
What Makes This Recipe Special
This recipe is crafted around ease and deliciousness. The use of taco seasoning lends a unique twist to traditional grilled chicken, giving it a vibrant flavor profile that delights the palate. The marination process enhances the chicken’s natural juiciness, preventing it from drying out on the grill. Lean chicken thighs bring a richness that complements the spices beautifully. The grilling technique ensures a satisfying charred exterior while preserving the moistness within, making each bite a perfect balance of textures. Quick to prepare and boasting bold flavors, this grilled chicken is not just a dish; it’s an experience that makes any meal feel special.
Kitchen Tools You’ll Need
- Grill – The perfect tool for achieving that delicious smoky flavor and grilled char.
- Bowl – To mix and marinate the chicken with the seasoning and olive oil.
- Tongs – Essential for flipping the chicken on the grill safely.
- Meat thermometer – Helps ensure the chicken is cooked through to a safe temperature.
Ingredients
- boneless, skinless chicken thighs: Provides a juicy and tender bite that holds up well to grilling.
- taco seasoning: Delivers a punch of flavor with a blend of spices that enhance the chicken.
- olive oil: Adds richness to the marinade while helping to keep the chicken moist on the grill.
Ready to cook? Scroll to the recipe card below for exact measurements.
How to Make Three-Ingredient Grilled Chicken
Phase 1 – Prep
STEP 1. Combine chicken and seasonings. Place the chicken in a large bowl. Sprinkle the taco seasoning and olive oil over it. Toss until the chicken is well coated.
STEP 2. Marinate the chicken. Cover the bowl and marinate in the fridge for 1-48 hours. You can also grill the chicken immediately if you are pressed for time.
Phase 2 – Cook
STEP 3. Preheat the grill. Preheat your grill to high for roughly 20 minutes — you want it to be at roughly 525ºF when you start.
STEP 4. Prepare the grill grates. Clean your grates if you haven’t already, then re-cover the grill and let it get back up to at least 525ºF before proceeding.
STEP 5. Grill the chicken. Lay the chicken on the grates, cover, and grill for 4 to 5 minutes.
STEP 6. Flip and continue grilling. Uncover, flip the chicken, and grill for another 4 to 5 minutes or until cooked through.
Phase 3 – Serve
STEP 7. Rest before serving. Remove the chicken, and let it rest for at least 5 minutes before serving.
(Note: depending on the brand of taco seasoning you are using, you may or may not need any salt. Taste the chicken post-grilling and finish with a sprinkle of flaky sea salt if necessary.)
Why This Recipe Works
The texture balance in this dish comes from the combination of juicy chicken thighs and the crunchy exterior created by grilling. The taco seasoning introduces layers of flavors, enhancing the chicken with bold and savory notes. This balance of seasoning and cooking method creates a harmonious interaction that keeps the chicken tender while imparting a slightly crispy outer layer. The high heat of the grill locks in moisture, ensuring that every bite is juicy and flavorful. This recipe not only serves up flavor but also offers a satisfying texture contrast that leaves you asking for more.
Pro Tips
For the most flavorful chicken, consider marinating overnight. The longer the chicken soaks in the seasoning, the more pronounced the flavors will be. Ensure your grill is well-preheated before placing the chicken on it to achieve those restaurant-style sear marks. If you can, use a meat thermometer to check the internal temperature, targeting at least 165°F for perfect doneness. Letting the chicken rest after grilling allows the juices to redistribute, enhancing its juiciness. Lastly, don’t hesitate to experiment with different brands of taco seasoning to find the blend that best suits your taste!
Common Mistakes to Avoid
Mistake: Skipping the marinating step.
Why it happens: Many people are impatient or unaware of the flavor benefits from marination.
How to fix it: Schedule ahead and allow for at least a couple of hours in the marinade, or make it a priority to prepare the chicken the night before.
Mistake: Not preheating the grill properly.
Why it happens: Some may believe it isn’t necessary and place chicken on a cold grill.
How to fix it: Always preheat the grill for a sufficient amount of time to ensure optimal cooking temperatures.
Mistake: Overcooking the chicken.
Why it happens: The high heat may cause the exterior to cook faster than the interior.
How to fix it: Monitor cooking time closely and use a thermometer to avoid dryness.
Variations
- Use chicken breast instead of thighs for a leaner option.
- Add lime juice to the marinade for a refreshing twist.
- Serve with a side of grilled vegetables for a complete meal.
- Incorporate a dash of chili powder for extra heat.
- Mix in some minced garlic or onion powder for additional flavor depth.
Nutrition Highlights
| Nutrient | Role |
|---|---|
| Protein | Helps support satiety and balanced meals. |
Serving Ideas
This grilled chicken pairs well with various sides to complete your meal. Consider serving it alongside fresh vegetable salads, quinoa, or rice for a hearty dish. Wrap the chicken in warm tortillas with your favorite toppings for delicious tacos. Alternatively, chop the grilled chicken and add it to greens for a protein-packed salad, or serve it with grilled corn and black beans for a full-on Mexican fiesta. The possibilities are endless!
Best Occasions for This Recipe
This dish is a fantastic choice for summer barbecues, family gatherings, or casual weeknight dinners. It’s also perfect for meal prep to allow for quick lunches or easy dinners throughout the week. Whether you’re serving a crowd or simply making dinner for yourself, this grilled chicken is versatile enough to shine on any occasion.
Meal Prep & Storage
Meal Prep
Grilling a large batch of this chicken makes for an excellent meal prep option. Marinate multiple portions to have ready-to-grill meals throughout the week.
Refrigeration
Store leftover grilled chicken in an airtight container in the fridge for up to four days.
Freezing
Cooked chicken can be frozen for up to three months. Ensure it is well-wrapped to avoid freezer burn.
Reheating
When reheating, use low heat in the microwave or oven to maintain moisture levels, or pan-sear for best results.
FAQs
Can I use chicken breasts for this recipe?
Yes, chicken breasts can be used for a healthier alternative, but they may require careful monitoring to avoid drying out during grilling.
How can I store leftovers?
Leftovers can be stored in an airtight container in the refrigerator for up to four days or frozen for later use.
Can I make this recipe ahead of time?
Absolutely! Marinate the chicken in advance and keep it refrigerated until you’re ready to grill.
What are some good side dishes to pair with grilled chicken?
Consider serving it with salads, grilled vegetables, rice, or beans for a complete meal.
How do I know when the chicken is cooked through?
Use a meat thermometer to check for an internal temperature of 165°F.
Save This Recipe for Later
Don’t forget to save or pin this recipe for an easy weeknight dinner or summer barbecue!
Conclusion
This three-ingredient grilled chicken recipe is a testament to how simple ingredients can create phenomenal flavor. Perfect for any occasion, it offers the perfect solution to dinner dilemmas without overwhelming your to-do list. Experience the joy of grilling with this foolproof recipe that keeps everyone coming back for more. Say goodbye to complicated recipes and hello to effortless deliciousness!
Three-Ingredient Grilled Chicken
Ingredients
Method
- Place the chicken in a large bowl. Sprinkle the taco seasoning and olive oil over it. Toss until the chicken is well coated.
- Cover the bowl and marinate in the fridge for 1-48 hours. You can also grill the chicken immediately if you are pressed for time.
- Preheat your grill to high for roughly 20 minutes — you want it to be at roughly 525ºF when you start.
- Clean your grates if you haven't already, then re-cover the grill and let it get back up to at least 525ºF before proceeding.
- Lay the chicken on the grates, cover, and grill for 4 to 5 minutes.
- Uncover, flip the chicken, and grill for another 4 to 5 minutes or until cooked through.
- Remove the chicken, and let it rest for at least 5 minutes before serving.