Homemade Caramel Apples
The autumn season calls for comforting treats that evoke a sense of nostalgia, and few desserts capture that feeling quite like caramel apples. Imagine biting into a crisp Granny Smith apple, the tanginess perfectly countered by a luscious layer of homemade caramel that’s rich, buttery, and oh so satisfying. These delightful creations are not only a feast for the taste buds but also an attractive centerpiece for fall gatherings, Halloween parties, or cozy family nights. Picture the vibrant colors and glossy finish glistening under the soft light of autumn evenings, each bite offering a crunchy, sweet experience reminiscent of childhood fairs. Infusing your kitchen with warmth and joy, making caramel apples at home is a fun activity that transforms simple ingredients into an unforgettable treat.
You don’t need any special equipment or complicated techniques to master this classic recipe. With just a handful of ingredients and a little patience, turning fresh apples into gourmet delights becomes effortless. Whether you’re preparing them for a festive occasion or simply to indulge in a sweet tooth craving, these homemade caramel apples will undoubtedly steal the show and bring smiles to everyone around. Get ready to create an eye-catching and mouth-watering dessert that will have everyone’s taste buds dancing!
Why You’ll Love This Recipe
Creating homemade caramel apples is not only about the delicious final product; it’s about the experience. The joy of dipping the crisp apples into warm, gooey caramel is an interactive culinary adventure that’s perfect for both kids and adults alike. It’s a sensory experience that engages everyone and invites creativity. You can play around with various toppings, making each creation unique and personal.
Furthermore, this recipe offers the flexibility to suit various dietary preferences and tastes. You can easily swap out traditional toppings for healthier options or cater to those with specific dislikes. Plus, using Granny Smith apples adds a delightful tartness that complements the sweetness of the caramel, making for a balanced treat. Simple and fulfilling, these caramel apples are bound to become a seasonal staple that everyone looks forward to year after year.
What Makes This Recipe Special
What sets this homemade caramel apple recipe apart is the comforting combination of flavors and textures. The salted butter and light brown sugar create a caramel that is not only rich and creamy but also perfectly balanced with a hint of saltiness, enhancing the overall flavor. Unlike store-bought caramel, which often uses preservatives, this recipe allows you to control the quality of each ingredient, ensuring you enjoy a fresh, wholesome treat.
The option to customize with toppings, from crushed salted peanuts to sprinkles or even crushed cookies, makes each caramel apple a personal masterpiece. This adaptability means you can cater to preferences, whether you want a classic, a festive version with colored sprinkles, or an indulgent one with chocolate drizzling. This versatility makes homemade caramel apples not just a dessert, but a canvas for creativity in the kitchen.
Ingredients
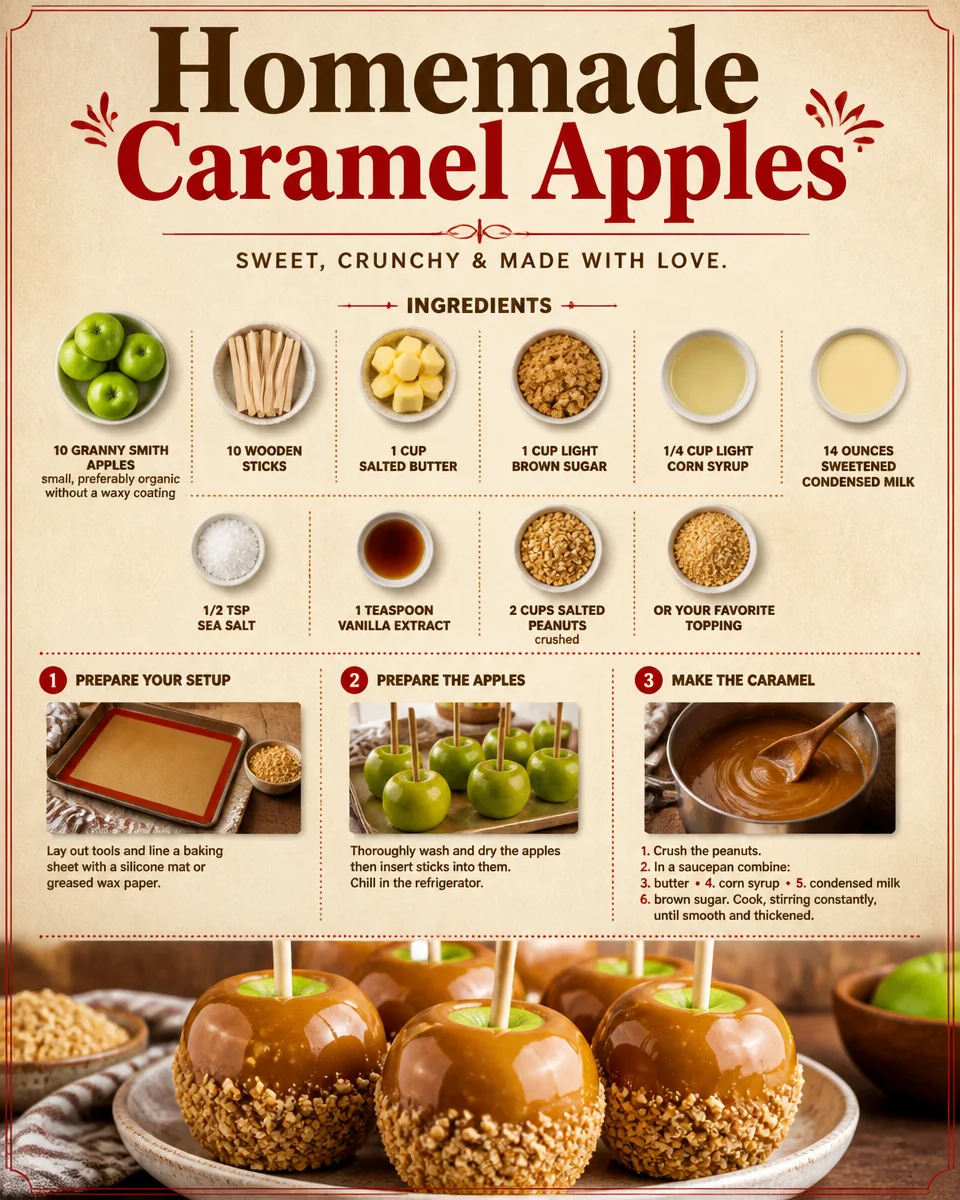
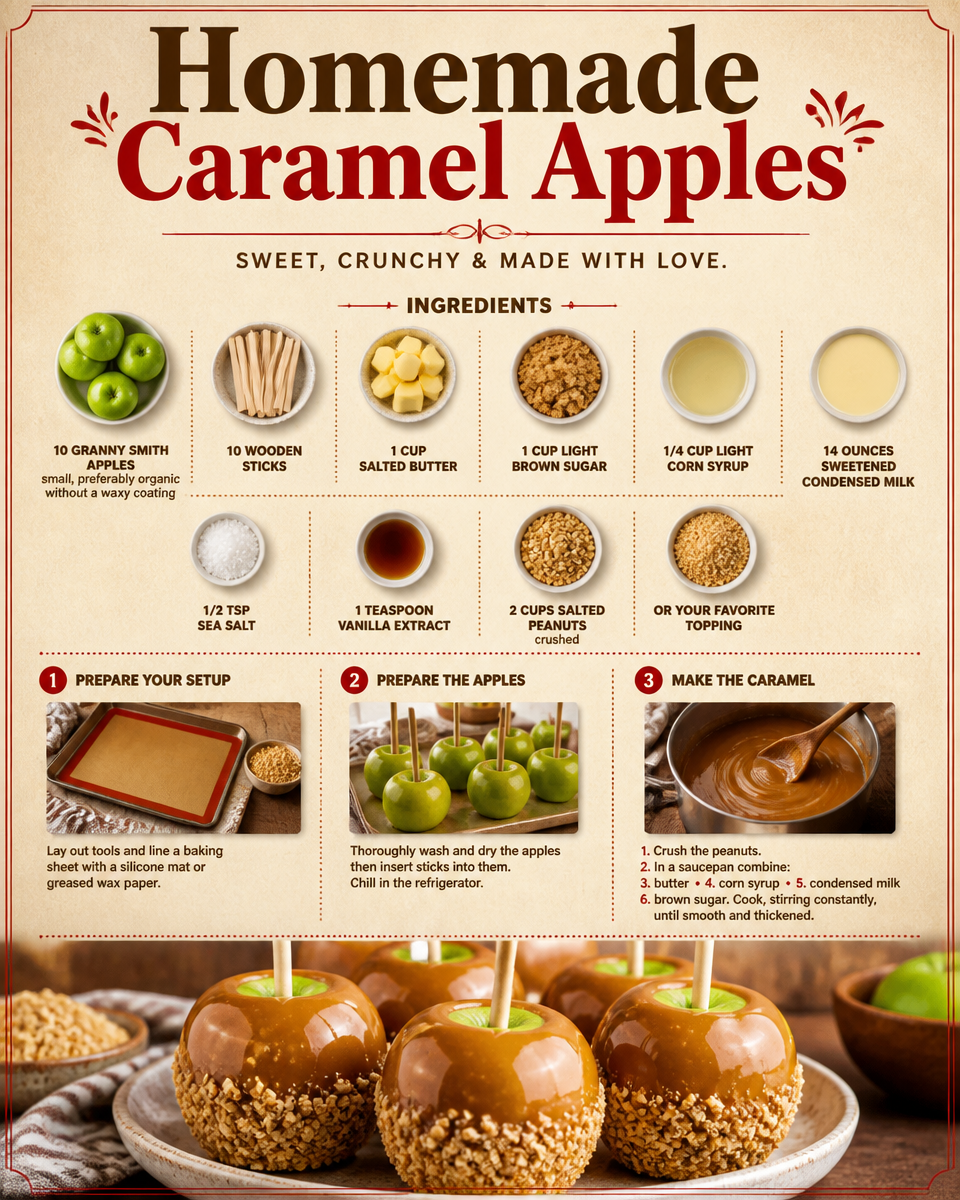
granny smith apples: Offers a crisp texture and tart flavor that balances the sweetness of the caramel.
wooden sticks: Provides a sturdy handle for dipping and munching on the apples.
salted butter: Creates a rich, creamy base for the caramel, enhancing its flavor and texture.
light brown sugar: Adds a deep sweetness and a hint of molasses flavor to the caramel.
light corn syrup: Ensures the caramel remains smooth and prevents crystallization.
sweetened condensed milk: Contributes to the creaminess and sweetness of the caramel.
sea salt: Enhances the overall flavor profile and balances the sweetness.
vanilla extract: Adds depth and warmth to the caramel, making it more aromatic.
salted peanuts: Provides a crunchy topping option that adds flavor and texture.
favorite topping: Personalizes the apples, allowing for a variety of flavors and presentations.
How to Make Homemade Caramel Apples
STEP 1. Prepare your workspace. Lay out your tools and line a baking sheet with a silicone mat or greased wax paper to prevent sticking.
STEP 2. Prep the apples. Thoroughly wash and dry the apples, inserting wooden sticks into them for easy dipping. Chill the apples in the refrigerator to help the caramel set better once dipped.
STEP 3. Crush the toppings. Use a rolling pin or food processor to crush the peanuts or your chosen toppings into small bits for rolling.
STEP 4. Make the caramel sauce. In a saucepan, combine salted butter, light corn syrup, sweetened condensed milk, light brown sugar, and sea salt. Cook over medium-low heat, stirring constantly until the caramel reaches 235-240 degrees F.
STEP 5. Add vanilla extract. Remove the saucepan from heat, then add the vanilla extract, stirring until thoroughly combined.
STEP 6. Dip the apples. Quickly dip each chilled apple into the caramel, ensuring a generous coating, then roll in your choice of toppings and set them on the prepared baking sheet.
STEP 7. Cool and serve. Allow the caramel apples to harden at room temperature or refrigerate briefly to speed up the process. Once set, slice the caramel apples for easier serving and enjoyment.
Pro Tips
To ensure your caramel apples turn out perfectly, consider these pro tips. First, start with extremely clean and dry apples as any moisture can affect caramel adhesion. Using organic apples with no wax coating ensures the caramel sticks well and you get the pure apple flavor. If you want extra shiny caramel, you can add a small amount of vegetable oil to the warm caramel sauce.
Your caramel should reach the right temperature to avoid being too runny or too hard when it cools. Consider using a candy thermometer for accuracy. If you desire a more complex flavor, experimenting with different extracts like almond or even orange can add unique notes to the caramel. Finally, let the apples cool completely before slicing to maintain the overall shape and presentation.
Common Mistakes to Avoid
Avoid these common pitfalls to ensure your caramel apples are a hit. First, don’t skip the chilling step for the apples; this helps the caramel adhere better. Also, cooking the caramel sauce too quickly can burn it, resulting in a bitter taste rather than the desired sweet and buttery flavor.
When dipping, make sure the caramel is at the right temperature—if it’s too thick, it won’t coat well, and if it’s too runny, it won’t set properly. Roll quickly for best coverage and cleanly set them down to avoid a sticky mess. Lastly, don’t skip using quality ingredients, as they greatly impact the flavor.
Variations
• Add chocolate drizzle for a decadent touch.
• Incorporate different nuts like almonds or pecans for a new crunch.
• Use crushed graham crackers for a fun s’mores-inspired twist.
• Try adding a sprinkle of cinnamon for a warm, autumnal flavor.
• Dip the apples in dark chocolate before coating with caramel for a richer taste.
Serving Ideas
Present your homemade caramel apples beautifully on a festive platter for parties or family gatherings. You can offer a dessert bar-style setup where guests choose their toppings and dipping sauces. Slices can be arranged on a rustic wooden board, adorned with some autumn foliage or edible flowers for a charming presentation. This makes for an attractive centerpiece for any fall-themed get-together. Serving them alongside warm apple cider or coffee adds a delightful pairing, making a cozy and inviting atmosphere.
Meal Prep & Storage
For best results, enjoy the caramel apples fresh, as they are most flavorful and enjoyable on the day of preparation. If you have leftovers, store them in an airtight container in the refrigerator to maintain freshness, but they will start to lose texture over time. Avoid stacking them to prevent caramel from sticking to other apples. When ready to eat, simply let them sit at room temperature for a few minutes to soften slightly before enjoying.
{image_template}
FAQs
Can I use other types of apples for this recipe?
While Granny Smith apples are preferred for their tartness and crunch, you can use other varieties like Fuji or Honeycrisp for a sweeter flavor.
How long do homemade caramel apples last?
When stored properly in the refrigerator, they can last for about 3-5 days. However, they are best enjoyed fresh.
Can I make caramel in advance?
Yes, the caramel can be made ahead of time and stored in an airtight container in the fridge. Just warm it up gently before dipping the apples.
What can I use as a topping besides peanuts?
You can use crushed cookies, sprinkles, shredded coconut, dried fruit, or any of your favorite candies for a unique twist.
Is there a vegan version of this recipe?
Yes, you can replace the butter and condensed milk with coconut milk and dairy-free butter substitutes to create a vegan caramel apple.
How can I make the caramel firmer?
If you want a firmer caramel, you can cook it to a slightly higher temperature or reduce the amount of corn syrup used.
Conclusion
Embracing the delightful tradition of making homemade caramel apples is a wonderful way to celebrate the flavors of fall. With their inviting aroma, satisfying crunch, and customizable ingredients, these treats create lasting memories. From festive gatherings to cozy nights in, these caramel apples are sure to bring warmth and smiles to everyone who enjoys them. So gather your ingredients, get creative with your toppings, and enjoy every sweet moment of this time-honored treat!
Caramel Apples
Ingredients
Method
- Lay out your tools and line a baking sheet with a silicone mat or greased wax paper.
- Thoroughly wash and dry the apples, inserting wooden sticks into them for easy dipping. Chill the apples in the refrigerator.
- Crush the toppings into small bits for rolling.
- In a saucepan, combine salted butter, light corn syrup, sweetened condensed milk, light brown sugar, and sea salt.
- Cook over medium-low heat, stirring constantly until the caramel reaches 235-240 degrees F.
- Remove the saucepan from heat, then add the vanilla extract and stir until combined.
- Quickly dip each chilled apple into the caramel, ensuring a generous coating, then roll in your choice of toppings.
- Set them on the prepared baking sheet to harden.
- Allow the caramel apples to cool and set before serving.