
There’s something undeniably comforting about the smell of freshly baked chocolate chunk muffins wafting through the kitchen. These delightful treats are more than just a dessert; they can be a solution for those days when you’re grappling with cooking fatigue or searching for a way to connect with your family over a meal. These Chocolate Chunk Muffins are not only scrumptious but also cater to your calorie-conscious meal planning needs. Whether you’re a health-conscious individual looking for a satisfying snack or a busy parent trying to reunite the family over something delicious, this recipe ensures you can bake up a storm without breaking a sweat.
Kitchen Frustration That Makes This Recipe a Lifesaver
In today’s fast-paced world, finding time to cook can feel like an uphill battle. You may find yourself too exhausted to spend hours in the kitchen, yet still want to provide your family with delicious, homemade treats. It’s a common scenario, especially for women aged 30-75, who often juggle work, family responsibilities, and household tasks. That’s where this Chocolate Chunk Muffins recipe comes in, as it only takes about 30 minutes from start to finish, making it a time-saving choice that fits easily into your busy lifestyle.
The best part? Each bite of these muffins delivers a delightful combination of rich chocolate and fluffy texture. Plus, they are freezer-friendly, allowing you to whip up a larger batch and stash some for later—a perfect solution for those unexpected snack cravings or gatherings. If you ever feel overwhelmed in the kitchen, remember that simplicity can coexist with flavor.
Why This Chocolate Chunk Muffins Works So Well
Quick Answer: Chocolate Chunk Muffins are quick to prepare, budget-friendly, and deliver a chocolatey goodness that the whole family will love while meeting nutrition goals.
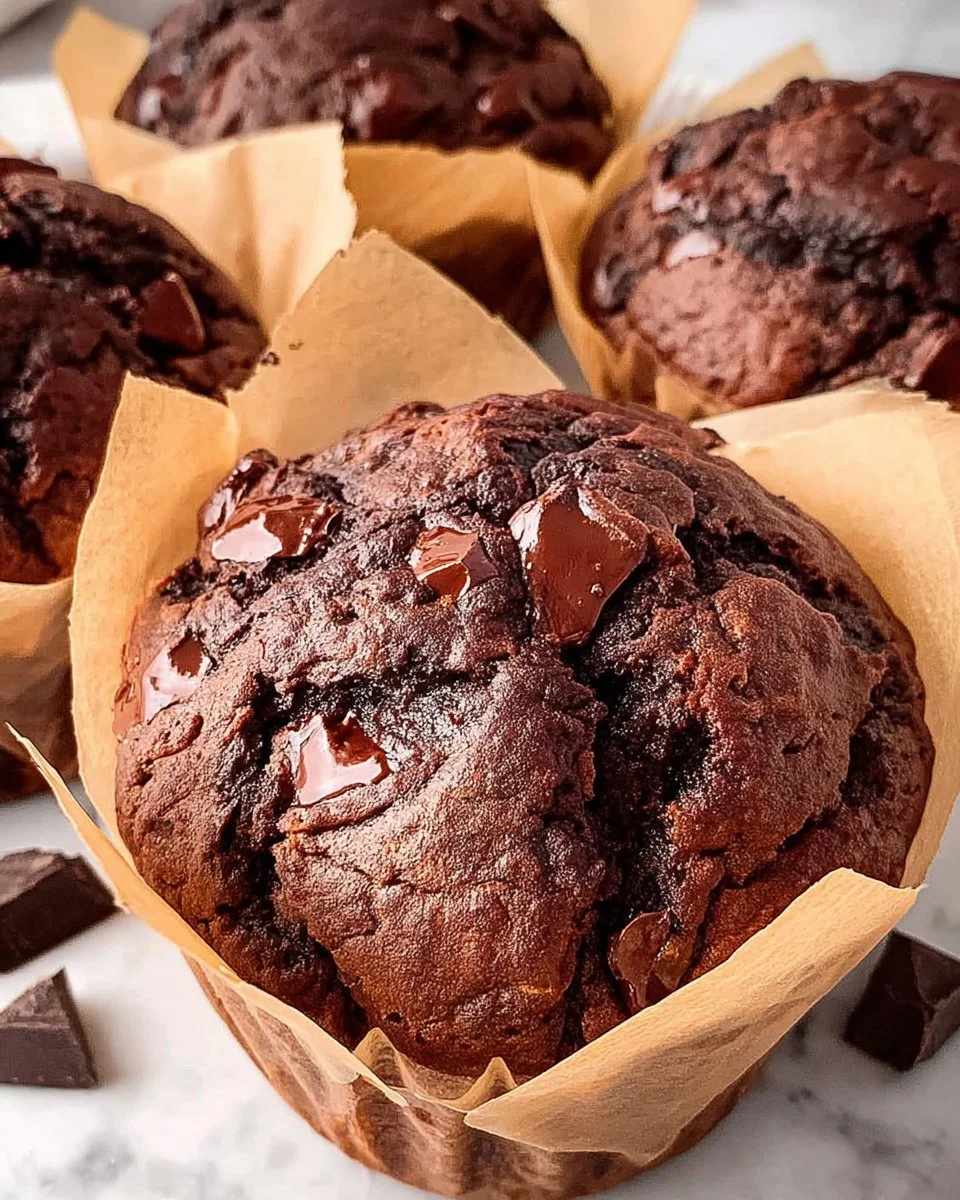
These muffins aren’t just about flavor; they are about the experience. The rich, dark chocolate chunks melting into a fluffy, moist muffin create a delightful texture that’s hard to resist. You’ll find them to be both calorie-conscious and satisfying, making them perfect for those who are health-conscious yet want to indulge. The blend of cocoa powder and chunks of chocolate ensures a robust chocolate flavor, while the buttermilk adds moisture that makes each muffin irresistible.
Worth noting is the use of vegetable oil, which keeps these muffins tender and moist without the heaviness of butter, creating a lighter treat that won’t weigh you down. Plus, the added instant coffee powder enhances the chocolate flavor without overwhelming it, proving that each component has a purpose.
{image_template}
Ingredients, Substitutions & Foolproof Tips
- 250 ml buttermilk: Adds moisture and richness; a dairy-free alternative can be homemade almond milk mixed with lemon juice.
- 120 ml vegetable oil: Keeps muffins moist; can be substituted with melted coconut oil or applesauce.
- 2 eggs: Binds the ingredients and provides structure; for egg-free, use flax eggs (1 tbsp ground flaxseed with 3 tbsp water).
- 1/2 tsp vanilla extract: Enhances flavor; consider almond extract for a twist.
- 300 g plain flour: The base for the muffins; whole wheat flour can be used for added nutrition.
- 180 g sugar: Sweetens the muffins; cut down the amount for a less sweet treat or substitute with honey or maple syrup.
- 60 g cocoa powder: Provides the chocolate flavor; ensure it’s unsweetened for balanced taste.
- 1 tsp bicarbonate of soda: A leavening agent for rise; make sure it’s fresh for the best results.
- 1 tsp instant coffee powder: Enhances chocolate flavor; can be omitted if not desired.
- Pinch of salt: Balances sweetness.
- 200 g dark chocolate (chopped into chunks): Melts into gooey pockets for a decadent experience; adjust type based on preference (semi-sweet or bittersweet).
Step-by-Step Directions
- Preheat the oven: Set your oven to 180°C fan/200°C regular/400°F. This crucial step ensures even baking.
- Prepare the dry ingredients: In a mixing bowl, combine 300 g of plain flour, 180 g of sugar, 60 g of cocoa powder, 1 tsp of bicarbonate of soda, and a pinch of salt. Whisk to distribute the ingredients evenly.
- Mix the wet ingredients: In a separate bowl, whisk together 250 ml of buttermilk, 120 ml of vegetable oil, 2 eggs, and 1/2 tsp of vanilla extract until well blended, ensuring a smooth mixture.
- Combine wet and dry: Pour the wet mixture into the dry ingredients, mixing gently until just combined. This ensures the muffins remain fluffy rather than dense.
- Add chocolate chunks: Fold in 200 g of chopped dark chocolate. Avoid over-mixing to retain the tender texture.
- Distribute into muffin tray: Scoop the batter into a lined muffin tray with six holes. Fill each hole about three-quarters full for that perfect rise.
- Bake to perfection: Place the tray in the oven and bake for 20 minutes, or until a skewer inserted comes out clean with just a few moist crumbs.
- Cool & enjoy: Allow the muffins to cool for about 10 minutes before carefully removing them from the tin. While they cool, the chocolate will be wonderfully melty. Savor them warm if you can!
Common Mistakes to Avoid & Pro Tips
Common Mistakes to Avoid:
- Overmixing the batter: This can lead to tough muffins.
- Not measuring ingredients accurately: Use a kitchen scale for precise measurements.
- Opening the oven door too soon: This can cause the muffins to collapse. Wait until they are near the baking time.
Pro Tips:
- For extra chocolate flavor, sprinkle some additional chocolate chunks on top before baking.
- Use a muffin scoop to ensure equal portions for even baking.
- Let cooled muffins sit in an airtight container overnight to allow flavors to meld.
Serving, Storage & Freezer Guide
How to Serve Chocolate Chunk Muffins
Chocolate Chunk Muffins are versatile and can be served warm as a breakfast treat alongside coffee or tea. They also make excellent afternoon snacks or dessert at family gatherings. Dress them up with a sprinkle of powdered sugar or a dollop of whipped cream for an indulgent experience.
How to Store Chocolate Chunk Muffins
To keep your muffins fresh, store them in an airtight container at room temperature for up to three days. If you’d like to keep them longer, a slice of bread added to the container can help maintain moisture.
Can You Freeze Chocolate Chunk Muffins?
Yes, these muffins freeze beautifully! Place them in a single layer on a baking sheet until frozen solid, then transfer to a freezer-safe bag. They can be stored for up to three months. To enjoy, simply defrost at room temperature or warm them up in the microwave for a few seconds.
Frequently Asked Questions
Can I use gluten-free flour for this recipe?
Yes, you can substitute the plain flour with a gluten-free flour blend. Ensure the mixture includes a binding agent to retain moisture.
How can I reduce sugar in the recipe?
You can reduce the sugar by 25% without affecting the texture significantly. Alternatively, consider using a sugar substitute suitable for baking.
Can I add fruit to these muffins?
Absolutely! You can add berries or chopped bananas. Just be mindful of the moisture they will contribute.
What other flavors can I add to the muffins?
Feel free to include spices like cinnamon or nutmeg for added complexity, or experiment with different types of chocolate—milk chocolate or even white chocolate for a unique twist.
Conclusion
These Chocolate Chunk Muffins are not just a treat to appease your sweet tooth but a heartfelt nod to nostalgia, family gatherings, and the joy of baking. They’re a delightful addition to your meal plan, keeping you fulfilled without straying from your health goals. If this recipe reminds you of someone you love, share it with them. Your memories keep recipes alive.

Chocolate Chunk Muffins
Ingredients
Method
- Preheat the oven to 180°C fan/200°C regular/400°F.
- In a mixing bowl, combine the dry ingredients: flour, sugar, cocoa powder, bicarbonate of soda, and salt. Whisk to mix evenly.
- In a separate bowl, whisk together the wet ingredients: buttermilk, vegetable oil, eggs, and vanilla extract until smooth.
- Pour the wet mixture into the dry ingredients and mix gently until just combined to avoid dense muffins.
- Fold in the chopped dark chocolate chunks carefully.
- Scoop the batter into a lined muffin tray, filling each hole about three-quarters full.
- Bake for 20 minutes or until a skewer inserted comes out clean with a few moist crumbs.
- Allow the muffins to cool for about 10 minutes before removing them from the tin.