There’s something undeniably comforting about the aroma of freshly baked goods wafting through your home, especially when they’re as delightful as Peanut Butter Blondies. Imagine a warm, chewy treat, brimming with gooey chocolate and the rich, nutty flavor of peanut butter. It’s surprising how a simple dessert can transport you to cherished memories of home, laughter, and family gatherings. Perhaps you’re trying to find a quick recipe that satisfies that sweet tooth while also being a crowd-pleaser. Let’s dive into these Peanut Butter Blondies and discover how they can lighten your mood and brighten your day.
Finding the Right Balance in Baking
We’ve all been there, standing in the kitchen, ingredients scattered like our thoughts. Baking can feel overwhelming, especially if the recipe calls for precision, and the nature of quick, easy desserts sometimes adds to that pressure. I remember the first time I attempted to make a batch of blondies. I meticulously laid out all the necessary ingredients—an experience that should have been straightforward but quickly spiraled into chaos. Forgetting to set my timer led to mishaps that culminated in a slightly charred batch that still tasted delicious but didn’t present well.
That day taught me that baking isn’t just about following a rigid recipe; it’s a dance between flavors and your personal preferences. Over the years, I learned some invaluable tips that help me maintain that perfect balance—especially when it comes to classic recipes like these Peanut Butter Blondies. You see, the best baking experiences often stem from a blend of disciplined technique intertwined with love and a dash of creativity.
Quick Tip: When you’re about to bake, make sure to organize your workspace. It’ll save you from the chaos and result in a more enjoyable experience.
The Magic of Peanut Butter Blondies
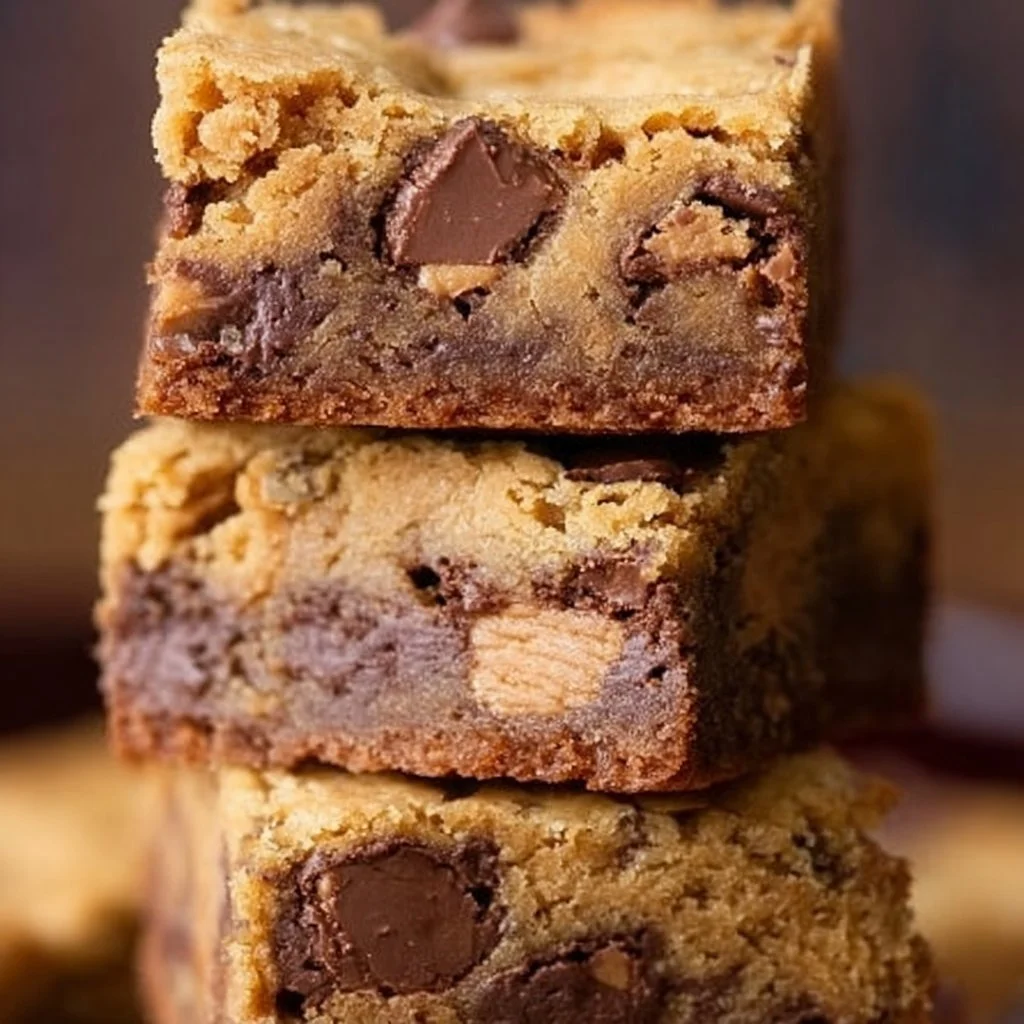
You may be wondering, “What makes Peanut Butter Blondies so special?” The secret lies in their ability to combine the beloved taste of peanut butter with the caramel-like richness of brown sugar, not to mention added textures from chopped peanut butter cups. These bars are perfect for satisfying those peak afternoon cravings or surprising your loved ones during family gatherings.
Quick Answer: The secret to perfect Peanut Butter Blondies is ensuring you mix the sugars and butter until light and fluffy, which creates a delightful chewy texture.
Not only are these blondies a quick alternative to traditional brownies, but they also bring a unique, satisfying flavor profile that can elevate any dessert table. Each bite offers a blend of sweetness and nuttiness while boasting a slightly crisp edge and a gooey center that calls for second helpings. They’re incredibly versatile, too! If you want to switch things up, consider adding your favorite mix-ins such as nuts or cookies to create your personalized version.
For additional fun in the kitchen, you might also enjoy exploring the savory side of peanut butter with our Peanut Butter Chicken Recipe: The Ultimate Comfort Food Dish.
Ingredients, Substitutions & Foolproof Steps
To create these delightful Peanut Butter Blondies, follow this carefully crafted list of ingredients, ensuring your kitchen masterpiece shines!
- 3/4 cup butter, room temperature — Provides richness; use vegan butter for a dairy-free option.
- 1/2 cup creamy peanut butter — Essential for that classic peanut butter taste; chunky peanut butter adds texture.
- 1 cup granulated sugar — Sweetness balanced and enhances browning; consider coconut sugar for a healthier option.
- 1/2 cup light brown sugar — Adds moisture and depth; dark brown sugar intensifies the flavor.
- 2 eggs — Binds everything together; flax eggs work for a vegan substitute.
- 2 teaspoons vanilla extract — Elevates the flavors; feel free to experiment with almond extract.
- 1 teaspoon kosher salt — Balances sweetness; avoid adding too much.
- 1 teaspoon baking soda — Provides lift; baking powder is an alternative, but adjust the quantity.
- 2 cups all-purpose flour — For structure; gluten-free flour blends work well for those with sensitivities.
- 2 cups coarsely chopped peanut butter cups (about 12 ounces) — Adds an extra chocolatey delight; any chocolate candy can substitute.
Directions / Steps:
- Preheat your oven to 350°F. Line a 9×9 pan with parchment paper and coat it with nonstick spray; set it aside.
- In the bowl of a stand mixer fitted with a paddle attachment, mix together the butter, creamy peanut butter, and both sugars for about 2 minutes.
- Add in the eggs, vanilla, salt, and baking soda, mixing for 1 minute while scraping the sides as needed.
- Turn the mixer to low and gently mix in the flour until just combined.
- Using a rubber spatula, fold in half of the chopped peanut butter cups.
- Spread the batter into the prepared pan, then press the remaining peanut butter cups into the batter.
- Bake for 25 to 30 minutes until the edges are lightly golden. Allow to cool completely before slicing into bars.

Common Mistakes to Avoid:
- Overmixing once you add the flour can lead to dense bars.
- Don’t skip the cooling time; it’s essential for better slicing.
Pro Tips:
- Use room temperature ingredients to ensure a smooth batter.
- Check for doneness by inserting a toothpick; moist crumbs should cling to it.
Nutrition Highlights Table:
NutrientPer Serving Protein7g Carbs12g Fat6g If you need hearty meal ideas for entertaining, don’t forget to check out our delicious Cottage Cheese Mac and Cheese Recipe.
Serving, Storage & Freezer Tips
How to Serve Peanut Butter Blondies:
These blondies shine when served warm or at room temperature. Consider pairing them with a scoop of vanilla ice cream or drizzling warm chocolate sauce on top for an extra indulgence. You could even whip up some homemade whipped cream to elevate the experience!
How to Store Peanut Butter Blondies:
Once cooled, store the blondies in an airtight container at room temperature for up to 4 days. To maintain their freshness and texture, it’s best to separate layers with parchment paper.
Can You Freeze Peanut Butter Blondies?
Absolutely! Wrap individual blondie squares in plastic wrap and place them in a freezer bag. They store well for up to 2 months. Just remember to let them thaw at room temperature when you’re ready to enjoy!
Baking evokes fond memories, and these Peanut Butter Blondies can quickly become a cozy family tradition.
FAQ Section
1. Can I use a different type of nut butter?
Yes! Feel free to swap in almond or cashew butter for a distinct taste. The flavor will vary but still provide a yummy twist.
2. How can I make these blondies gluten-free?
Using a gluten-free flour blend in place of all-purpose flour will work beautifully. Ensure that any mixes you use are gluten-free.
3. Can I double the recipe?
Absolutely! Simply use a larger pan and adjust the bake time as necessary, checking for doneness before removing them from the oven.
4. What flavors can I add to these blondies?
Add-ins like chopped nuts, coconut flakes, or different candy bars can take your blondies to the next level!
Conclusion
In moments where comfort comes from taste and nostalgia, Peanut Butter Blondies are a delightful avenue. They remind us of the warmth of home and the joy of sharing. If this recipe sparks a sweet memory with someone you love, don’t hesitate to share it with them. Your memories keep recipes alive.
You May Also Like:
- Cottage Cheese Chips Recipe
- Alice Springs Chicken: A Complete Guide
- Bento Cakes: The Sweet Personal-Sized Treat Everyone Loves
Peanut Butter Blondies
Ingredients
Method
- Preheat your oven to 350°F. Line a 9x9 pan with parchment paper and coat it with nonstick spray; set it aside.
- In the bowl of a stand mixer fitted with a paddle attachment, mix together the butter, creamy peanut butter, and both sugars for about 2 minutes.
- Add in the eggs, vanilla, salt, and baking soda, mixing for 1 minute while scraping the sides as needed.
- Turn the mixer to low and gently mix in the flour until just combined.
- Using a rubber spatula, fold in half of the chopped peanut butter cups.
- Spread the batter into the prepared pan, then press the remaining peanut butter cups into the batter.
- Bake for 25 to 30 minutes until the edges are lightly golden. Allow to cool completely before slicing into bars.