
Life is busy. Between work, family responsibilities, and the never-ending to-do list, it can feel like there’s barely time to breathe, let alone whip up an elaborate dinner. Have you ever stood in front of your pantry, feeling completely uninspired by the ingredients at your disposal, resigned to the fact that takeout is the only way out? Well, hang tight! There’s a solution that not only satisfies your cravings but does so in a matter of minutes—enter Pita Pizza.
As someone who has faced many a dinner dilemma, I’m a firm believer in simple dishes that pack a punch. I remember one particularly chaotic week where everything seemed to go awry. Between late meetings and unexpected errands, dinner prep felt impossible. On one of those frazzled evenings, I turned to the humble pita bread I had lying around and created a deliciously cheesy, satisfying Pita Pizza that came together in mere minutes. This flavor-packed dish was not only a lifesaver but also a delightful experience that I now cherish and share with family.
So, what makes Pita Pizza so special? It’s all about simplicity, creativity, and customization. Using sturdy pita bread as the base, you can layer on your favorite toppings. Whether you’re a fan of classic pepperoni, fresh veggies, or an explosion of cheese—there’s room for everyone’s preferences. Plus, Pita Pizza is fast enough for weeknight meals or a fun family cooking activity.
Why Pita Pizza Works So Well
It’s simple: Pita Pizza combines convenience and versatility. The structure of pita bread provides the perfect canvas, standing up against sauce and toppings without getting soggy. This means you’ll have a delightful crunch in every bite along with a warm, cheesy center. The best part? You can personalize each pizza for everyone’s taste, making it a fun activity for the whole family.
Quick Answer: The secret to perfect Pita Pizza is achieving the right balance of sauce, cheese, and toppings while cooking at the optimal temperature to achieve a crispy crust.
Ingredients, Substitutions & Foolproof Steps
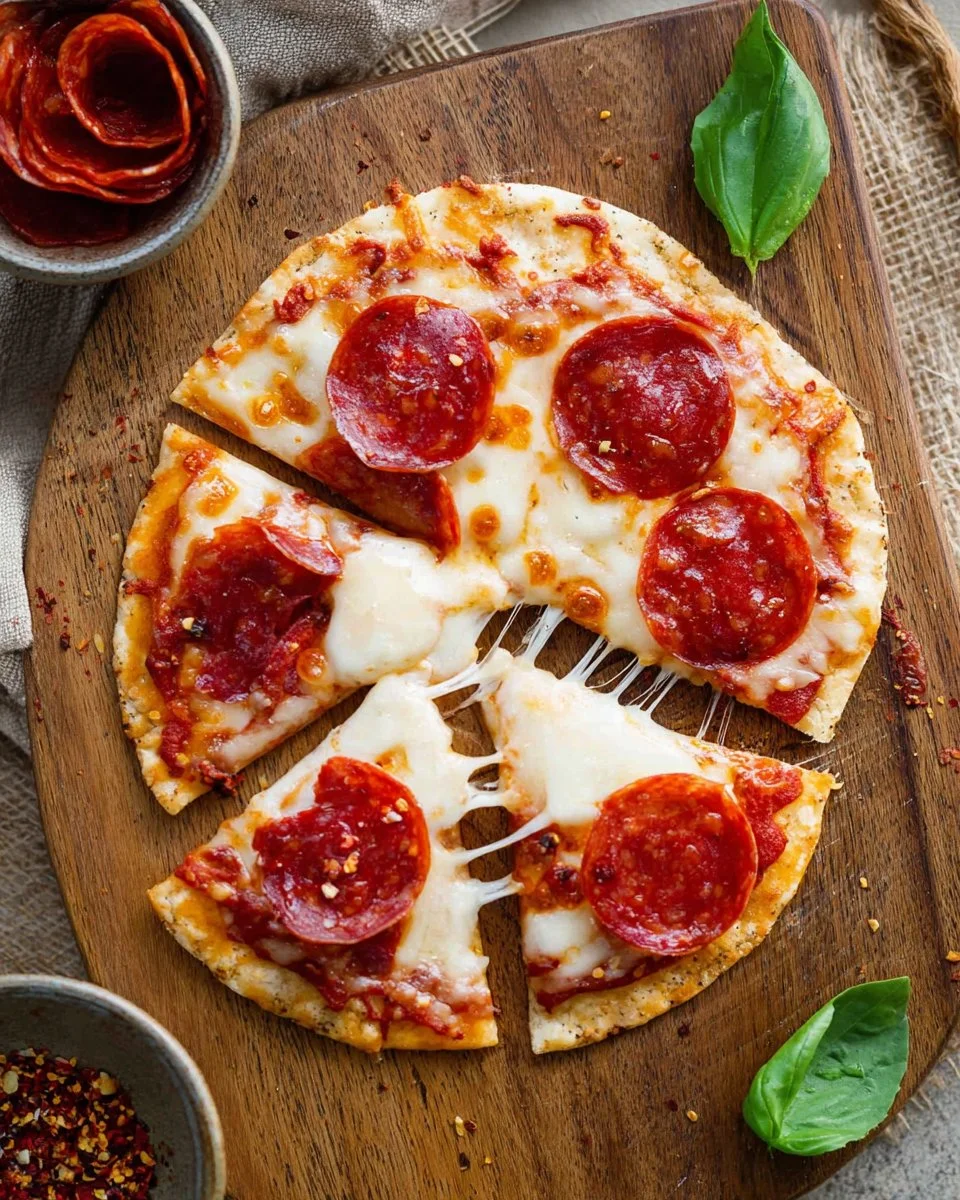
- Store-bought Pita Bread — The foundation of your Pita Pizza; opt for whole wheat for added nutrition.
- Marinara Sauce — A classic choice; substitute with pesto or Alfredo sauce for variety.
- Mozzarella Cheese — Provides that gooey texture; try mixing with provolone for a flavor twist.
- Pepperoni Slices — A favorite topping; you can swap these for turkey pepperoni or toss on fresh veggies instead.
- Fresh Basil — Adds a burst of flavor for garnishing; use dried basil in a pinch but fresh is always best.
- Red Pepper Flakes — For those who love a kick; omit if you prefer a milder flavor.
Directions / Steps:
- Start by spreading approximately 2 tablespoons of marinara sauce evenly on top of one pita bread, ensuring every bite has flavor.
- Next, sprinkle about ½ cup of shredded mozzarella cheese over the sauce, creating a luscious layer of goodness.
- Arrange the pepperoni slices on top and feel free to add any additional toppings you desire, such as sliced olives or bell peppers.
- Carefully place the assembled pita pizza in your air fryer basket and set it to cook at 375 degrees Fahrenheit for 5-6 minutes, or until the cheese is bubbling and the edges of the pita are golden. Alternatively, place the pizza on a baking pan and bake in a preheated oven at 400 degrees Fahrenheit for 5-7 minutes.
- Once cooked, slice with a pizza cutter and garnish with fresh basil and a sprinkle of red pepper flakes if desired.
Common Mistakes to Avoid
- Overloading the pizza with toppings can cause sogginess.
- Not preheating your air fryer or oven may lead to uneven cooking.
- Forgetting to leave some crust uncovered—ensure the edges get that perfect crisp.
Pro Tips
- Experiment with various sauces for unique flavors.
- Use shredded cheese from blocks rather than pre-shredded varieties for better melting.
- Remember to watch the pizza closely as cooking times may vary based on your air fryer model or oven temperature.
Serving, Storage & Freezer Tips
How to Serve Pita Pizza: Pita Pizza is perfect as a quick meal or as a fun appetizer for parties. Cut into bite-sized pieces and serve with a variety of dipping sauces for a finger-food experience.
How to Store Pita Pizza: Store any leftovers in an airtight container in the refrigerator for up to three days. When reheating, use the air fryer or oven to retain crunchiness.
Can You Freeze Pita Pizza? Yes! Assemble your Pita Pizza without baking and freeze it. Wrap it tightly in plastic wrap and then foil. When ready to enjoy, bake directly from frozen, adding a few extra minutes to the cooking time.
Looking back, every time I create a Pita Pizza, I’m reminded of those tightly packed evenings where a simple meal made all the difference. Cooking shouldn’t be a chore; it should be a joy that brings families together, even if it’s just for a few minutes in the kitchen.
FAQ SECTION
1. Can I use whole wheat pita bread for this recipe? Yes! Whole wheat pita adds a nutritious twist to your Pita Pizza and complements the toppings beautifully.
2. What are some alternative toppings for Pita Pizza? Feel free to experiment! Some great alternatives include grilled chicken, sautéed mushrooms, fresh spinach, or even pineapple for a sweet touch.
3. How do I prevent my pita from becoming soggy? Ensure you don’t over-sauce the pita and place it in a preheated air fryer or oven to achieve that desired crispness.
4. Can I make Pita Pizza in the oven without an air fryer? Absolutely! Simply bake your assembled Pita Pizza on a baking sheet at 400 degrees Fahrenheit for 5-7 minutes or until the cheese is bubbly and golden.
In conclusion, Pita Pizza is the ideal meal solution for busy nights and spontaneous gatherings. This easy, customizable dish not only satisfies hunger but also sparks creativity in the kitchen. If this recipe reminds you of someone you love, share it with them. Your memories keep recipes alive. Embrace the joy of cooking with Pita Pizza, and make it a delightful part of your family’s culinary tradition!

Pita Pizza
Ingredients
Method
- Spread approximately 2 tablespoons of marinara sauce evenly on top of one pita bread.
- Sprinkle about ½ cup of shredded mozzarella cheese over the sauce.
- Arrange pepperoni slices on top and add any additional toppings you desire.
- Place the assembled pita pizza in the air fryer basket and set it to cook at 375°F for 5-6 minutes until cheese is bubbling and edges are golden, or bake on a baking pan in a preheated oven at 400°F for 5-7 minutes.
- Once cooked, slice with a pizza cutter and garnish with fresh basil and a sprinkle of red pepper flakes if desired.