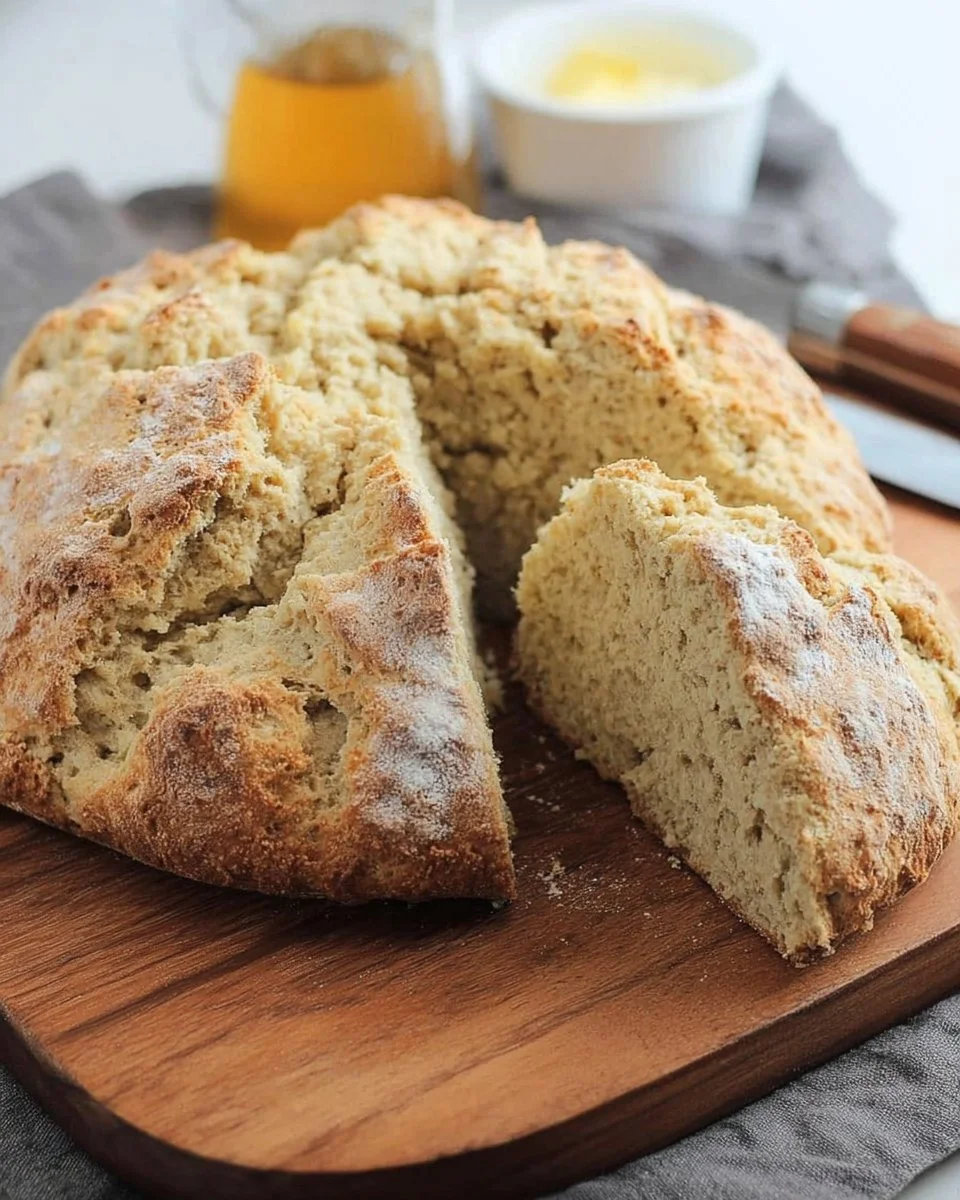
Irish Soda Bread
In a world where family dinners often feel rushed and health-conscious choices become difficult to maintain, finding a recipe that balances time, taste, and nutrition can feel like an uphill battle. You want something nourishing that brings everyone together, yet you’re juggling the demands of work, school, and life. That’s where Irish Soda Bread comes into play—a warm, inviting solution that encapsulates comfort while aligning with your healthy lifestyle goals. This isn’t just any Irish Soda Bread; this is a healthy, protein-packed version designed for busy families and health-conscious eaters.
Imagine coming home after a hectic day, your mind racing with to-do lists and tasks yet to be tackled. The kitchen can feel like the last place you want to enter. But let me share a moment from my own life: I remember a day when I returned from work feeling drained, but the aroma of freshly baked Irish Soda Bread wafting through the air transformed my fatigue into comfort. I quickly threw together this simple recipe and baked a loaf, breathing in the earthy notes of flour and baking soda. It was a unifying moment, my family gathering around the table as we sampled warm bread together. This light and airy bread became not just a dish, but a cherished memory.
So, what makes Irish Soda Bread such a beloved choice? First, it’s simplicity—perfect for home cooks navigating tight schedules. The bread’s soft texture, combined with its slightly nutty flavor, is what makes it both comforting and versatile. Interestingly, this version supports a healthy lifestyle, allowing you to enjoy a piece without guilt when you’re navigating your nutrition goals. It’s an easy addition to any meal plan, offering a sense of indulgence without the burden of unnecessary calories.
Quick Answer: The secret to perfect Irish Soda Bread is how you handle the dough—minimal kneading is key for a tender loaf.
Ingredients, Substitutions & Foolproof Steps
Flour (4 cups) — The heart of the bread, giving it structure; whole wheat flour can boost your fiber intake.
Sugar (4 tablespoons) — Adds a hint of sweetness; consider using honey for a natural alternative.
Baking Soda (1 teaspoon) — The leavening agent, responsible for the bread’s rise; ensure it’s fresh for best results.
Baking Powder (1 tablespoon) — Complementing the baking soda, it adds lightness; a gluten-free version can be used if required.
Salt (1/2 teaspoon) — Enhances flavor; sea salt offers a delightful crunch.
Butter (1/2 cup softened and 1/4 cup melted) — Provides richness; coconut oil is a dairy-free alternative.
Buttermilk (1 and 1/4 cups) — Contributes moisture and tenderness; use a milk-vinegar mixture for a dairy-free option.
Egg (1) — Binds the ingredients together; a flax egg can be employed for a vegan approach.
Directions / Steps
Preheat your oven to 375°F (190°C). Set the scene for deliciousness as the oven warms up, filling your kitchen with anticipation.
Grease a baking sheet. Use the butter wrapper for easy greasing; this gives a little extra flavor in the end.
Mix dry ingredients together. In a large bowl, combine the flour, sugar, baking soda, baking powder, and salt. Stir until well blended for an even texture.
Combine wet ingredients. Add 1/2 cup softened butter, 1 cup buttermilk, and the egg to the dry mixture, stirring until everything is just incorporated—overmixing can lead to a denser bread.
Prepare your work surface. Lightly flour your countertop to prevent sticking; this step invites you to delve into your baking with confidence.
Knead the dough gently. Turn out the dough onto the floured surface and knead it briefly, just until it comes together—remember, tender bread is achieved through gentle handling.
Shape the dough. Form the dough into a round loaf and place it on the prepared baking sheet; envision the family sharing this warm creation.
Whisk butter and buttermilk. In a small bowl, mix together the remaining melted butter and buttermilk for brushing.
Brush the loaf. Generously coat the top with the butter mixture; this adds a tantalizing shine and flavor.
Cut an X on top. Use a sharp knife to create a cross; this allows steam to escape while baking, giving your loaf a beautiful rise.
Bake for 45 minutes. Place the bread in the oven; your kitchen will fill with a warm, inviting aroma. Check for doneness by inserting a toothpick—when it comes out clean, it’s ready.
Brush again while baking. Every 15 minutes, brush with the buttermilk mixture for added moisture and richness; your attention to detail pays off in the final loaf.
Common Mistakes to Avoid
- Over-kneading. Avoid tough bread by only mixing until just combined.
- Old ingredients. Ensure your baking soda and powder are fresh for best rise; stale ingredients can ruin the recipe.
- Not preheating. Skipping this step means uneven baking. Always preheat to give your bread a proper start.
- Not using enough buttermilk. Insufficient liquid leads to a dry texture; trust the recipe amounts for best results.
Pro Tips
- Use room temperature ingredients for effortless blending.
- For a twist, add herbs or cheese for extra flavor dimensions.
- Keep a close eye on the bread during the final minutes, as ovens can vary.

Serving, Storage & Freezer Tips
How to Serve Irish Soda Bread: Serve warm with butter, jams, or even as an accompaniment to soups and salads; it’s a versatile treat.
How to Store Irish Soda Bread: Keep in an airtight container for up to three days at room temperature; consider wrapping it if you prefer to maintain crispiness.
Can You Freeze Irish Soda Bread? Absolutely! Wrap it tightly and freeze for up to three months; thaw overnight in the refrigerator before enjoying.
This hearty bread can be perfect for meal prep, making it a delightful addition to your weekly lineup. Whether gracing your weekend brunch table or sharing with friends over a warm gathering, Irish Soda Bread offers a simple way to connect and create memories.
FAQ Section
Can I make Irish Soda Bread gluten-free?
Yes! Substitute a gluten-free flour blend for a wonderful gluten-free variation that maintains the characteristic taste and texture.
What makes Irish Soda Bread different from regular bread?
Unlike traditional yeast breads, Irish Soda Bread relies on baking soda and baking powder for leavening, giving it a unique texture that’s denser yet deliciously soft.
How can I vary the flavors in Irish Soda Bread?
You can easily customize it by adding ingredients like raisins, herbs, or spices. Feel free to get creative and adapt to your family’s taste preferences!
Is Irish Soda Bread healthy?
This recipe can indeed align with a healthy lifestyle by using wholesome ingredients. With a good balance of carbs and fats, it can be part of a macro-friendly diet.
In conclusion, creating a loaf of Irish Soda Bread is more than just baking; it’s about crafting connections and heartwarming moments in your home. This simple recipe lends itself beautifully to family gatherings, meal prep, or a cozy treat at the end of a long day. Each bite offers not just sustenance but nostalgia and comfort.
“If this recipe reminds you of someone you love, share it with them. Your memories keep recipes alive.”

Irish Soda Bread
Ingredients
Method
- Preheat your oven to 375°F (190°C).
- Grease a baking sheet using the butter wrapper for easy greasing.
- In a large bowl, combine the flour, sugar, baking soda, baking powder, and salt. Stir until well blended.
- Add 1/2 cup softened butter, 1 cup buttermilk, and the egg to the dry mixture, stirring until just incorporated.
- Lightly flour your countertop to prevent sticking.
- Turn out the dough onto the floured surface and knead it briefly.
- Form the dough into a round loaf and place it on the prepared baking sheet.
- In a small bowl, mix together the remaining melted butter and buttermilk for brushing.
- Generously coat the top of the loaf with the butter mixture.
- Use a sharp knife to cut an X on top to allow steam to escape.
- Bake for 45 minutes, checking for doneness with a toothpick.
- Every 15 minutes, brush with the buttermilk mixture for added moisture.