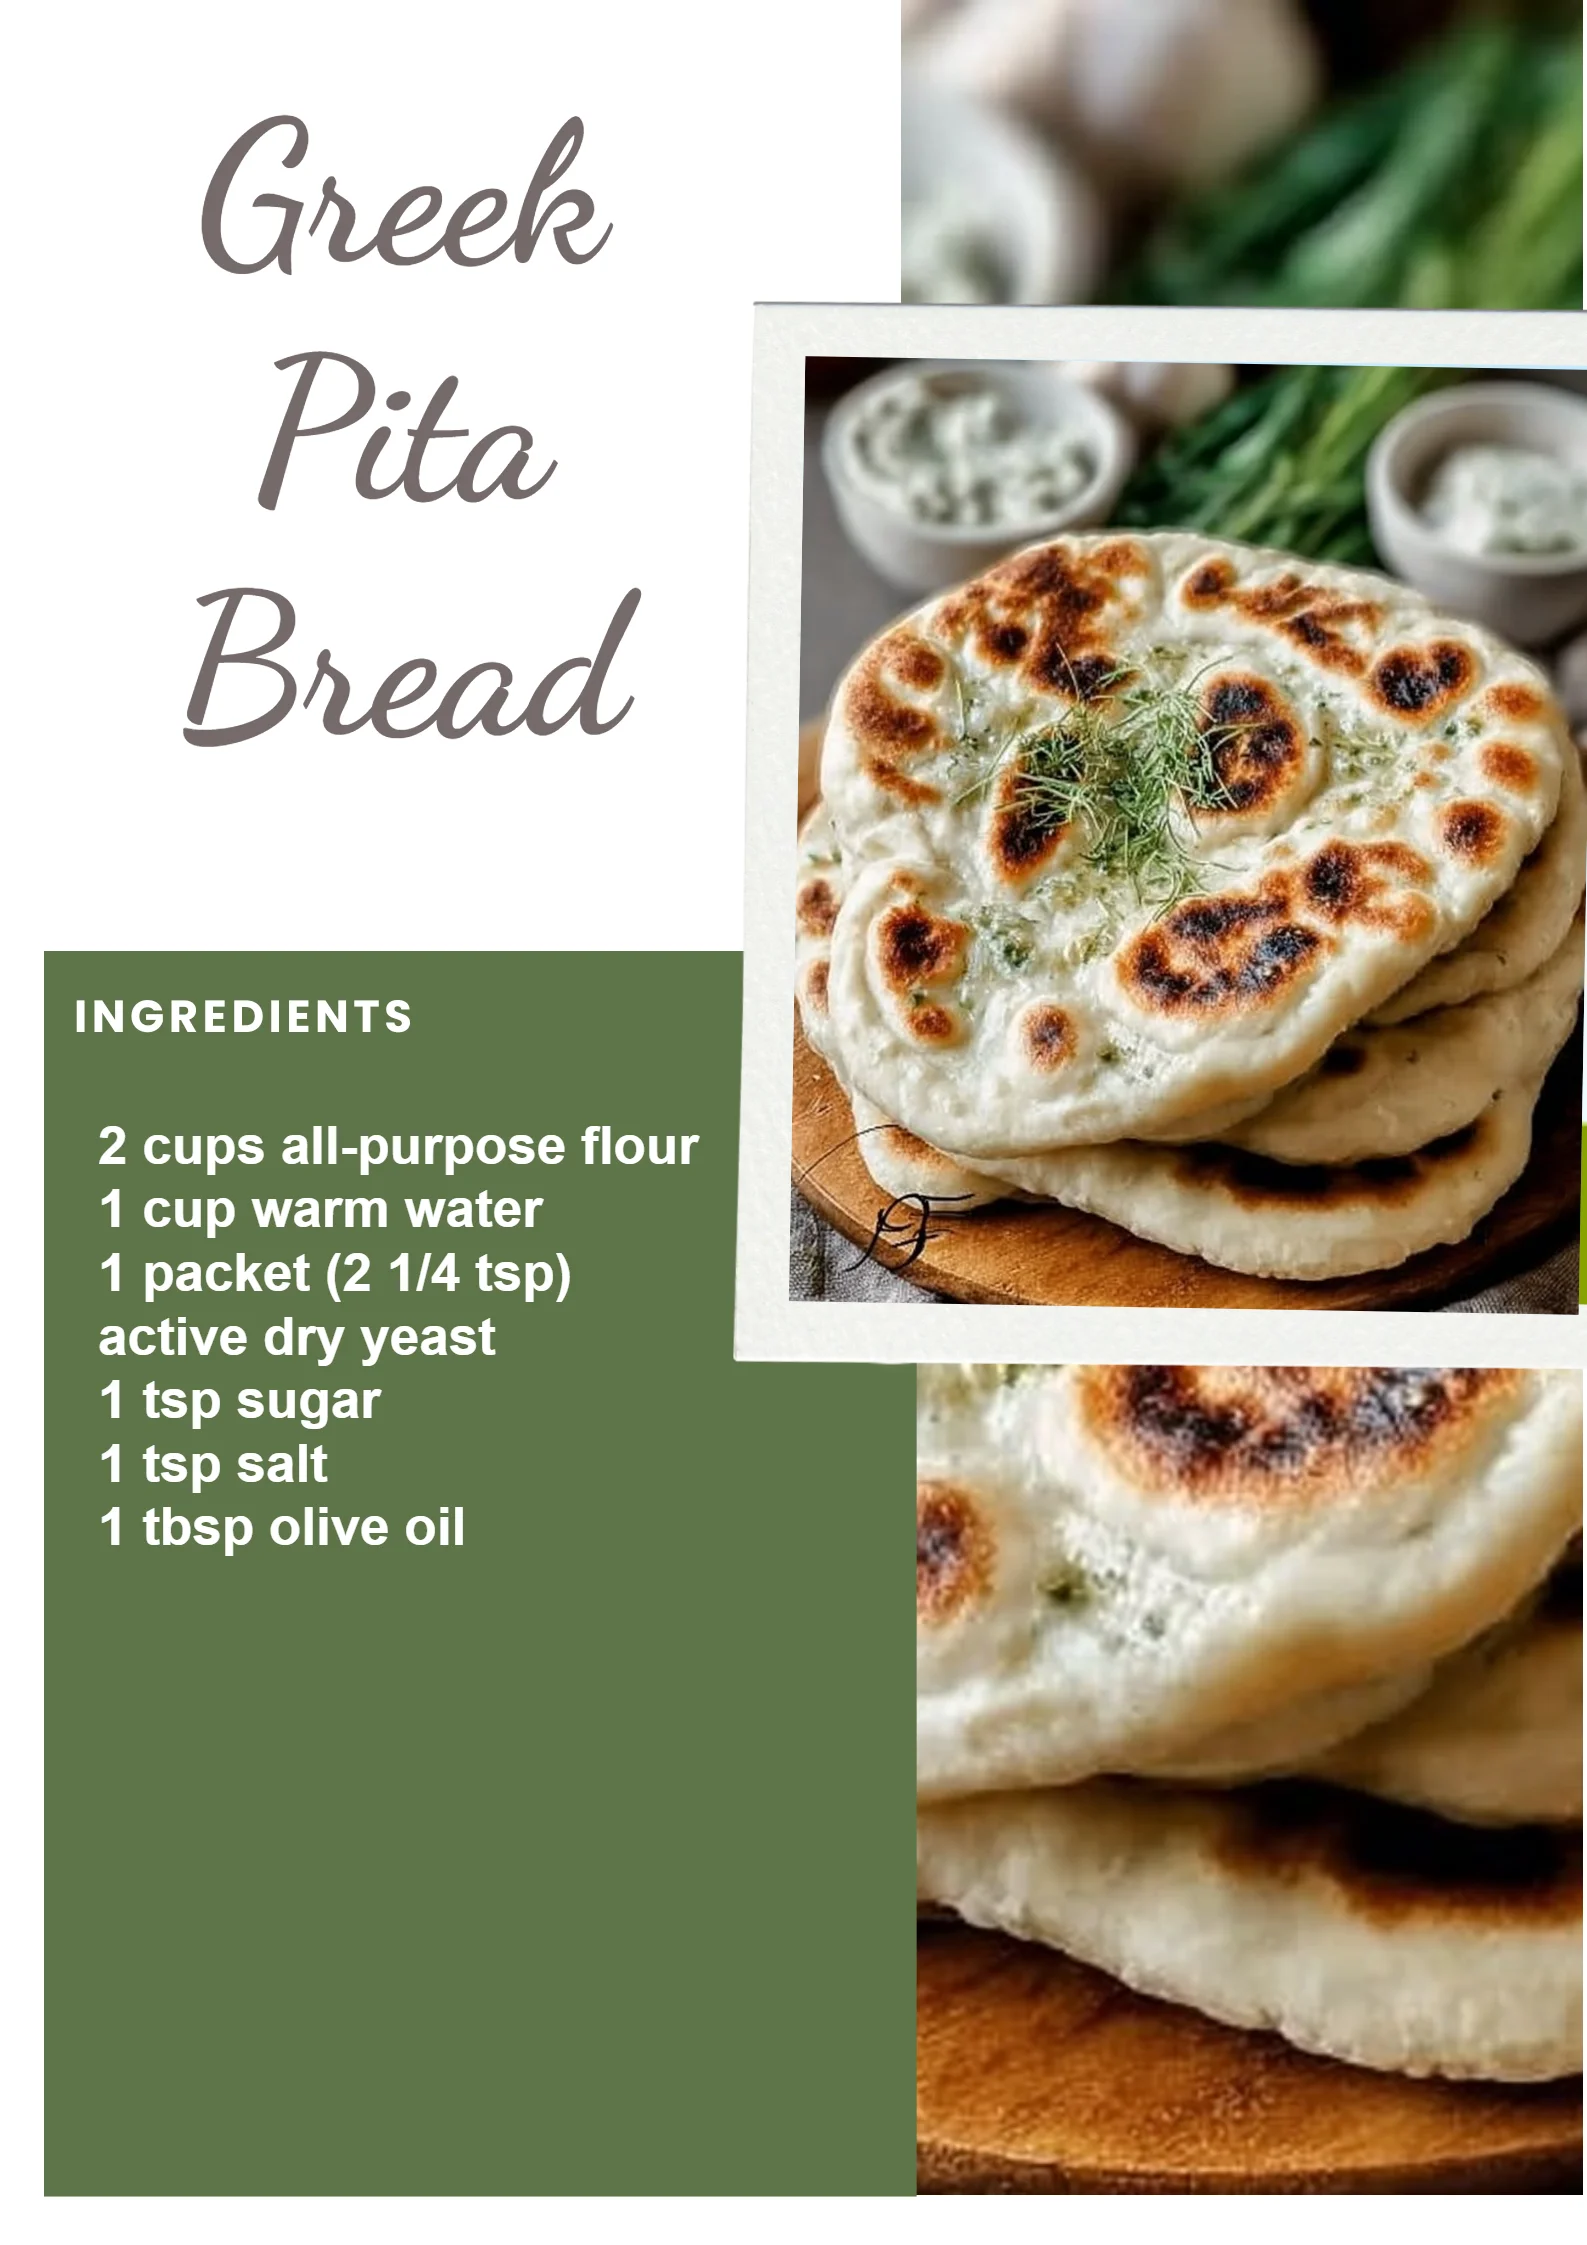
Greek Pita Bread
Greek Pita Bread
Making dinner can often feel overwhelming, especially when trying to meet the diverse tastes and dietary needs of a family. Whether you’re sticking to a meal plan, aiming for something budget-friendly, or simply trying to fight off the dreaded cooking fatigue, having a go-to recipe can be a lifesaver. Enter Greek Pita Bread—this delightful, protein-packed bread brings the warmth of Mediterranean cuisine to your family table while being incredibly versatile. If you’ve ever felt stuck in a cooking rut, this Greek Pita Bread recipe is just what you need to break free and get back to enjoying the art of cooking.
Kitchen Frustration That Makes This Recipe a Lifesaver
We’ve all been there: the clock is ticking, you’re staring at a fridge full of unexciting ingredients, and the family is expecting dinner soon. With busy schedules and constant meal prep, the joy of cooking can quickly dwindle, leaving many of us in a jam. Greek Pita Bread provides a warm, comforting solution that allows you to satisfy hunger while keeping calories in check.
This recipe’s beauty lies in its ability to fit seamlessly into your meal plan. Not only is it easy on the wallet, but it also makes a fantastic canvas for a multitude of dishes—from classic gyros to Mediterranean-inspired dips and spreads. Plus, folding a warm pita around fresh veggies or leftover meats transforms even the simplest ingredients into something special. So, when you’re feeling the kitchen blues, remember this Greek Pita Bread recipe, and let it inspire creativity in your family meals.
Why This Greek Pita Bread Works So Well
Quick Answer: This Greek Pita Bread is made with minimal ingredients, creating a fluffy, soft texture that’s perfect for wraps or dipping, while remaining heart-healthy and budget-friendly.
The magic of Greek Pita Bread is in its simplicity and the memories it evokes. The delightful softness and slight chewiness of this bread make it an essential part of countless meals. The ingredient profile—just flour, water, yeast, and olive oil—is both straightforward and nourishing. This recipe leans into your healthy lifestyle, offering a meal that’s both macro-balanced and calorie-conscious.
Whether you’re wrapping up a nourishing veggie-packed lunch or serving it as part of a cozy family dinner, this Greek Pita Bread elevates any dish. It’s a kid-friendly option that encourages even the pickiest eaters to enjoy their meals.
Ingredients, Substitutions & Foolproof Tips
- 2 cups all-purpose flour: Acts as the base of your pita, creating that classic chewy texture.
- 1 cup warm water: Essential for activating the yeast and hydrating the flour.
- 1 packet (2 1/4 tsp) active dry yeast: The key ingredient that allows the dough to rise and become fluffy.
- 1 tsp sugar: Helps feed the yeast and aids in achieving a golden-brown crust.
- 1 tsp salt: Enhances the flavor of the dough.
- 1 tbsp olive oil: Adds richness and moisture to the pita.
Substitutions: You can use whole wheat flour for a healthier spin, and if you’re gluten-free, look for a suitable all-purpose gluten-free flour mix.
Foolproof Tip: Ensure your water is warm, not hot, to keep the yeast healthy and active.
Step-by-Step Directions
- Combine yeast mixture: In a bowl, combine warm water and sugar, then sprinkle the yeast on top. Let it sit for 5-10 minutes until frothy.
- Mix dry ingredients: In a large mixing bowl, combine flour and salt. Create a well in the center, where you’ll add the yeast mixture and olive oil.
- Form the dough: Stir the mixture until a dough forms. Knead on a floured surface for about 5 minutes until smooth.
- Let it rise: Place your dough in a greased bowl, cover it, and let it rise for 1 hour, or until it doubles in size.
- Preheat the oven: Preheat your oven to 475°F (245°C) to ensure a good baking environment for your pitas.
- Shape the dough: Divide the risen dough into equal portions and roll each into a flat disc, making sure they’re about 1/4 inch thick.
- Bake: Place the discs on a hot baking stone or sheet and bake for 5-7 minutes until puffy and lightly browned.
- Cool before serving: Remove from the oven and allow the pitas to cool slightly before serving them to your family.
Common Mistakes to Avoid & Pro Tips
Common Mistakes:
- Using cold water: This will not activate the yeast properly.
- Over-kneading: This can result in tough bread. Knead just until smooth.
- Skipping the rising step: Rushing through this step will lead to dense pitas.
Pro Tips:
- Experiment with adding herbs or spices to the dough for added flavor.
- Keep your oven door closed during baking; this ensures the pitas puff up properly.
- Serve warm with olive oil for dipping for an easy appetizer.
Serving, Storage & Freezer Guide
How to Serve Greek Pita Bread
Greek Pita Bread is incredibly versatile. Serve it alongside various Mediterranean dishes such as hummus, tzatziki, or as a base for grilled meats and veggies. It’s also perfect stuffed with fresh salads or cold cuts for a nutritious lunch.
How to Store Greek Pita Bread
Once your pitas are cooled, store them in an airtight container to keep them fresh. Ideally, you should consume them within a few days. If you notice them going stale, a quick refresh in the oven for a minute or two will bring back their delicious softness.
Can You Freeze Greek Pita Bread?
Absolutely! Allow your pitas to cool completely, then stack them with parchment paper in between each one to prevent sticking. Seal them in a freezer-safe container or bag. They can be stored for up to three months. When you’re ready to enjoy them, simply thaw at room temperature or warm in the oven.

Frequently Asked Questions
What can I use Greek Pita Bread for besides sandwiches?
Greek Pita Bread is fantastic for dipping and can be cut into triangles for chips, ideal for pairing with dips like salsa, guacamole, or spinach artichoke dip.
Can I make this recipe without yeast?
To achieve that traditional pita texture, yeast is vital. However, you could experiment with baking powder for a quicker version, but the texture will differ.
How can I add flavor to my pita bread?
Feel free to mix in dried herbs such as oregano, garlic powder, or sesame seeds into the dough for a unique twist on traditional Greek Pita.
How do I ensure my pita puffs up?
Make sure your oven is fully preheated before baking and avoid opening the door while they’re baking to maintain heat.
Conclusion
In conclusion, Greek Pita Bread not only fills your kitchen with delightful aromas but also serves as a staple that can simplify your mealtime routines while appealing to everyone in the family. It embodies comfort and nostalgia, connecting generations through food. If this recipe reminds you of someone you love, share it with them. Your memories keep recipes alive.

Greek Pita Bread
Ingredients
Method
- In a bowl, combine warm water and sugar, then sprinkle the yeast on top. Let it sit for 5-10 minutes until frothy.
- In a large mixing bowl, combine flour and salt. Create a well in the center, where you’ll add the yeast mixture and olive oil.
- Stir the mixture until a dough forms. Knead on a floured surface for about 5 minutes until smooth.
- Place your dough in a greased bowl, cover it, and let it rise for 1 hour, or until it doubles in size.
- Preheat your oven to 475°F (245°C).
- Divide the risen dough into equal portions and roll each into a flat disc, making sure they’re about 1/4 inch thick.
- Place the discs on a hot baking stone or sheet and bake for 5-7 minutes until puffy and lightly browned.
- Remove from the oven and allow the pitas to cool slightly before serving.