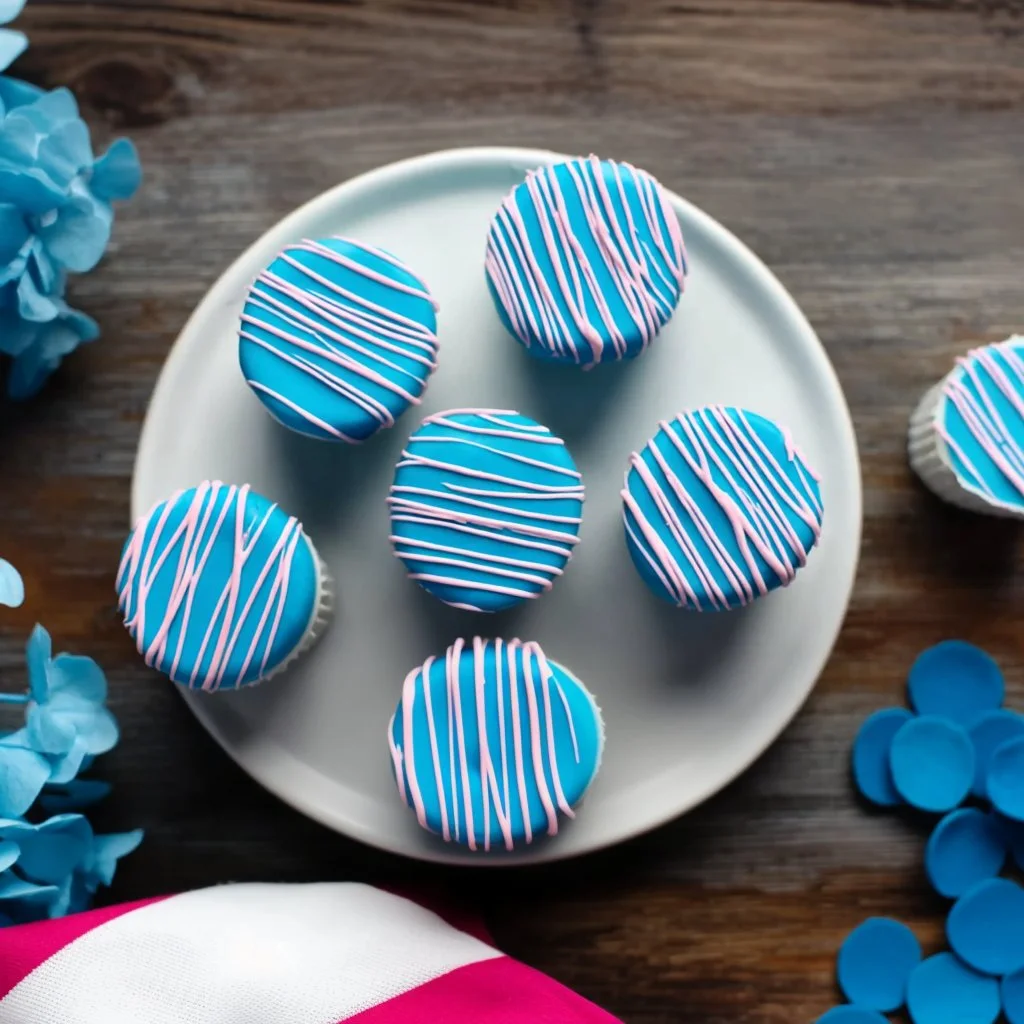
When memories are made in the kitchen, they often start with a simple recipe—and there’s something irresistibly charming about cake pops. These delightful bites of sweetness have the power to brighten any gathering, transforming a regular day into a celebration. Imagine the smiles on the faces of your loved ones when they take their first bite of these irresistible blue cake pops. But if you’re like many home cooks, you might have faced challenges when creating cake pops from scratch. Finding the perfect balance of texture, flavor, and visual appeal can sometimes be overwhelming. Fear not! This article is here to guide you through each step of the process, ensuring that your blue cake pops turn out deliciously every time.
Why Blue Cake Pops? A Baking Journey of Compassion
Have you ever poured your heart and soul into a baking project only to watch it flop? We’re all guilty of feeling defeated when recipes don’t quite match our expectations. I remember my first attempt at making cake pops. I envisioned a colorful, fun dessert; instead, I crafted a sad pile of crumbled cake. The worst part? My kids, with those big, hopeful eyes, just stared at the kitchen disaster.
Those moments can be disheartening, but they taught me an important lesson: baking is more than ingredients and instructions—it’s about connection. That’s why I am so excited to share this recipe for blue cake pops. This vibrant treat reminds us of joy, celebration, and pure fun. If you’re crafting these for a birthday party, holiday gathering, or simply as a sweet treat for your family, these blue cake pops are sure to create positive memories.
If you want to start your culinary journey with a comforting dish, check out our Peanut Butter Chicken Recipe for a warm, nostalgic heartwarming meal.
What Makes Blue Cake Pops So Special? Understanding the Craft
So why are blue cake pops such a hit? The rich color alone makes them visually appealing, enticing both kids and adults. But that’s not all—flavor plays a big role too. Using a box of blue cake mix provides that stunning hue while ensuring that you achieve moist, tender cake effortlessly.
For those with dietary restrictions, you can swap out traditional ingredients for gluten-free or dairy-free options without compromising taste. Think of using a gluten-free cake mix and plant-based frosting—it’s just as delightful and offers everyone a chance to indulge.
Dividing this delicious cake mixture into personalized pops empowers creativity. Decorating them with sprinkles adds that extra touch of fun and excitement!
Quick Answer: The secret to perfect Blue Cake Pops is the technique of crumbling the cake and mixing it with frosting to ensure that they are moist and flavorful.
For more delightful creations, you might be interested in some Gluten-Free and Dairy-Free Breakfast Ideas or the Cinnamon Roll Cheesecake that combines two beloved treats.
Ingredients, Substitutions & Foolproof Steps for Blue Cake Pops
- 1 box of blue cake mix — Provides an easy base and gorgeous color; choose gluten-free if needed.
- 1 cup of water — This hydrates the cake mix for a fluffy texture.
- 1/2 cup of vegetable oil — Creates moisture; can be substituted with melted coconut oil for a different flavor.
- 3 large eggs — Binds the mixture; use flax eggs for a vegan alternative.
- 1 tub of frosting (blue or vanilla flavor) — Adds sweetness and moisture; homemade frosting gives a personal touch.
- 1 package of candy melts (blue or white) — Perfect for coating; feel free to use chocolate melts if desired.
- Cake pop sticks — Essential for structure and serving.
- Sprinkles (optional) — For that extra pop of color!
Directions / Steps:
- Preheat the oven according to the cake mix box instructions. Prepare a cake pan.
- In a mixing bowl, combine the cake mix, water, vegetable oil, and eggs. Mix until smooth.
- Pour the mixture into the prepared pan and bake as per the instructions on the cake mix box.
- Once baked, let the cake cool completely.
- Crumble the cake into a large bowl and mix in the frosting until well combined.
- Form the mixture into small balls and place them on a baking sheet.
- Freeze the cake balls for at least 30 minutes.
- Melt the candy melts in a microwave or double boiler.
- Dip the end of each cake pop stick into the melted candy melts and insert it into each cake ball.
- Dip each cake pop in the melted candy melts, coating completely.
- Decorate with sprinkles if desired and let them harden.
- Enjoy your blue cake pops!
Common Mistakes to Avoid:
- Not Allowing the Cake to Cool Completely: This can lead to a gooey mess when crumbling.
- Over-Melting Candy Melts: Find the right balance in your microwave to avoid burning them.
- Skipping the Freezing Step: Chilling cake balls prevents them from falling off the sticks when dipped.
Pro Tips:
- Use a small cookie scoop for uniform pops.
- Experiment with flavors in your cake mix by adding spices or extracts.
- Let your creativity shine during decoration!
Nutrition Highlights Table:
NutrientPer Serving Protein7g Carbs12g Fat6g Feeling inspired by how easy these blue cake pops can be? Check out our Bento Cakes for a personalized cake experience.
Serving, Storage & Freezer Tips:
How to Serve Blue Cake Pops
Serve blue cake pops at room temperature on a fun platter. They make for great party favors or a delightful treat for movie nights at home. Add personal touches by providing various types of sprinkles and toppings.
How to Store Blue Cake Pops
Store your cake pops in an airtight container in the fridge for 3-5 days. They retain their flavor and moisture well, so don’t worry about drying out!
Can You Freeze Blue Cake Pops?
Absolutely! These pops freeze beautifully. Just wrap them individually in cling film and seal them in a ziplock bag for up to three months. Let them thaw at room temperature before serving.
Baking these blue cake pops transports me back to childhood birthdays and carefree times spent with family and friends. Each pop is filled with joyful memories and tastes like sweet nostalgia.
Frequently Asked Questions about Blue Cake Pops
- Can I use a different cake mix flavor? Yes! Feel free to get adventurous with flavors. Just remember that it might alter the color of your cake pops.
- What if my cake pops are too crumbly? This could mean you didn’t incorporate enough frosting. Add a bit more to achieve the desired moisture.
- Can I use chocolate instead of candy melts? Absolutely! Just ensure you temper the chocolate properly for the best results.
- What is the best way to decorate cake pops?
- Beyond sprinkles, you can use edible glitter, drizzle melted chocolate, or even candy eyes for a playful touch.
In Conclusion
These blue cake pops aren’t just a treat; they’re an opportunity to create cherished memories and delicious moments. Whether you’re celebrating a special occasion or wrapping one up as a surprise for a loved one, blue cake pops add a vibrant touch to your dessert table. If this recipe reminds you of someone you love, share it with them. Your memories keep recipes alive.
YOU MAY ALSO LIKE:
- Sweet and Sour Mix: Ultimate Guide to Cocktails
- Cottage Cheese Chips Recipe
- Chicken Tikka Masala Recipe

Blue Cake Pops
Ingredients
Method
- Preheat the oven according to the cake mix box instructions and prepare a cake pan.
- In a mixing bowl, combine the blue cake mix, water, vegetable oil, and eggs. Mix until smooth.
- Pour the mixture into the prepared pan and bake as per the instructions on the cake mix box.
- Once baked, let the cake cool completely.
- Crumble the cooled cake into a large bowl and mix in the frosting until well combined.
- Form the mixture into small balls and place them on a baking sheet.
- Freeze the cake balls for at least 30 minutes.
- Melt the candy melts in a microwave or double boiler.
- Dip the end of each cake pop stick into the melted candy melts and insert it into each cake ball.
- Dip each cake pop in the melted candy melts, coating completely.
- Decorate with sprinkles if desired and let them harden.