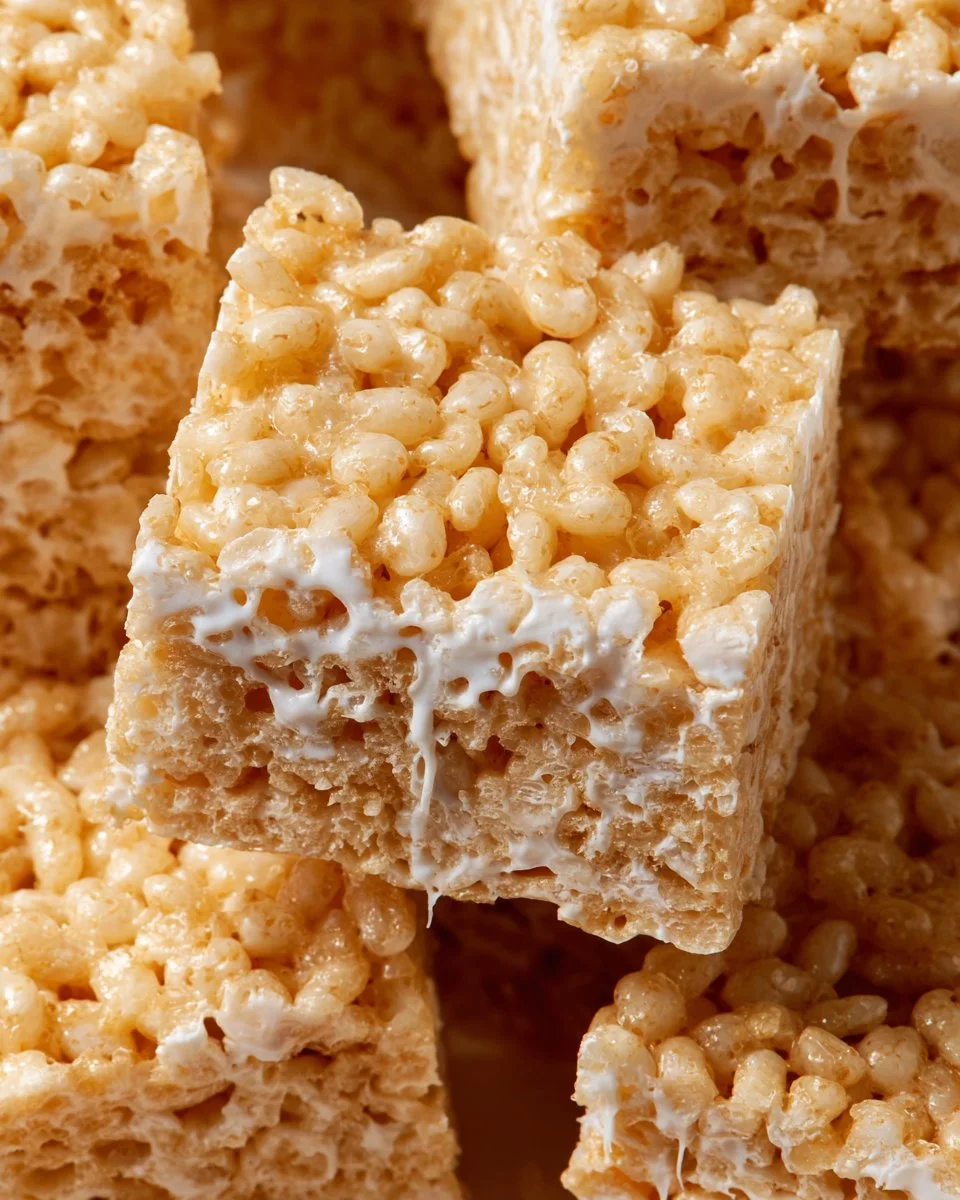
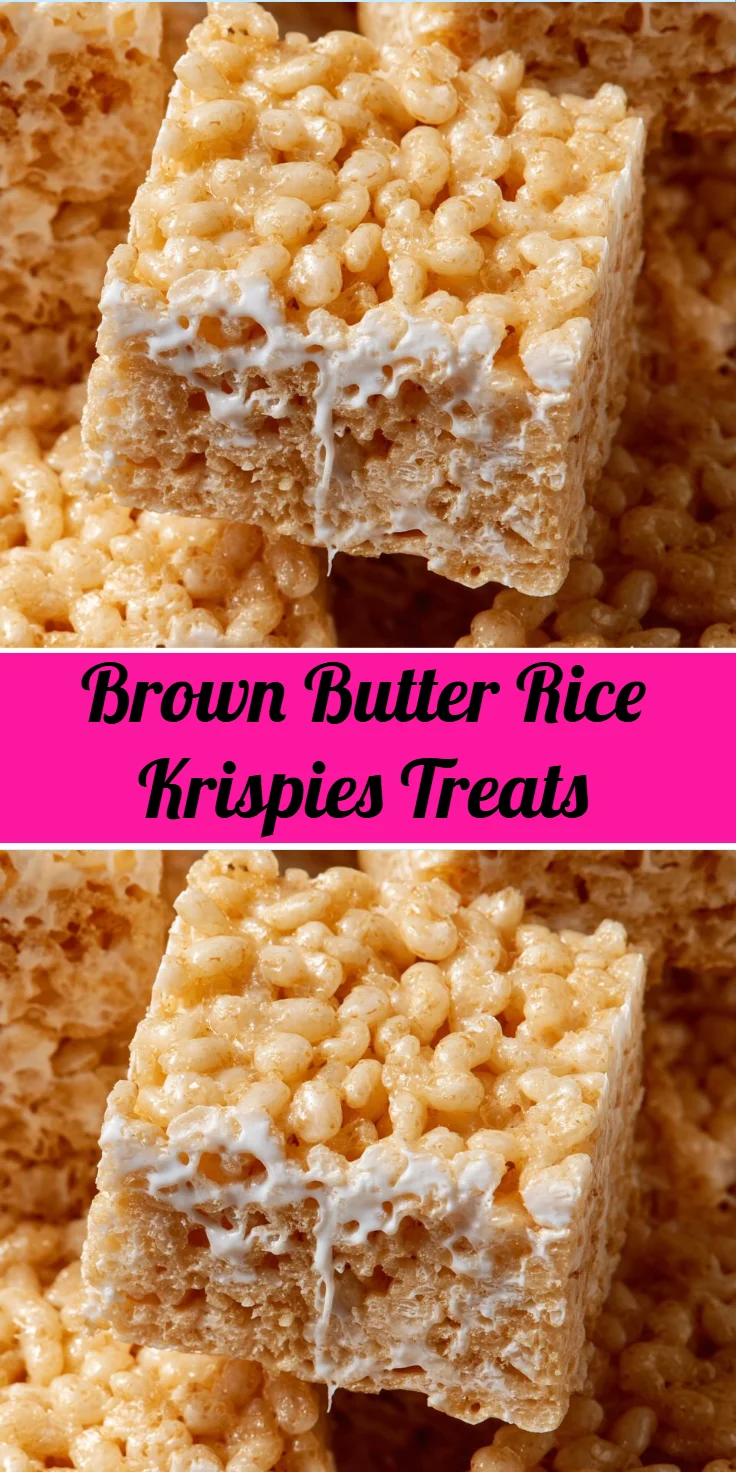
Nothing quite compares to the nostalgic joy of biting into a homemade treat that melts in your mouth. These delightful squares carry the essence of childhood, evoking warm memories of school days and sleepovers. With a luscious blend of creamy butteriness and the satisfying crunch of Rice Krispies, each bite presents a symphony of flavor and texture. The brown butter infuses these treats with a deeper, nuttier taste that elevates them into a comforting dessert that everyone will love. Whether you’re making them for a birthday party, a casual dessert, or simply treating yourself, these indulgent bites are an absolute must-try. Perfectly crispy on the outside and buttery soft on the inside, they are an ideal sweet treat to share—or keep all to yourself. So, gather your ingredients, and let’s embark on a sweet journey that will have you reminiscing and replaying memories with every delightful square you munch on!
Why You’ll Love This Recipe
This recipe is not only an easy and quick option that can be whipped up in no time, but it also brings a delightful twist to a classic snack. The process of browning the butter adds a layer of complexity and richness that transforms the traditional Rice Krispies treat into something extraordinary. With just a few simple ingredients, you can create a delicious dessert that is both comforting and satisfying. It’s a great way to indulge your sweet tooth while allowing everyone to enjoy a familiar favorite. Perfect for school lunches, family gatherings, or as an after-dinner treat, these delightful goodies will disappear as quickly as they’re made. Plus, this recipe is versatile enough to adapt to various tastes and preferences, making it a go-to favorite for any occasion.
What Makes This Recipe Special
The secret to what makes these treats truly special lies in the brown butter. As the butter is cooked, it undergoes a transformation, developing a deep, nutty flavor that adds depth to the otherwise simple ingredients. This technique takes the classic Rice Krispies treat to an entirely new level, creating a fusion of flavors that delights the senses. The blend of crispy cereal and smooth, melted marshmallows binds together beautifully, forming a perfect union of sweet and salty. Adding a delicate sprinkle of sea salt on top enhances the flavors even more, providing a satisfying contrast to the sweetness. This balance of textures and flavors creates a delicious treat that appeals to both kids and adults alike, ensuring that they are the star of any dessert table!
Ingredients
unsalted butter: The base of the treats, providing richness and a buttery flavor.
mini marshmallows: Melted into a gooey consistency, they help bind the Rice Krispies and add sweetness.
vanilla extract: Enhances the overall flavor with a warm, aromatic hint.
Rice Krispies cereal: Provides the crispy texture and forms the foundation of the treats.
sea salt: Balances the sweetness and adds a hint of savoriness to the dessert.
How to Make Brown Butter Rice Krispies Treats
STEP 1. Prep the baking pan. Line a 9×9 baking pan with parchment paper or grease it with nonstick spray, then set aside.
STEP 2. Brown the butter. In a large pot over medium-low heat, melt your butter, stirring occasionally until the milk solids in the butter turn golden brown.
STEP 3. Mix in the marshmallows. Lower the heat and add 6 cups of the mini marshmallows, stirring continuously until they are fully melted and creamy.
STEP 4. Incorporate the vanilla. Remove the pot from the heat and stir in the vanilla extract for enhanced flavor.
STEP 5. Add Rice Krispies. Pour in the Rice Krispies along with the remaining marshmallows, mixing just until the cereal is well coated.
STEP 6. Transfer to the pan. Carefully move the cereal mixture to the prepared baking pan.
STEP 7. Press down gently. Spray a rubber spatula with nonstick spray and gently press the mixture into an even layer in the pan.
STEP 8. Sprinkle with salt. Add a light sprinkle of sea salt on top for a flavorful contrast.
STEP 9. Cool the treats. Allow the Krispie treats to cool to room temperature to set up properly.
STEP 10. Cut into squares. Once set, remove the treats from the pan and cut them into squares for serving.
Pro Tips
To ensure your Brown Butter Rice Krispies Treats turn out perfectly, consider these pro tips. Use unsalted butter to control the saltiness of your treats; this allows you to adjust the flavor profile to your liking. When browning the butter, keep a close eye on it as it can quickly turn from golden to burnt. For an even richer flavor, use high-quality vanilla extract. To avoid sticking, lightly butter or spray your spatula with nonstick spray when pressing the mixture into the pan. If you find the mixture too sticky to handle, dampen your hands with water or nonstick spray before pressing it down. Taking time to allow the treats to cool will help them set up well and be easier to cut into squares. Lastly, store the treats in an airtight container at room temperature to preserve their crispy texture.
Common Mistakes to Avoid
When making Rice Krispies treats, there are a few common pitfalls to watch out for. One frequent mistake is not allowing the butter to brown sufficiently, which can result in a lack of flavor. Remember to stir the butter continuously while it browns to prevent burning. Another issue is not greasing the pan properly, which can lead to sticking and messy removal. Also, avoid overmixing after adding the Rice Krispies, as this can create a dense mixture rather than a light, airy texture. Be careful not to let the treats cool too long in the pan before cutting, as they can become too firm. Lastly, ensure you store them correctly; exposure to air can make your treats stale and lose their appealing crispiness.
Variations
• Add chocolate chips for a chocolatey twist.
• Swap in peanut butter for a nutty flavor.
• Mix in dried fruit for added sweetness and texture.
• Incorporate different cereal types for a fun combination.
• Drizzle melted chocolate on top for an indulgent finish.
Serving Ideas
These treats are perfect for a variety of occasions! Serve them at birthday parties or bake sales to please a crowd. Consider pairing them with a scoop of vanilla ice cream for a delightful dessert that guests will love. You can also pack them for school lunches, providing a sweet surprise during the day. For holiday celebrations, consider adding festive sprinkles to fit the theme. They also make a great snack for movie nights or family game evenings, offering a simple yet satisfying treat everyone can enjoy!
Meal Prep & Storage
For optimal flavor and texture, enjoy your Brown Butter Rice Krispies Treats fresh when they are made. If you need to prepare them ahead of time, simply store them in an airtight container at room temperature to keep them crispy. They usually last for about a week if kept properly stored. If you live in a humid climate, consider refrigerating them to maintain freshness, but be aware that this might alter their crispness. If you’d like to make them in advance for an upcoming event, prepare the mixture and press it into the pan, then wait to cut them until just before serving for the best eating experience.
FAQs
How do I know when the butter is browned?
You’ll recognize the butter is browned when it turns golden and develops a nutty aroma, with tiny brown specks forming at the bottom.
Can I use regular marshmallows instead of mini marshmallows?
Yes, you can use regular marshmallows; just consider cutting them into smaller pieces to help them melt evenly.
Why did my Rice Krispies treats turn out hard?
Hard treats can happen if too much cereal is added or if the mixture is overcooked. Ensure you follow the ratio and don’t cook beyond melting the marshmallows.
Can I freeze Brown Butter Rice Krispies Treats?
Yes, you can freeze them! Wrap them tightly in plastic film and place them in an airtight container for best results.
What can I do with leftover Rice Krispies treats?
You can crumble them over ice cream, use them in dessert bowls, or even incorporate them into other baked goods for added flavor and texture.
Are there gluten-free options for Rice Krispies?
Yes, you can find gluten-free versions of Rice Krispies; be sure to check the packaging to ensure it fits your dietary needs.
Conclusion
You’ve now unlocked the secret to transforming a classic favorite into an extraordinary treat with a twist. The rich flavor of brown butter elevates these delightful squares into a cherished dessert that’s perfect for any occasion. Indulging in these delights is not just about satisfying your sweet tooth, but also about revisiting joyful memories with every crispy, buttery bite. Whether you’re whipping them up for a gathering or simply enjoying them on a cozy evening at home, these treats are bound to bring smiles all around. Enjoy every moment of baking, sharing, and savoring your freshly made Brown Butter Rice Krispies Treats!

Brown Butter Rice Krispies Treats
Ingredients
Method
- Line a 9x9 baking pan with parchment paper or grease it with nonstick spray, then set aside.
- In a large pot over medium-low heat, melt the unsalted butter, stirring occasionally until the milk solids turn golden brown.
- Lower the heat and add 6 cups of mini marshmallows, stirring continuously until fully melted and creamy.
- Remove the pot from the heat and stir in the vanilla extract.
- Pour in the Rice Krispies along with the remaining marshmallows, mixing until the cereal is well coated.
- Carefully transfer the cereal mixture to the prepared baking pan.
- Spray a rubber spatula with nonstick spray and gently press the mixture into an even layer in the pan.
- Add a light sprinkle of sea salt on top.
- Let the Krispie treats cool to room temperature to set properly.
- Once set, cut the treats into squares for serving.