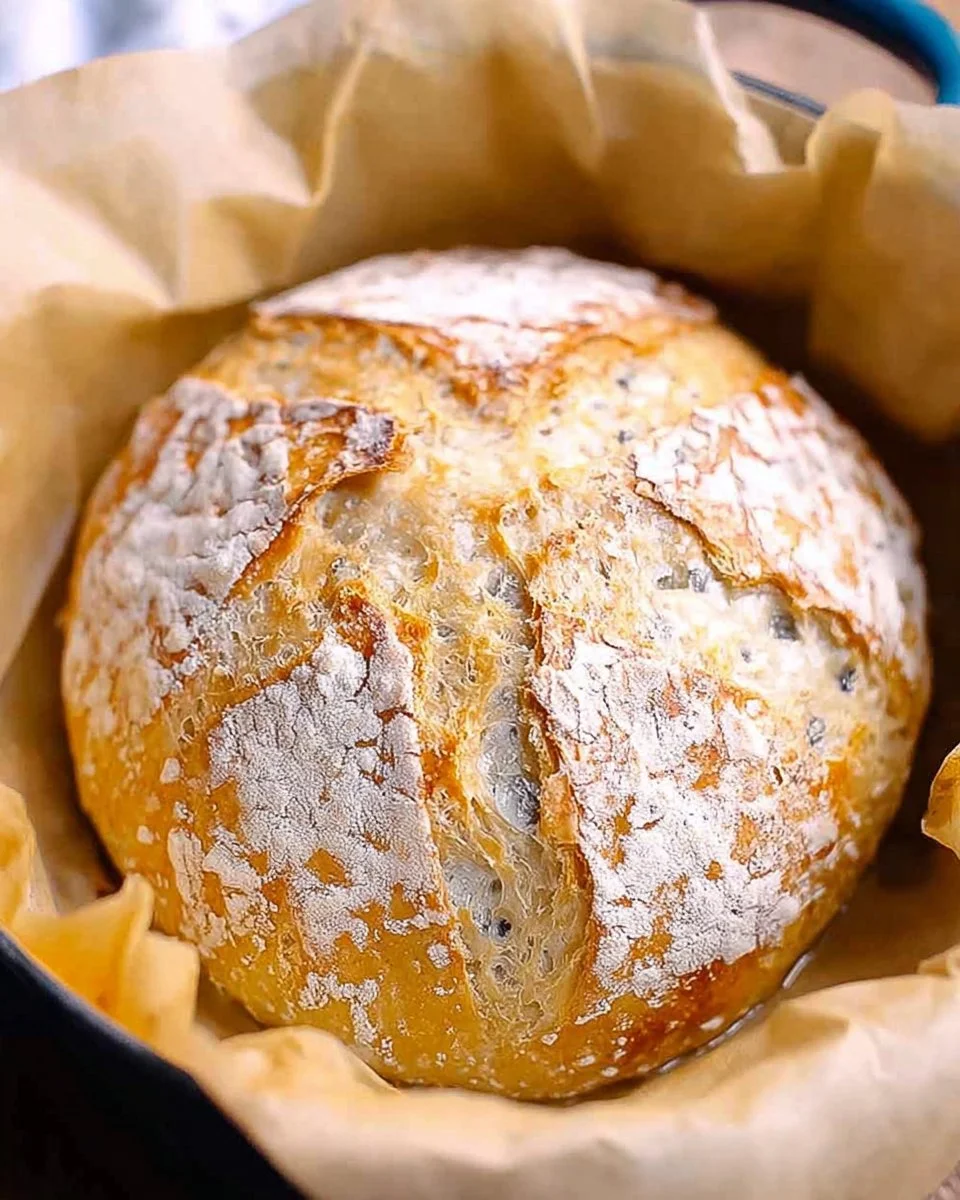
Dutch Oven No Knead Crusty Bread Recipe
There’s nothing quite like a freshly baked loaf of bread, warm from the oven, with a golden crust and a soft, airy interior. The aroma fills your kitchen, inviting everyone to gather around. The Dutch Oven No Knead Crusty Bread Recipe taps into this simple pleasure without demanding much of your time. Perfect for busy families and meal-prep planners, this bread recipe requires minimal effort and yields stunning results. With its incredible crust and hearty flavor, it’s bound to become a favorite in your household. Whether you enjoy it for breakfast, as a side at dinner, or toasted with butter as a snack, this versatile bread fits seamlessly into any meal. Get ready to impress your loved ones with this wonderful homemade bread!
Why You’ll Love Dutch Oven No Knead Crusty Bread
This delightful bread offers an easy way to enjoy homemade flavor without the fuss. Ideal for any busy lifestyle, it’s a convenient addition to your meal prep routine.
The Dutch Oven No Knead Crusty Bread stands out for its wonderful taste and satisfying texture. You won’t believe how simple it is to make a loaf that rivals those from your favorite bakery! Here are some reasons to love it:
- Effortless preparation with no kneading required
- Crunchy crust that delivers an authentic artisan-style experience
- Soft, chewy interior that pairs well with various meals
- Flexible enough for any meal, be it breakfast, lunch, or dinner
- Great for freezing, so you can always have fresh bread on hand
- Engages everyone with the warm, inviting aroma of baking bread

Ingredients for Dutch Oven No Knead Crusty Bread
- All-purpose flour – Forms the structure of the bread.
- Water – Activates the yeast and hydrates the dough.
- Salt – Enhances the flavor and strengthens gluten.
- Yeast – Leavens the bread for a light texture.
Ready to cook? See the recipe card for exact measurements below.
How to Make Dutch Oven No Knead Crusty Bread
Phase 1 – Prep
- In a large mixing bowl, combine the flour, salt, and yeast
- Add water and mix until a shaggy, sticky dough forms.
- Cover the bowl with plastic wrap or a kitchen towel and let it rise at room temperature for 12 to 18 hours.
Phase 2 – Cook
- After the dough has risen, it should be bubbly and doubled in size. Lightly flour a work surface and turn the dough out onto it.
- Shape the dough into a ball and let it rest for about 30 minutes.
- While the dough rests, preheat your oven to 450°F (232°C) and place a Dutch oven inside to heat up for 30 minutes.
- Once heated, carefully remove the Dutch oven and place the dough inside. Cover with the lid and bake for 30 minutes.
- Remove the lid and bake for an additional 15 to 20 minutes or until the bread is golden brown and crusty.
Phase 3 – Serve
- Take the bread out of the Dutch oven and let it cool on a wire rack for at least 30 minutes.
- Slice and serve as desired.
- Enjoy the bread warm or at room temperature with your favorite accompaniments.
Pro Tips for the Best Results
- Use fresh active dry yeast for the best rise.
- Allow the bread to cool completely before slicing to ensure a cleaner cut.
- Experiment with different flours like whole wheat or spelt for various flavors.
- Store the bread wrapped in a kitchen towel to maintain moisture.
- If using a large Dutch oven, consider doubling the recipe for more servings.
- Let the dough rest longer for a more developed flavor.
- Experiment with adding herbs or cheese for varied flavor profiles.
Common Mistakes to Avoid
One common mistake is not letting the dough rise long enough. This can result in dense bread instead of light and airy results. To avoid this, be sure to allow sufficient time for fermentation, ideally overnight.
Another pitfall is overbaking. It can be tempting to leave the bread in the oven to ensure it is cooked through, but this can lead to a dry loaf. Monitor closely during the last few minutes of baking for a perfect crust.
Finally, using too much flour when shaping the loaf can negatively affect the texture. Instead, use minimal flour on your work surface to keep the dough’s hydration and avoid a dry finished loaf.
Recipe Variations
- Incorporate herbs like rosemary or thyme for an aromatic loaf.
- Add cheese such as cheddar or feta for extra flavor.
- Mix in seeds like sesame or poppy for a nutritious crunch.
- Try incorporating olives or sundried tomatoes for a Mediterranean twist.
- For a sweeter variation, fold in dried fruits like cranberries or apricots.
How to Serve Dutch Oven No Knead Crusty Bread
- Pair with soups or stews for a comforting meal.
- Top with butter, garlic, or your favorite spreads.
- Serve alongside salads for a balanced dinner.
Make Ahead & Storage
Can I Meal Prep This?
Yes! This bread is perfect for meal prep. You can prepare the dough ahead and refrigerate it before baking.
Storing Leftovers
Store leftover bread in an airtight container at room temperature for up to 3 days. For longer freshness, wrap in foil or plastic wrap.
Freezing
You can freeze the bread for up to three months. Wrap tightly to maintain texture and avoid freezer burn.
Reheating
For best results, reheat in the oven at 350°F (175°C) for about 10-15 minutes. You may also microwave it on low heat for a few seconds if short on time.

FAQs
Can I use whole wheat flour instead of all-purpose flour?
Yes, but you may need to adjust water content for better texture.
Why is my bread not crusty?
Insufficient heat or not using a covered vessel can affect crust formation.
How long will leftovers last?
Leftovers can stay fresh at room temperature for 3 days.
Can I double the recipe?
Yes, just ensure your Dutch oven can accommodate the larger amount.
This Dutch Oven No Knead Crusty Bread Recipe is an excellent choice for those pursuing a healthy lifestyle without sacrificing flavor. Enjoy the life-changing benefits of homemade bread. Please leave a comment below and rate the recipe after you try it, or explore more related recipes for your meal planning needs!

Dutch Oven No Knead Crusty Bread
Ingredients
Method
- In a large mixing bowl, combine the flour, salt, and yeast.
- Add water and mix until a shaggy, sticky dough forms.
- Cover the bowl with plastic wrap or a kitchen towel and let it rise at room temperature for 12 to 18 hours.
- After the dough has risen, it should be bubbly and doubled in size. Lightly flour a work surface and turn the dough out onto it.
- Shape the dough into a ball and let it rest for about 30 minutes.
- While the dough rests, preheat your oven to 450°F (232°C) and place a Dutch oven inside to heat up for 30 minutes.
- Once heated, carefully remove the Dutch oven and place the dough inside. Cover with the lid and bake for 30 minutes.
- Remove the lid and bake for an additional 15 to 20 minutes or until the bread is golden brown and crusty.
- Take the bread out of the Dutch oven and let it cool on a wire rack for at least 30 minutes.
- Slice and serve as desired. Enjoy warm or at room temperature with your favorite accompaniments.