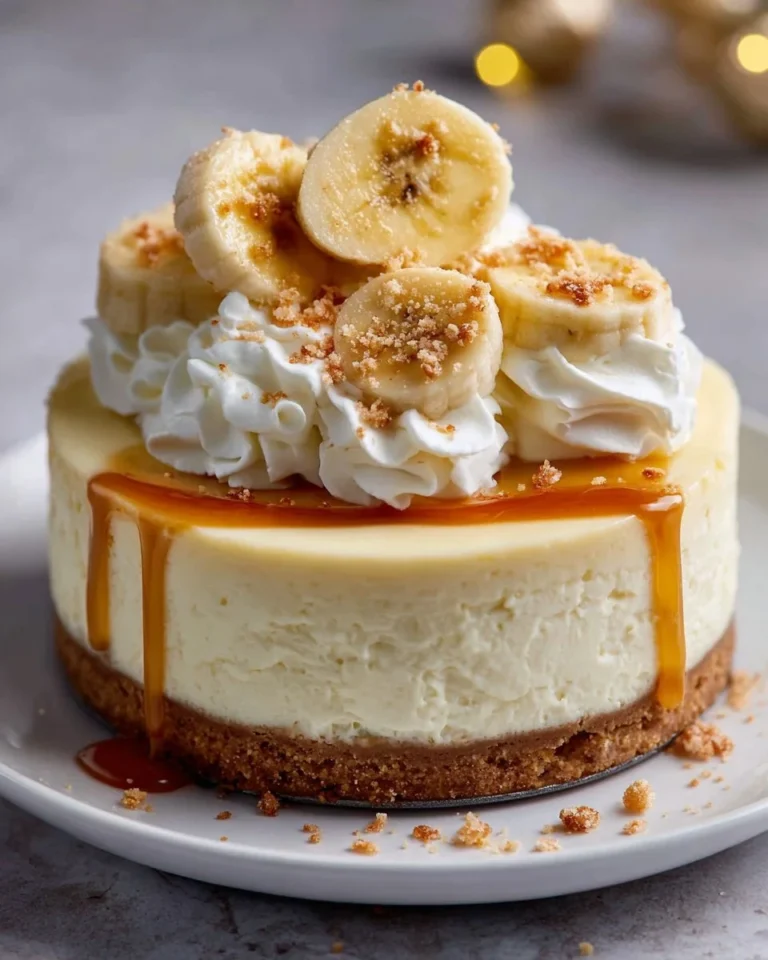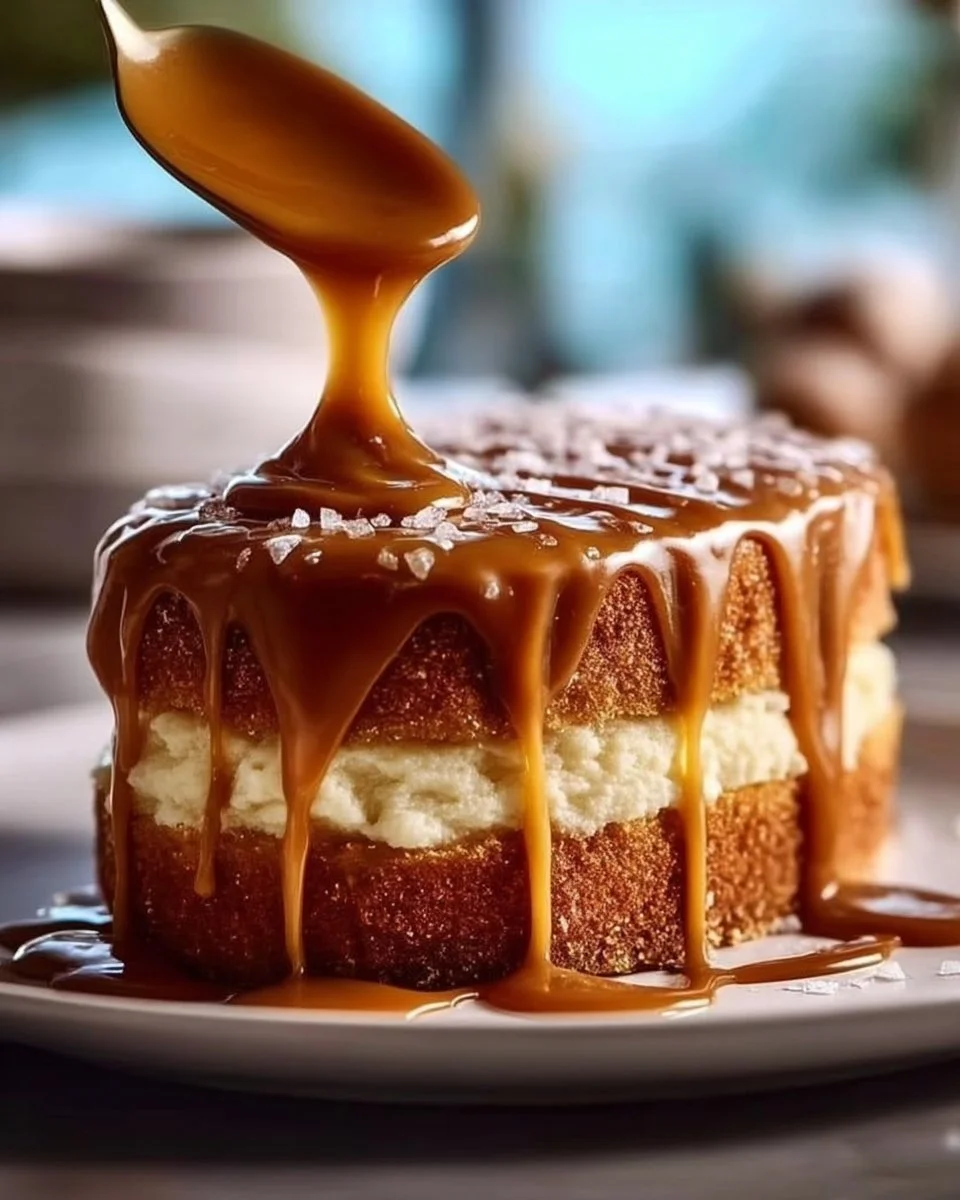
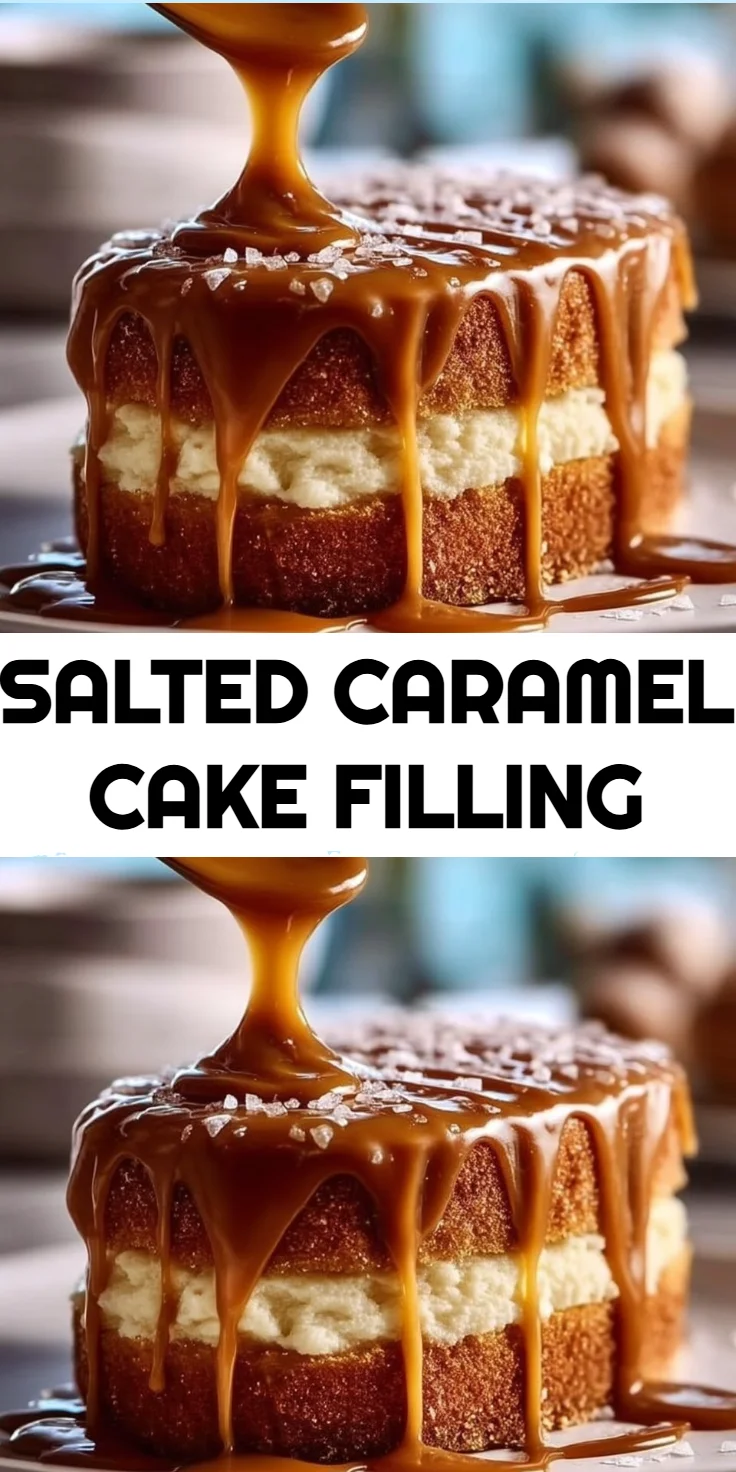
In the hustle of daily life, finding time to create delicious and meaningful family desserts can feel overwhelming. Many of us experience cooking fatigue, often defaulting to easy but less satisfying options. However, this Salted Caramel Cake Filling is the perfect solution, elevating your baking repertoire without breaking your meal plan. With its rich flavor and luxurious texture, this filling transforms any cake into a memory-making experience. It’s time to delight your loved ones with something sweet, calorie-conscious, and nostalgic.
Kitchen Frustration That Makes This Recipe a Lifesaver
Many home bakers face the snag of needing a show-stopping dessert without all the stress. Imagine preparing for a family gathering, only to realize you lack a standout cake filling. This is where the Salted Caramel Cake Filling becomes a lifesaver. Not only is it simple to whip up, but it also offers flexibility for various desserts. One of the best-kept secrets of this filling is its ease; you can have it ready in about 15 minutes! Imagine impressing your guests with a homemade caramel that feels decadent but is also budget-friendly and made from just a few pantry staples. It’s the perfect way to stay on track with your nutrition goals while still treating your family to a delightful dessert.
Why This Salted Caramel Cake Filling Works So Well
Quick Answer: This Salted Caramel Cake Filling is rich, smooth, and indulgent, striking the perfect balance between sweet and salty, making it an unbeatable addition to cakes, cupcakes, or even spooned over ice cream.
The beauty of this Salted Caramel Cake Filling lies in its texture and flavor. The deep amber color of the caramel, developed by melting granulated sugar, creates complexity that perfectly complements the saltiness. Not only does it serve as a luxurious surprise hidden in layers of cake, but it also meets the needs of those managing blood sugar or simply seeking a richer dessert option. Its creamy consistency not only acts as an incredible filling but can also be drizzled as a delicious topping, providing versatility for various dessert scenarios.
Ingredients, Substitutions & Foolproof Tips
- 1 cup granulated sugar: The base for your caramel; watch it closely as it melts for best results.
- 6 tablespoons unsalted butter: Adds creaminess and flavor; ensure it’s at room temperature for easy mixing.
- 1/2 cup heavy cream: Creates a smooth, rich texture; if you’re feeling health-conscious, half and half can be substituted but may alter the creaminess.
- 1 teaspoon sea salt: Enhances the sweetness and rounds out the flavor; adjust to taste based on your preference.
- 1 teaspoon vanilla extract: A flavor booster that adds warmth and depth.
Step-by-Step Directions
- Melt the Sugar: In a saucepan over medium heat, melt the sugar while stirring constantly until it turns a deep amber color. This should take about 5-7 minutes. The stirring helps to ensure even melting and prevents burning.
- Add the Butter: Carefully add the butter to the melted sugar, stirring until it’s completely melted and combined. Be cautious, as the hot sugar can splatter.
- Incorporate Heavy Cream: Gradually add the heavy cream while stirring continuously. Take care, as the mixture will bubble up. This step is crucial for achieving that luscious creamy consistency.
- Mix in Salt and Vanilla: Stir in the sea salt and vanilla extract. This will elevate the flavor profile of your caramel, creating the perfect salted sweetness.
- Cool Before Use: Allow the caramel to cool before using it as a filling for cakes, cupcakes, or desserts. This will thicken the consistency slightly and make it easier to work with.
Common Mistakes to Avoid & Pro Tips
- Mistake: Sugar burning.
- Fix: Keep stirring frequently and adjust your heat when necessary.
- Mistake: Caramel hardening after cooling.
- Fix: Gently reheat with a splash of cream until it returns to a pourable state.
- Pro Tip: Use a heavy-bottomed saucepan for even heating and best results.
- Pro Tip: If you prefer a lighter taste, consider reducing the salt to suit your preference.
Serving, Storage & Freezer Guide
How to Serve Salted Caramel Cake Filling
This Salted Caramel Cake Filling can be used in various desserts. Use it as a layer in your favorite cake, spread it between cupcakes, or drizzle it over brownies for a gourmet touch. It pairs deliciously with chocolate, vanilla, and even pumpkin-flavored desserts, making it a versatile addition to your baking arsenal.
How to Store Salted Caramel Cake Filling
Store leftover Salted Caramel in an airtight container in the refrigerator. It will last for one to two weeks. When you’re ready to use it, simply warm it gently on the stove or in the microwave, stirring until smooth.
Can You Freeze Salted Caramel Cake Filling?
Yes, you can freeze the Salted Caramel Cake Filling. Transfer it to a freezer-safe container, leaving space for expansion, and it can be frozen for up to three months. Thaw overnight in the fridge and warm before using.

Frequently Asked Questions
How do I know when the sugar has melted properly?
You should watch for a change in color to a deep amber shade. This indicates that the sugars have fully melted and caramelized, providing the rich flavor you want.
Can I make this filling ahead of time?
Absolutely! This filling can be made ahead and stored in the fridge for easy use during your baking sessions.
What can I do if my caramel is too thick?
If your caramel has thickened too much, simply add a little more heavy cream and warm it gently to reach your desired consistency.
Can I use alternative sweeteners in this recipe?
While the recipe uses granulated sugar for the ideal flavor and texture, feel free to experiment with alternative sweeteners. Keep in mind that they may alter the cooking process and final taste.
Conclusion
Creating your own Salted Caramel Cake Filling can not only elevate your desserts but also keep you connected with cherished memories or family traditions. With a few simple ingredients and straightforward steps, you can provide your family with a taste of indulgence that is both budget-friendly and satisfying. If this recipe reminds you of someone you love, share it with them. Your memories keep recipes alive.

Salted Caramel Cake Filling
Ingredients
Method
- In a saucepan over medium heat, melt the sugar while stirring constantly until it turns a deep amber color (about 5-7 minutes).
- Carefully add the butter to the melted sugar, stirring until completely combined.
- Gradually add the heavy cream while stirring continuously; take care as the mixture will bubble up.
- Stir in the sea salt and vanilla extract to elevate the flavor profile.
- Allow the caramel to cool before using it as a filling for desserts.